

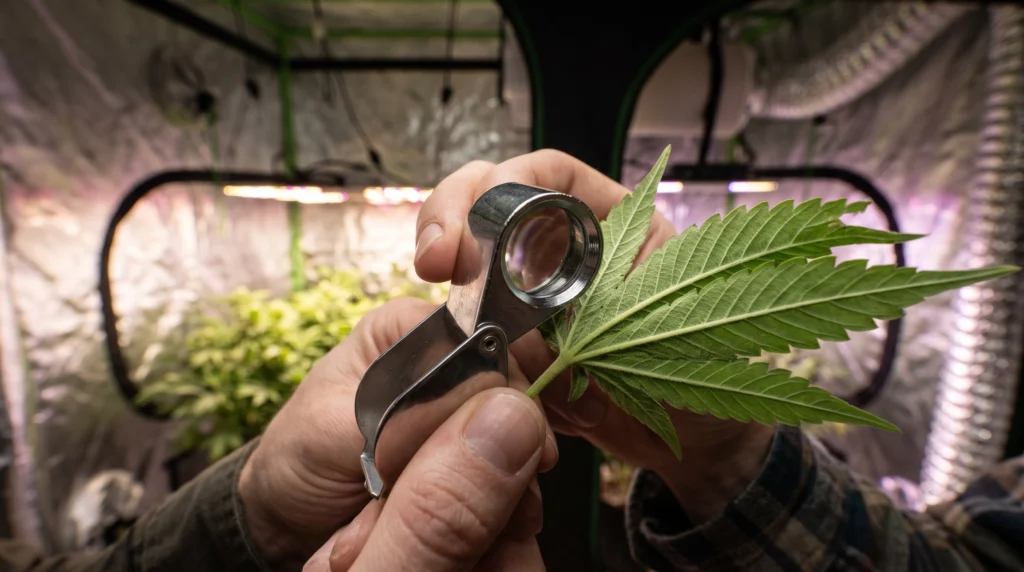
University extension services scout greenhouse pests with a 10x to 20x hand lens, and that range covers spider mites, their eggs and thrips damage. Even so, the jeweler's loupe for plants most growers should buy is a dual-lens LED model like the AC Infinity (30x and 60x): you scan at 30x and flip to 60x to confirm, so one tool does both jobs. HydroBuilder's sales team almost always recommends a loupe with more than one magnification. Add a 40x to 100x pocket microscope only if russet mites are a worry. Russet mites are the one pest where more power clearly matters, and even there the extension sources don't agree on whether a handheld lens is enough.
This guide covers what each pest actually requires, how a 30x or 60x loupe behaves differently from a 10x, which tool fits which job, and a weekly scouting pass you can repeat.
What Extension Services Recommend for Each Pest
Extension guidance is more modest than product packaging. Here's what the sources say, pest by pest.
| Pest | Power the source names | What to look for | Source |
|---|---|---|---|
| Two-spotted spider mite | 10x to 20x hand lens | Eggs and all life stages on leaf undersides, cast skins, empty eggshells, whitish or yellowish stippling | UConn Extension |
| Thrips | 10x hand lens | White flecks or silvery scars with dark fecal spots, often along leaf veins | Utah State Extension |
| Hemp russet mite | At least 20x, or a digital or stereo microscope | Individual mites with a good 20x lens. No webbing | Auburn University / Alabama Extension |
| General greenhouse scouting | 10x hand lens or a magnifying headset | Pest counts, recorded in a notebook | UMass Extension |
UConn Extension's two-spotted mite factsheet (Leanne Pundt, revised August 2024) tells growers to "use a 10-20x hand lens to detect the eggs and all stages of mites." Adult females are under 1/50 inch long, about half a millimeter. That's small, but it's well within what a 10x lens resolves.
For thrips, Utah State Extension's hemp thrips page recommends inspecting transplants with a 10x hand lens and discarding or managing infested plants. The damage it describes is the giveaway: white flecks or silvery scars on the leaf with dark fecal spots mixed in, usually along the veins. Our guide to identifying thrips and their damage goes further into treatment.
UMass Extension's IPM scouting and decision making factsheet (Tina Smith with Leanne Pundt, updated 2016) lists a 10x hand lens and/or an Optivisor headset magnifier among a scout's essential tools, alongside yellow sticky cards, greenhouse maps and a notebook. A field microscope appears on its list of additional tools, not essential ones.
So a 10x to 20x lens is the working standard. A loupe at 30x will still show all of the above. It just gives you a smaller patch of leaf to search, which matters more than most buyers expect.
How 30x and 60x Loupes Behave Differently From a 10x

Higher magnification doesn't come free. The first cost is field of view. The AC Infinity and Vivosun loupes both list a 30x lens at 22 mm and a 60x lens at 12 mm. The makers don't say whether that figure is the lens diameter or the viewing area, but either way the 60x lens shows a much smaller patch of leaf. On a fan leaf, you'll sweep back and forth to find a mite that a 10x or 20x lens would have shown in one look.
Focus and light suffer too. At 30x and up, the leaf is only sharp in a thin band very close to the glass, so a leaf that moves a fraction of a millimeter in the fan breeze drifts out of focus. Turn off oscillating fans for the minute you're looking, or hold the leaf against your palm. Steady hands matter too: our sales team says 30x is the power customers buy most often because it's the easiest to use with shaky hands. Bracing your hands against a branch or trellis helps at any power. You'll also be holding the loupe close enough to shade the leaf, which is why nearly every grow-store loupe has built-in LEDs. Try light from behind and from the side on eggs and cast skins to see which angle shows them better on your plants.
The practical upshot: on a two-lens loupe, scan with the 30x lens and only flip to 60x once you've found something worth a closer look. Treat 60x as a confirmation lens, not a search lens.
The Russet Mite Problem: Where the Sources Disagree

Russet mites are where a jeweler's loupe hits its limit, and the two extension sources that address hemp russet mites give growers different answers.
Auburn University's Katelyn Kesheimer, writing for Alabama Extension (ANR-2805, January 2022), says magnification is required because hemp russet mites are less than half the size of a two-spotted spider mite. Her options are "a hand lens (at least 20x), a digital microscope, or a stereo microscope," and she writes that "a good-quality 20x hand lens will allow you to see individual mites." Russet mites also make no webbing, so you can't use webbing to spot them the way you can with spider mites.
Utah State Extension's hemp russet mite page is far less hopeful. It describes the mites as "not visible with a magnifying lens," says they're "best identified under high magnification using a dissecting microscope," and notes they're "only noticed after plant damage appears," because low populations cause no visible damage. It still recommends "a strong hand lens or microscope" to check damaged leaves and the healthy leaves around them, and to look for bronzing in hot, dry weather.
Both can be true for different reasons. A good 20x lens on the right leaf in good light may show a moving mite. A lower-quality lens, a weak LED or an untrained eye may show nothing on the same leaf. What growers should take from it:
- Don't treat a clean look through a loupe as proof you don't have russet mites.
- If you see bronzing, curling or brittle leaves with no webbing, use the strongest optics you have, and consider a 60x to 100x pocket microscope or sending a sample to your extension diagnostic lab.
- Check the damaged leaves and the healthy leaves around them, as USU advises.
Our guide to russet mites covers symptoms and control in more detail.
Loupe, Pocket Microscope or Phone Clip: Which One to Buy

These tools overlap less than their magnification numbers suggest. You walk the room with a loupe, and you reach for a pocket microscope or phone clip once you've already found something worth confirming or photographing.
| Tool | Typical power | Best job | Main tradeoff |
|---|---|---|---|
| Dual-lens LED loupe | 30x and 60x | Weekly walk-through, leaf undersides, thrips damage | Small field at 60x, needs steady hands |
| Pocket microscope | 40x to 100x | Confirming eggs, very small mites, a suspect patch | Very small field, slow to search with |
| Phone clip microscope | 60x | Photos for your log or a diagnostic lab | Fit depends on your phone's camera layout |
Dual-lens LED loupes
Start with the AC Infinity Jeweler's Loupe. It pairs a 30x primary lens with a 60x supplementary lens, and a two-way switch lights an LED for each lens, so the light follows you when you flip from scanning to confirming. Its maker publishes the full spec: 28 grams, 4.7 by 2.7 cm, an aluminum swivel case and LR1130 button batteries.
The Vivosun 30x-60x Jeweler's Loupe has the same lens pair and a built-in LED, but its listing doesn't say whether each lens gets its own light or what batteries it takes. Neither loupe is a 10x or 20x lens, so expect the smaller field of view described above.
Pocket microscopes at 40x to 100x
Two scopes cover the range. The Active Eye 40X Microscope is the gentle step up from a loupe: enough extra power to chase eggs or a suspected russet mite without the tiny, twitchy view of 100x. It has LED lighting and comes with batteries and a case. If you want the most power, the Grow1 LED Pocket Microscope 60x-100x gives you two steps in one tool, comes with three LR1130 batteries per its listing, and is sold for pest and disease identification.
Use these the way UMass treats a field microscope: as an extra tool for confirming, not your main scouting tool. Searching a whole leaf at 100x takes far too long.
Phone clip microscope
The Grow1 Clip Microscope 60x clips over a phone camera and shows the magnified image on screen, with a white LED and a UV light. Its compatibility list names older phones (iPhone 4 through 6, Galaxy S3 through S5), so check that the clip will sit over the main lens on a current phone with multiple cameras before you count on it. The value here is photos: a sharp close-up is what an extension lab or a more experienced grower will ask to see.


A Weekly Scouting Pass With a Loupe
UConn advises inspecting plants weekly for spider mite feeding, eggs, larvae, adults and webbing. UMass ties scouting to a map and a notebook so findings can be compared week to week. The pests HydroBuilder's sales team hears about growers catching too late are spider mites and powdery mildew, with thrips a close second, and a weekly pass is how you catch them early. This routine builds on both extension sources. It's practical guidance, not a quoted extension protocol.
- Walk the same route each week and note the date, room and bench or plant number.
- Look at whole plants first. Pick out stippled, flecked, silvered or bronzed leaves, then check the plants that look fine too.
- Turn over the older, more mature leaves, which UConn says to check first, and work along the veins where it says spider mites tend to be found.
- Scan with the lower-power lens. Look for moving mites, round eggs, white cast skins and empty eggshells.
- Check new growth and flowers for thrips. For incoming plants, UMass suggests tapping tender new growth and flowers over a white sheet of paper and looking at what falls. The same check works on established plants.
- Flip to the higher-power lens or a pocket microscope only to confirm what you've found.
- On leaves with bronzing or curling, check the healthy leaves next to them too.
- Write down what you saw and whether it's suspected or confirmed, and photograph anything you're unsure about.
- Tag infested plants as indicator plants, as UConn suggests, so you can tell next week whether your control is working.
In a single tent, check every plant. Skipping plants is one of the most common mistakes our sales team sees. Across multiple rooms, a fixed sample of plants per bench keeps the time manageable, and a shared log keeps different scouts' findings comparable. Inspect new clones and transplants before they join the rest. UMass advises looking at one-third or more of incoming plants on arrival. The integrated pest management guide covers what to do with what you find.


Mistakes That Make a Good Loupe Look Useless

The two our sales team sees most are not checking leaf undersides and not checking every plant. The rest come down to buying and handling.
Buying for the biggest number. A 100x scope looks like an upgrade over a 30x loupe, but extension services do routine scouting at 10x to 20x. The extra power buys a smaller, dimmer, shakier view. Buy for the job: a loupe for scouting, a microscope for confirming.
Looking only at the tops of leaves. Spider mites and their eggs sit on leaf undersides, and UConn specifically points to older leaves and the areas along the veins. Stippling on top tells you where to flip the leaf, not what's causing it. Flip it every time. Our guide to identifying spider mites shows the pattern.
Reading silvery leaves as light damage. Thrips feeding leaves silvery scars and flecks, and Utah State notes they come with dark fecal spots. Under a loupe those small dark specks are the clue that separates thrips damage from a leaf that's simply been bleached.
Calling every white spot mildew. A lens helps you look closer at a white patch on a leaf before you decide what it is. Our powdery mildew identification and prevention guide covers what to look for. When a finding stays unclear, a photo or sample to a diagnostic lab beats guessing.
Calling a clean leaf a clean plant. One leaf with no mites proves little, and neither does one healthy-looking plant. Mites and thrips move, hide in new growth and start on a few plants before spreading. Look at every plant you can, repeat the pass weekly and record what you find.
Scouting in fan breeze and bad light. If the image swims, it's usually the leaf moving or glare, not the lens. Stop the fan, steady your hand on the plant or bench, and try the light from a different angle.
Using a Loupe at Harvest Time
Customers also use their loupes late in flower to check trichomes for harvest timing. Our sales team's guidance, depending on what the grower wants: harvest when 10% or fewer of the trichomes are still clear, and before more than 30 to 40% have turned amber. Check flowers on several parts of the plant, not just the top, and treat it as one observation among several, not a lab measurement. Our guide to resin glands and terpene development covers the crop side, and the harvest, drying and curing guide picks up from there.
To compare loupes and pocket microscopes side by side, browse our microscopes and magnifier loupes collection and match the power to the job you need it for.
Frequently Asked Questions
Can my phone's camera zoom replace a jeweler's loupe?
Not reliably. Zoom past a phone's optical lens is digital, which enlarges pixels rather than adding detail, so a mite egg can turn into a blur. A macro mode, if your phone has one, focuses closer and helps for photos of damage, but it's no substitute for a 10x to 20x lens when you're hunting eggs. A clip-on microscope lens over the camera is the closer substitute.
How do I clean a jeweler's loupe?
Blow or brush off dust and plant debris first, because wiping grit across the lens can scratch it. Then wipe gently with a clean microfiber or lens cloth. Avoid solvents the maker doesn't approve, and close the loupe into its case between uses. Plant sap and sticky honeydew can build up fast during scouting, so a quick wipe after each session keeps the view sharp.
What batteries does an LED loupe take?
Most pocket loupes and microscopes with LEDs use small button cells. The AC Infinity loupe lists LR1130 button batteries, and the Grow1 LED Pocket Microscope comes with three LR1130s. Check the listing before you buy, since not every maker says which cell its loupe uses. Keep spares on hand, because a fading LED makes the image dim and hard to focus at 30x and above. The glass lens itself works without power.