Growing in coco coir delivers one of the best root environments available to indoor growers — excellent aeration, controllable moisture retention, and complete nutrient flexibility. When managed correctly with optimized irrigation, nutrition, and environment, coco can outperform traditional potting soil for growth rate and yield potential across everything from a 4×4 tent to a large commercial facility. The learning curve is real, but it’s manageable — and the results are worth it.
Whether you’re new to coco or scaling up an existing program, these fundamentals apply at every level. Home growers can dial everything in with a few basic tools; commercial operators will find the scale-specific workflow in the section near the end.
What Is Coco Coir?
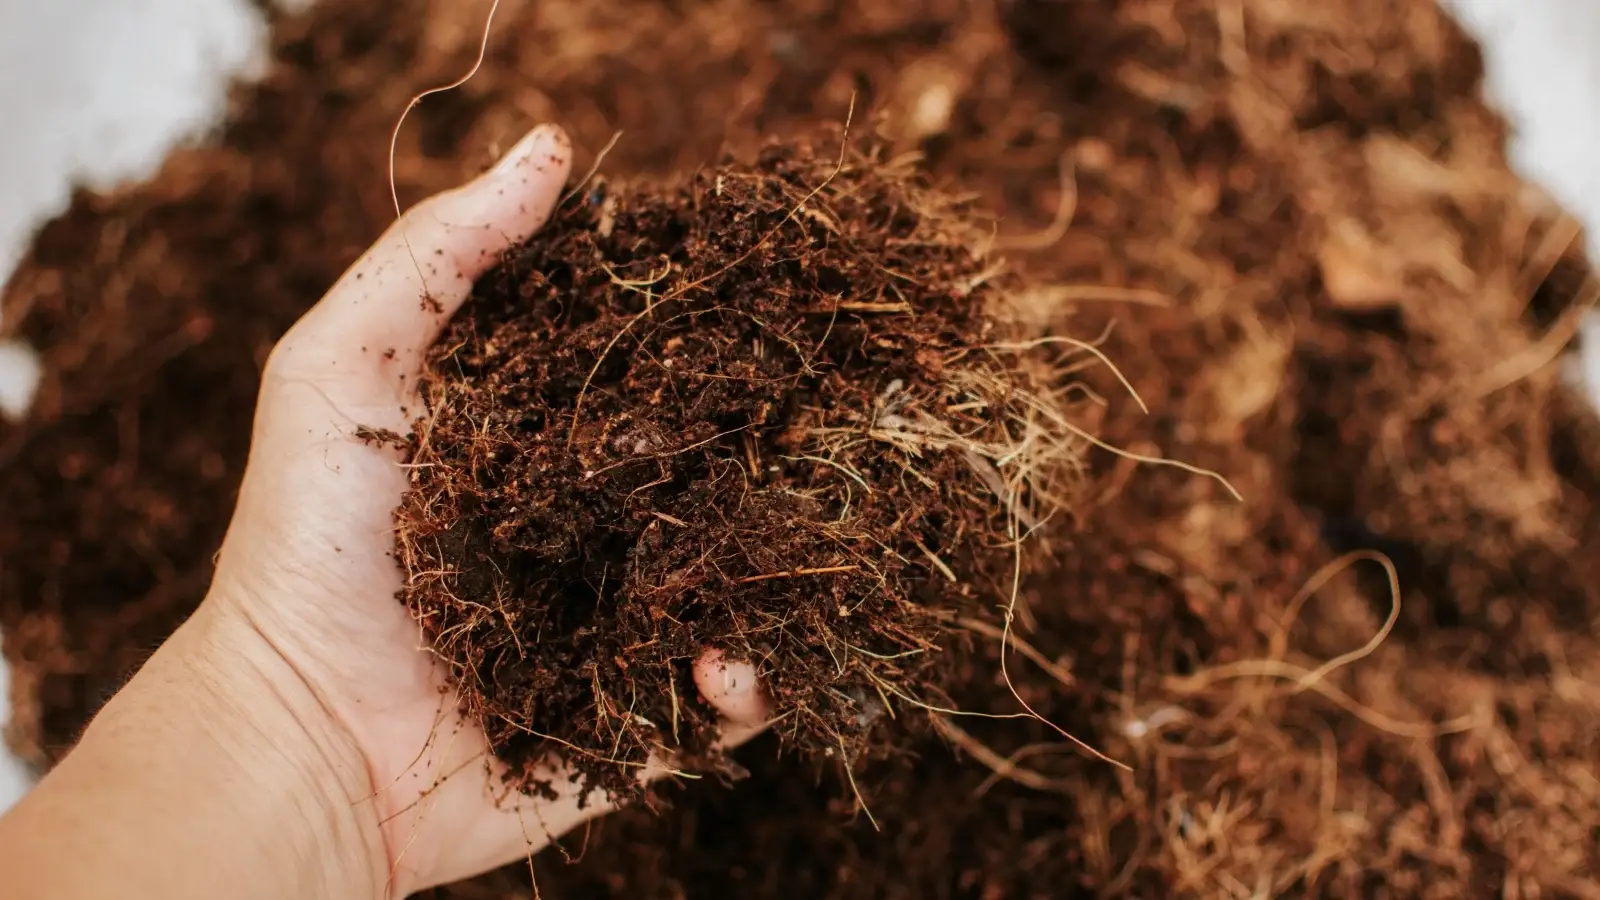
Coco coir is a natural growing medium made from the fibrous outer husk of coconuts. When coconut shells are harvested, the husk is cured, combed with steel combs to extract long fibers, and then dried. From there, it’s processed into bricks, loose fiber, chips, mats, or pre-formed grow bags depending on the intended application. Because coco is a by-product of coconut processing, it’s a renewable and more sustainable alternative to peat moss — which takes thousands of years to form and is increasingly difficult to source responsibly.
Coco is technically a soilless medium. It contains no inherent nutrients, which means you have complete control over your feeding program from the first watering. That inert nature is the most significant advantage of coco for experienced growers — and the most common adjustment challenge for those transitioning from amended soil. For a full side-by-side comparison, read our guide on coco vs. soil — which grow media is right for you?
The Different Forms of Coco Coir
Coco is not a single product. Understanding the available forms helps you match the medium to your system, container, and growing style before you buy.
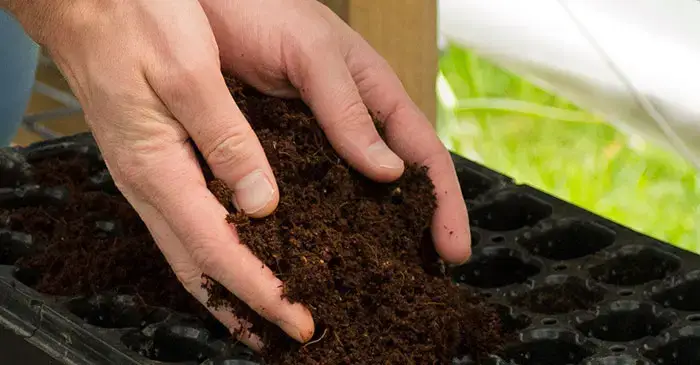
Coco fiber is the most common form — long strands that provide structure, drainage, and excellent root-zone aeration. Most hand-watered and drip-fed container grows use pure coco fiber or a coco-perlite blend.
| Form | Texture | Best For | Water Retention | Drainage |
|---|---|---|---|---|
| Coco Fiber | Long strands | Hand-watered & drip container grows | Medium | Good |
| Coco Pith (Peat) | Fine, spongy | Blended substrates; moisture-heavy mixes | High | Lower |
| Coco Chips | Chunky husk pieces | Hydroponic systems, ebb-and-flow | Low | Excellent |
| Coco Mats | Flat sheet | Flood tables, under slabs and blocks | Medium | Good |
| Pre-Buffered Blends | Fiber + pith combined | New growers, commercial consistency | Medium–High | Good |
| Pre-Formed Grow Bags | Ready-to-use bags | Commercial drip systems, streamlined setups | Medium–High | Good |
Coco pith (coco peat) is the fine, sponge-like fraction of the husk. It retains substantially more moisture than coir fiber and is often blended into pre-mixed substrates to balance water-holding capacity against drainage.
Coco chips are chunky husk pieces that create large air pockets in the root zone, similar in function to clay pebbles. They’re commonly used in hydroponic systems and drain-to-waste drip configurations where fast drainage and high oxygen availability are priorities.
Coco mats lie flat beneath blocks, slabs, or in flood tables and grow trays to extend the root zone and manage moisture at the base of the container. They can be cut to fit any bench or tray footprint and are sold separately as coco mats.
Pre-Buffered and Pre-Formed Coco Options
Pre-buffered coco blends combine fiber and pith in controlled ratios, then come pH-stabilized and salt-washed from the factory. These are the most consistent option for new coco growers and high-volume commercial operations when paired with the manufacturer’s recommended preparation steps.
Pre-formed coco grow bags are the preferred format in commercial settings — loaded with buffered coco and sometimes pre-amended with coco chips for aeration, ready to hydrate and plant without a separate container.
For a comprehensive breakdown of every grow media type available to indoor growers, read our definitive guide to traditional and hydroponic grow media.
Why Grow in Coco Coir?
Coco has become one of the most popular growing media across both home and commercial cultivation for several well-established reasons.
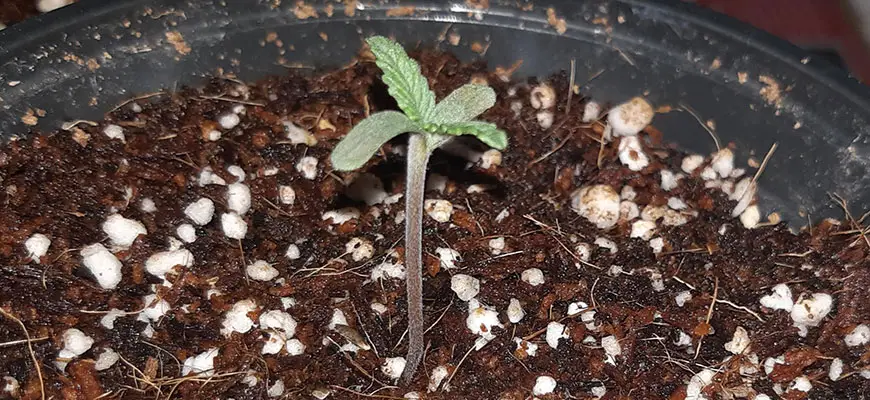
Superior root-zone oxygen. High-quality coco blends typically maintain roughly 25–30% air-filled porosity by volume even when fully saturated, giving roots consistent access to oxygen. Compared to dense soil, this generally drives faster uptake and more vigorous vegetative growth — particularly under high light intensity.
Controllable moisture retention. Coco holds moisture well and, in well-drained containers with appropriate irrigation frequency, resists waterlogging far better than dense soil mixes. This allows you to push watering frequency aggressively — a key technique for maximizing growth rates in both hand-watered and automated systems.
Full nutrient control. Because coco is essentially inert, every nutrient the plant receives comes directly from your feeding solution. This is a significant advantage for experienced growers who want precision, and a genuine adjustment for those coming from amended soils with a built-in nutrient buffer.
Sustainability and renewability. Coco is biodegradable (in most forms), reusable across multiple crop cycles, and carries a significantly smaller environmental footprint than peat-based growing media when sourced and processed responsibly.
Versatility across growing systems. Coco works in hand-watered containers, top-drip systems, drain-to-waste setups, ebb-and-flow tables, and even certain recirculating configurations. It bridges the gap between traditional container gardening and full hydroponics in a way that no other media quite matches.
Choosing the Right Coco Coir Product
Pre-Formed Coco Grow Bags
For indoor growers who want a streamlined, ready-to-use solution, coco grow bags eliminate container sourcing and media preparation in a single step. Coirgro EZ Open Top Coco Coir Grow Bags are the most widely used product in this category. Each bag features a multi-washed, low-EC coco blend with integrated coco chunks for enhanced root-zone aeration. Pre-compressed for efficient shipping, they expand fully with water, hold many times their compressed volume in moisture, and stand upright without a separate pot. Available in 1, 2, and 3-gallon sizes, they work from small home setups through small commercial rooms. Shipment pH typically runs in the mildly acidic range (around 5.8–6.8), giving a clean starting point before your first buffering pass and nutrient program. The open-top design makes transplanting clones and seedlings straightforward without tools or cutting.
Pre-Buffered Bagged Coco Substrate
For growers who prefer to fill their own containers with a premium loose substrate, Canna Nutrients Coco Plus+ is a benchmark product in this category. Produced from first-quality coconuts using controlled freshwater-only processing, Canna Coco is not aggressively steam-treated — a distinction that helps preserve the substrate’s physical integrity and beneficial microbiological potential across the full grow cycle. It’s fully pH-buffered, RHP-certified, and delivers a typical field-capacity water/air ratio in the range of about 70–75% water to 20–30% air by volume, depending on container size and irrigation style. Paired with a coco-specific nutrient line, it performs consistently and predictably from week one of veg through the final weeks of flower.
Shop Coco Coir & Soilless Mixes → — bagged coco substrate, loose coir, soilless blends, and perlite for container and hand-watered grows.
Coco-Perlite Blends
If you want aeration built directly into your substrate rather than amended manually, a pre-blended coco-perlite product removes the guesswork from mixing ratios. Mother Earth Coco + Perlite Mix runs 70% coco pith and fiber to 30% perlite, delivering excellent drainage alongside reliable moisture retention. The 30% perlite fraction allows more aggressive feeding frequency without overwatering risk, making it a well-suited choice for automated drip fertigation, where consistent dry-back between irrigation events matters for root health and runoff management. RHP-certified and ready to use from the bag.


Coco for Hydroponic Drip Systems
Growers running automated drip configurations, drain-to-waste systems, or commercial high-density operations will find FloraFlex QuickFill Bags purpose-built for the format. At approximately 60% water-holding capacity, they balance moisture retention with adequate drainage and arrive pre-drilled with a propagation plug hole plus two irrigation stake holes — transplanting and drip stake installation requires no cutting or setup.
For growers blending and filling their own containers, Mother Earth Perlite #3 is a reliable standalone amendment. A 70/30 coco-to-perlite ratio is a standard starting point; growers running high-frequency automated irrigation sometimes push to roughly 55/45 for faster dry-back between events.
Shop Coco Grow Bags, Blocks & Mats → — pre-formed coco bags, blocks, mats, chips, and croutons for hydroponic drip and system-based growing.
Containers: Fabric Pots vs. Grow Bags
Coco performs best in containers with strong drainage and sidewall aeration. For growers using loose or blended coco rather than pre-formed grow bags, Covert Fabric Pots are an excellent match. The breathable fabric walls air-prune roots as they reach the pot boundary — encouraging a dense, branching root structure rather than circling roots. Available in 1–15 gallon sizes with integrated handles for repositioning, they dry out more evenly than rigid plastic pots and provide inherently better oxygen availability at the root periphery.
Container size selection matters more in coco than in soil. Because coco dries out faster, smaller containers (1–3 gallon) require more frequent watering but give tighter nutrient control and faster dry-back between feedings. Larger containers (5–10 gallon) provide more moisture stability between waterings and a more forgiving environment for heavy-feeding varieties in late flower. Place coco liners inside net pots for hydroponic applications to prevent the medium from falling through the mesh while still allowing roots to extend freely.
Buffering Coco Coir: The Non-Negotiable First Step
Buffering is strongly recommended before planting into any coco — including products labeled pre-buffered, unless the manufacturer explicitly instructs otherwise. Coco coir has a high cation exchange capacity and a natural affinity for calcium and magnesium, while often starting loaded with potassium and sodium. If you plant into unbuffered or insufficiently buffered coco, the medium actively pulls Ca/Mg from your nutrient solution before it ever reaches the roots. This is the single most common cause of calcium and magnesium deficiency in new coco growers — and it’s largely preventable.
How to Buffer Coco Coir Step by Step
To buffer coco, saturate it thoroughly in a dilute calcium-magnesium solution that many growers target in the 150–250 ppm Ca/Mg range at pH 5.8–6.2, and allow it to soak for 8–24 hours. After soaking, allow the coco to drain fully by gravity before planting. High-quality factory-buffered products reduce the severity of this cation-exchange problem, but a secondary buffering pass before first use remains best practice for predictable results from the first feeding, provided it aligns with the product’s own directions.
pH and EC Management in Coco
Target pH: 5.8–6.2
Maintain input solution pH between 5.8 and 6.2 for optimal nutrient availability throughout the grow cycle in coco-based systems. Unlike soil, coco has minimal natural buffering capacity — your input water pH becomes your root-zone pH within a short window. Test every feeding and correct early. Allowing pH to drift outside roughly 5.5–6.5 will cause nutrient lockout regardless of how well every other parameter is managed.
General Hydroponics pH Down is the most widely used pH-Down product for coco growers at every scale — add to your fully mixed nutrient solution after all nutrients are incorporated, then retest before applying. For commercial operations requiring pH management at volume, HGV Condition – pH Down is formulated for direct use alongside HGV nutrients, requires no dilution, and scales from 1-gallon retail up to 55-gallon drum quantity.
Track temperature and humidity with the HBX Thermo-Hygrometer. Temperature and RH directly influence how quickly coco dries between waterings — environmental swings between lights-on and lights-off are a frequent driver of unexpected EC and pH instability at the root zone. The Min/Max memory function makes it easy to track the full range across the photoperiod rather than just spot-checking at a single moment.
EC Targets by Growth Stage
| Growth Stage | Target Input EC | Notes |
|---|---|---|
| Seedling / Early Propagation | 0.4–0.8 mS/cm | Low EC protects sensitive roots; adjust up as roots establish |
| Early Veg | 0.8–1.2 mS/cm | Increase gradually as canopy develops |
| Late Veg | 1.2–1.8 mS/cm | Monitor runoff EC closely as feeding ramps up |
| Early Flower | 1.6–2.2 mS/cm | Adjust based on cultivar response and runoff readings |
| Peak Flower | 2.0–2.6 mS/cm | High-demand crops under ≥600 µmol/m²/s; many programs run lower end |
| Late Flower / Pre-Harvest | 1.0–1.5 mS/cm | Begin stepping down 2 weeks before target harvest |
| Final Flush | 0.4–0.6 mS/cm | Drain-to-waste; nutrient-free or very low EC for recirculating |
⚠️ Assumes source water EC of 0.0–0.2 mS/cm. Runoff climbing more than ~20% above input signals salt accumulation — flush immediately.
Watering and Feeding in Coco
Feed Often, Feed to Runoff
How often should you water coco? Almost always more frequently than growers new to the medium expect. Unlike soil, where overwatering creates anaerobic conditions at the root zone, coco’s aerated structure supports daily or even multiple-daily feedings under warm temperatures and high light intensity. Coco’s physical structure and air-filled porosity help prevent root drowning at appropriate irrigation frequency.
The core rule: water to roughly 15–30% runoff every time. This helps prevent salt accumulation at the container base and gives you a reliable ongoing indicator of root-zone EC. Avoid routinely irrigating an established coco system with plain, un-nutriated water in drain-to-waste programs — coco has no nutrient reserve, and repeated plain-water events will dilute and unbalance ion concentrations in the medium rapidly, aside from deliberate low-EC flushes when runoff EC gets too high.
For hand-watered home setups, the HBX Pump Sprayer 8 Liter delivers consistent pressure and even coverage across multiple containers. It’s sized well for irrigation runs in rooms up to mid-scale without constant refilling.
Dry-Back Strategy
An intentional dry-back period — allowing coco to reach approximately 50–65% of field capacity before the next irrigation — is used by experienced growers to steer plant behavior and drive root exploration. Moderate dry-back during vegetative growth encourages roots to branch and spread through the medium in search of moisture. Minimal dry-back during peak flower maintains cell turgor and supports maximum cell expansion in developing flowers. The right dry-back window varies with container size, ambient temperature (often 72–82°F), VPD, and growth stage — there is no universal number, but tighter monitoring in the final weeks of flower typically delivers measurable return.
Coco Nutrient Selection
Because coco is inert and actively exchanges cations, use a nutrient line formulated specifically for coco substrate whenever possible. General-purpose hydroponic nutrients can work with supplementation, but coco-specific formulas account for the medium’s calcium-buffering behavior and pre-adjust calcium and magnesium ratios to compensate for it from the start.
For growers who want a clean, scalable dry-nutrient system that works from small home setups through large commercial facilities, HGV Dry – Grow (3-6-22) and HGV Dry – Flower (0-10-26) are professional-grade formulas used by licensed commercial cultivators and award-winning growers. Available in 5 lb and 25 lb formats, they dissolve completely in water and are highly cost-efficient when purchased at volume. Add HGV Dry – Base (14-5-0-0) to provide the nitrogen-calcium-magnesium foundation used across all growth stages — this three-part system covers the full nutritional program without requiring additional supplements in most coco applications.


Reusing Coco Coir
Coco’s lignin structure resists decomposition far longer than most organic growing media, making it genuinely reusable for two to three crop cycles under proper care. To recondition spent coco between grows:
- Remove as much root material as possible from the container or bag.
- Rinse thoroughly with pH-adjusted, low-EC water until runoff clears and EC drops near baseline.
- Re-buffer with a calcium-magnesium solution in the commonly used 150–250 ppm Ca/Mg range, pH 5.8–6.2, as described in the buffering section above, unless the manufacturer provides a different reconditioning protocol.
- Sterilize containers with a diluted hypochlorous acid or peroxide solution before refilling.
- Test EC and pH of the reconditioned media before planting the next crop.
Even high-quality coco should generally be replaced after two to three cycles. Physical structure begins to degrade, pH stability becomes more difficult to maintain, and pathogen carryover risk increases with each successive reuse.
Pre-Harvest Flush in Coco
Flushing coco before harvest removes accumulated nutrient salts from the root zone and allows the plant to metabolize remaining reserves in its tissues. Because coco doesn’t hold nutrients to the same degree as soil, the flush window is shorter — 5–10 days is sufficient for most drain-to-waste coco programs.
Target runoff EC of 0.4–0.6 mS/cm before ending the flush and moving to harvest. Use pH-corrected water (5.8–6.2) at low or zero EC and water to normal runoff percentage at each irrigation event. Watch foliage — mild yellowing of fan leaves is expected and normal as the plant draws down internal reserves. Yellowing that moves into developing flowers means the flush has gone too long; harvest immediately.
For a complete harvest timing walkthrough, read our guide on flushing plants and preparing for harvest.
Common Coco Growing Mistakes

Skipping or Rushing the Buffer
The most preventable error in coco growing. Unbuffered or insufficiently buffered coco strips calcium and magnesium from your nutrient solution before those elements reach the root zone. Early cal-mag deficiency in a new coco grow almost always traces back to this step.
Watering Like Soil
Growers who transition from soil and allow coco to fully dry between waterings typically see slowed growth, heat stress at the root zone, and nutrient lockout. Coco is designed for high-frequency irrigation — the physical structure supports it and benefits from it.
Ignoring Runoff EC
Testing only input EC tells you what you’re putting in; it tells you nothing about what’s accumulating in the root zone. Monitor runoff EC every few feedings — it’s one of the most reliable early warning systems available in a coco grow.
Using Non-Coco Nutrients Without Cal-Mag
Standard soil nutrients are typically deficient in calcium relative to what coco actively demands through cation exchange. Use a coco-formulated line or add a dedicated cal-mag supplement at every single feeding.
Letting pH Drift
Without soil’s natural buffering capacity, pH drift in coco happens fast — especially with hard tap water or in warm conditions. Test every feeding, not once a week, and keep input in the recommended range.
For Commercial Operations
Commercial Coco Workflow
Commercial cultivators running drain-to-waste coco systems at scale typically build their protocols around the following framework.
Media Selection and Container Sizing
Media selection and sourcing. Pre-formed coco grow bags in 1–3 gallon sizes are a standard format for high-density top-drip canopy configurations. At peak flower under full canopy and high-intensity lighting (often ≥800 µmol/m²/s PPFD) at 80–84°F / 55–65% RH, mature plants in 2-gallon bags are commonly run at roughly 6–8 irrigation events daily to maintain optimal water content, with final frequency tuned to VPD, cultivar, and substrate blend. Plan bag volume to canopy target and row spacing before finalizing irrigation design — guessing this number is costly to correct mid-cycle.
Fertigation Design and EC Consistency
Fertigation design and consistency. Use an EC-controlled inline dosing system or continuous pH/EC monitoring at the injector. Target input EC within about ±0.1 mS/cm of program values at all times. pH drift outside roughly 5.7–6.3 should trigger an immediate correction at commercial scale — don’t wait for the next scheduled maintenance window.
Environmental Monitoring and VPD
Environmental integration. Coco dry-back rate is directly influenced by VPD, canopy temperature, and light intensity. Track Min/Max temperature and humidity across the canopy with the HBX Thermo-Hygrometer — environmental swings between lights-on and lights-off are a frequent driver of unexpected pH and EC instability in high-density coco operations. Multiple units distributed across the canopy (one per zone) is standard practice in rooms over 1,000 sq ft.
Runoff Capture and Compliance
Runoff capture and compliance. In a licensed commercial facility, most jurisdictions require that all drain-to-waste runoff be captured and disposed of according to applicable local and state regulations. Design your tray and floor drainage system before finalizing bag volume — the runoff volume generated by 6–8 daily irrigations at around 20% runoff per event adds up quickly across a full room.
Volume Purchasing and Fulfillment
Volume purchasing. Operations consuming more than 20 bags of coco per cycle benefit significantly from case and pallet quantity pricing. Canna Coco Plus+, Coirgro grow bags, and FloraFlex QuickFill Bags are all available at commercial volume through HydroBuilder’s commercial accounts program. Contact our team at 888-815-9763 or visit the commercial accounts page to discuss scheduled fulfillment.

Why Shop at HydroBuilder for Coco Media?
HydroBuilder stocks a broad selection of coco coir products available from a single hydro retailer — from individual packs for home growers to commercial pallet quantities for large licensed facilities. We carry Coirgro, Canna Nutrients, FloraFlex, Mother Earth, The Coco Depot, RxGreen Technologies, and more, with priority stock allocation maintained on high-demand SKUs through direct supplier relationships. Our Northern California–based expert staff can help you select the right substrate for your system, size your media order for your canopy, and set up a commercial fulfillment program that works with your production calendar.
Call us at 888-815-9763, or browse our full selection below.
Shop Coco Coir & Soilless Mixes → — loose coir, bagged substrate, pre-blended soilless mixes, and perlite for container and hand-watered grows.
Shop Coco Grow Bags, Blocks & Mats → — pre-formed coco bags, blocks, mats, chips, and croutons for hydroponic and drip-system grows.


Frequently Asked Questions: Growing in Coco Coir
Q: Do you need special nutrients for coco coir?
A: Yes. Coco actively exchanges calcium ions from your nutrient solution, so standard soil nutrients typically under-deliver calcium and magnesium to the root zone relative to the medium’s demand. Use a nutrient line formulated specifically for coco, or supplement calcium and magnesium at every single feeding without exception.
Coco-specific nutrients like the HGV Dry line pre-adjust calcium and magnesium ratios to compensate for the medium’s exchange activity. If using a general hydroponic line, plan to add a dedicated cal-mag product at every feeding and monitor runoff EC closely for signs of salt accumulation or elemental imbalance.
For commercial operations, running a dedicated coco nutrient program eliminates one of the largest variables in crop-to-crop consistency and reduces the risk of widespread deficiency in a full room.
Q: What is the best pH for coco coir?
A: Maintain input solution pH between about 5.8 and 6.2 throughout the grow cycle. Unlike soil, coco has little natural buffering ability — your nutrient solution pH becomes the root-zone pH quickly.
Test every feeding and correct early rather than waiting. Drift outside roughly 5.5–6.5 causes nutrient lockout even in an otherwise well-managed system — phosphorus and iron are particularly sensitive to high pH in coco.
At commercial scale, inline pH monitoring at the injector or reservoir is standard. Manual testing at 1–2 feedings per day is the minimum viable monitoring frequency for large drain-to-waste systems.
Q: How often should you water coco coir?
A: More often than soil — typically once or twice daily for hand-watered containers under moderate conditions (around 75–80°F, ~60% RH). Under high light intensity and warm ambient temperatures, multiple waterings per day is normal and appropriate.
Always water to roughly 15–30% runoff at each irrigation event to flush accumulating salts and give you a consistent runoff EC to monitor. Coco’s structure provides adequate oxygen even at high irrigation frequency — overwatering risk in coco is primarily EC-driven (salt buildup), not structure-driven (waterlogging) as it is in dense soil.
Q: Can you reuse coco coir?
A: Yes. Coco’s lignin structure makes it reusable for two to three crop cycles with proper reconditioning between grows: remove root material, flush with pH-corrected low-EC water, re-buffer with a commonly used 150–250 ppm cal-mag solution, and sterilize containers before replanting.
After two to three cycles, replace the media regardless of visual condition. Physical structure degrades, buffering capacity decreases, and pathogen carryover risk increases in ways that are difficult to detect visually.
Q: Does coco coir need to be buffered before use?
A: Strongly recommended — almost always, even for factory-buffered products, unless your specific substrate’s instructions state otherwise. Unbuffered coco pulls calcium and magnesium directly out of your nutrient solution before those elements reach plant roots, causing early cal-mag deficiency.
Soak in a 150–250 ppm cal-mag solution at pH 5.8–6.2 for 8–24 hours before first planting, then allow to drain fully, following any additional manufacturer guidance. This single step prevents the most common early-stage failure in coco — calcium deficiency in the first one to two weeks.
Q: What is the difference between coco fiber, coco peat, and coco chips?
A: Coco fiber is the long-strand structural component — provides drainage, aeration, and physical support. Coco peat (pith) is the fine, spongy fraction with higher moisture retention. Coco chips are chunky husk pieces that maximize air space, used primarily in hydroponic drip and ebb-and-flow systems.
Most commercial substrates blend fiber and pith in controlled ratios, sometimes with added perlite, to target a desired water-holding and air-filled porosity profile. Chips are purpose-selected for system-based growing where fast drainage and oxygen availability at the root zone outweigh moisture retention.
Q: Is coco coir better than soil for indoor growing?
A: For growers who want faster growth, more precise nutrient control, and higher potential yields in a controlled environment, coco often outperforms traditional potting soil when managed correctly. But coco has no nutritional buffer — every feeding matters, and mistakes show up faster.
Soil is more forgiving and a better starting point for beginners or growers who prefer organic living-soil methods. If you’re new to growing indoors, starting in soil and transitioning to coco once you understand plant growth stages and feeding programs is a reasonable approach.
Q: What EC should I run in coco during flower?
A: At peak flower (roughly weeks 3–6 of bloom), many coco programs target around 1.8–2.4 mS/cm input EC, with up to roughly 2.6 mS/cm used by experienced growers on high-demand crops under strong light (≥600 µmol/m²/s) at 75–84°F. These values assume near-zero source water EC — adjust downward if your tap water starts at 0.3+ mS/cm.
Scale back to about 1.0–1.5 mS/cm for the final two weeks of flower, then reduce to roughly 0.4–0.6 mS/cm flush EC in the final 7–10 days. Monitor runoff EC continuously — if it climbs more than about 20% above input, flush promptly with pH-corrected water.
Q: Can I mix coco coir with perlite?
A: Yes, and it’s generally recommended for better aeration and drainage. A 70/30 coco-to-perlite ratio improves drainage, increases root-zone oxygen, and allows more aggressive feeding frequency. Automated drip systems often use closer to 55/45 for faster dry-back between irrigation events.
Pre-blended options like Mother Earth Coco + Perlite Mix remove the mixing step for growers who want consistent ratios without measuring. Mixing your own from bulk coco and loose perlite is more cost-effective at scale.
Q: How do commercial operations manage coco at scale?
A: Commercial coco programs typically use pre-formed grow bags with automated top-drip fertigation targeting roughly 4–8 irrigation events daily at peak flower, depending on VPD, cultivar, and substrate. Inline pH/EC control or monitoring ensures solution consistency. Runoff capture is mandatory in most licensed facilities.
The highest-leverage investment at commercial scale is standardization: consistent bag size, buffering protocol, nutrient program, and irrigation timing reduce variability between rooms, cuts, and cycles more than any single equipment upgrade. Volume purchasing through a commercial account also reduces per-cycle media cost significantly at 20+ bag quantities.
Related Guides in the HydroBuilder Learning Center
- Coco vs. Soil: Which Grow Media Is Right for You?
- The Definitive Guide to Traditional and Hydroponic Grow Media
- Flushing Plants and Preparing for Harvest
- Rockwool for Plants: How to Grow in This Soilless Media
- Hydroponics 101: The Complete Guide to Hydroponic Growing
- Best Soil for Indoor & Outdoor Plants