
Every indoor grower needs a grow light timer or controller. Not as an optional add-on — as a core piece of infrastructure. Without one, you’re either glued to your grow room or leaving your plants vulnerable to inconsistent photoperiods, which can cause stress, reduced yields, and in photoperiod crops, accidental flowering at the wrong time.
The question isn’t whether you need a timer or controller. It’s which type is right for your setup — and that answer depends largely on how many lights you’re running, what kind of fixtures they are, and how much control you actually need.
Whether you’re running a single LED in a tent or managing 20 lights across a commercial facility, this guide covers every tier of lighting control: from simple dual-outlet digital timers to hardwired relay controllers, brand-specific dimming adapters, and fully integrated smart systems.
Commercial growers: The fundamentals covered here apply at scale, but we’ve included a dedicated commercial operations section covering relay controllers, hardwired systems, staggered startup, and integration with environmental control platforms like TrolMaster.
Why Consistent Photoperiod Control Matters
Grow light timers and controllers exist to solve one problem: plants are exquisitely sensitive to light duration, and human beings are unreliable timekeepers.
For photoperiod crops, the difference between 18/6 and 12/12 is the difference between vegetative growth and flowering. An inconsistent schedule — even one accidentally extended by 30 minutes of ambient light — can delay or disrupt the flowering transition. In perpetual harvest operations running multiple rooms at different stages, a single scheduling error in one room affects the entire production cycle.
Even for crops without strict photoperiod requirements, consistent light cycles reduce plant stress and produce more predictable growth patterns. Timers significantly reduce the risk of human error in light scheduling when programmed correctly.
Beyond scheduling, modern controllers manage dimming, sunrise/sunset ramps, high-temperature shutoffs, and power-failure delays that protect expensive fixtures from in-rush voltage spikes when the grid comes back on after an outage.
For more on designing a grow room that leverages automation fully, see our complete guide to grow room automation.
Single-Outlet vs. Dual-Outlet Timers
Simple outlet timers are the right tool for small setups: one or two lights, typically 1,000W or less total draw, running off a standard 15-amp 120V circuit.
Single-outlet timers handle one device. Useful for single-light setups or controlling a single piece of equipment (a CO2 generator, a reservoir pump) on its own schedule.
Dual-outlet timers handle two devices, usually on the same schedule. The Covert 7-Day Grounded Dual Outlet Digital Timer is a solid, no-drama option here — 7-day programmable, 120V, battery backup to help preserve settings through power outages, and minute-level on/off control. Good for a single grow tent running one primary light and a supplemental bar or CO2 device.
One clarification growers often miss: outlet count is not the same as load capacity. A dual-outlet timer rated at 15 amps doesn’t mean you can run two 1,000W loads. Add up the total amperage of everything plugged in and confirm it stays below the rated limit — with headroom.
For a practical look at how light selection, timers, and room layout interact, check out our grow room example designs for real-world reference builds at multiple scales.
Analog vs. Digital Timers
Analog (mechanical) timers use physical trippers on a rotating 24-hour dial — you push in the tabs for “on” intervals and pull them out for “off.” Simple, no programming required, no batteries, no display. They typically work in 15-minute increments, which is sufficient for standard 18/6 or 12/12 schedules.
Downsides: they require manual reset after a power outage (the dial stops), they can’t run different schedules on different days, and the mechanical components wear over time.
Digital timers program via LCD interface and offer substantially more flexibility: 7-day scheduling (different on/off times per day), minute-level precision, and battery backup that preserves settings and keeps counting during an outage on most models. For any serious grow, the digital format is usually worth the marginal cost difference.
The Autopilot 7 Day Dual Outlet Digital Timer is a well-regarded option in this category — reliable, straightforward to program, 120V.


Multi-Light Relay Controllers: What They Are and When You Need One
Once you’re running more than two lights — or running any fixtures drawing significant amperage — a plug-in outlet timer is not the right tool. You need a relay controller.
What a relay controller does: Rather than switching current directly through a standard outlet, a relay controller uses a low-voltage signal to trigger high-capacity contactors that handle the actual load. This means it can safely switch multiple 1,000W (or 600W, or 630W) fixtures simultaneously when correctly sized and installed, reducing the risk of overloading, arcing, or heat buildup at the outlet.
Most relay controllers are hardwired directly into your electrical panel (120V or 240V), bypassing the limitations of consumer-grade outlets entirely. A timer signal — either built-in or from a separate controller — tells the relay when to close the circuit. All lights can fire at the same time from one control point, assuming the system has been properly designed and wired.
When do you need one?
- Running 3 or more high-wattage fixtures in a single zone
- Running 240V fixtures (most outlet timers don’t support 240V loads)
- Operating in a dedicated grow room or facility where hardwired infrastructure is appropriate
- Running photoperiod crops where absolutely consistent, simultaneous on/off is required
The LTL Controls Master 8 Lighting Relay Controller supports up to 8 fixtures at 120/240V when wired to an appropriately rated supply and is a proven choice for medium-scale rooms. For larger operations, the LTL Controls Master 16 Lighting Controller scales to 16 circuits. Both are built specifically for grow room loads.
Important: Multi-light relay controllers that require hardwiring should be installed by a licensed electrician in accordance with local electrical codes and the manufacturer’s instructions. This is critical for electrical safety and long-term reliability.
Features to Look for in a Timer or Controller
Not every grower needs every feature. Here’s what actually matters and when:
Surge protection and in-rush delay. When a high-pressure sodium or CMH ballast fires cold, it draws a short spike of current well above its rated wattage. A controller with built-in surge protection helps absorb this spike rather than passing it to the outlet wiring. Power-failure delay (sometimes called hot-start protection) introduces a brief pause before relighting after an outage, protecting both the ballast and the lamp from immediate re-strike stress.
High-temperature shutoff. Cuts power to lights if grow room temperature exceeds a set threshold. Useful in hot climates or rooms with marginal cooling — helps prevent heat events from compounding into fire risk.
Trigger cord support. A trigger cord lets a secondary piece of equipment — a CO2 generator, exhaust fans, supplemental lighting — switch on and off in sync with the main light schedule. Photocell-based controllers do this automatically, sensing the on/off state of the lights rather than requiring a separate timer.
Staggered startup. In rooms with 8–20 lights, firing everything simultaneously creates a large in-rush load spike. Some controllers allow staggered startup: lights fire in sequence with a short delay between each, smoothing the electrical demand curve. This is a meaningful feature in larger facilities when coordinated with the overall electrical design.
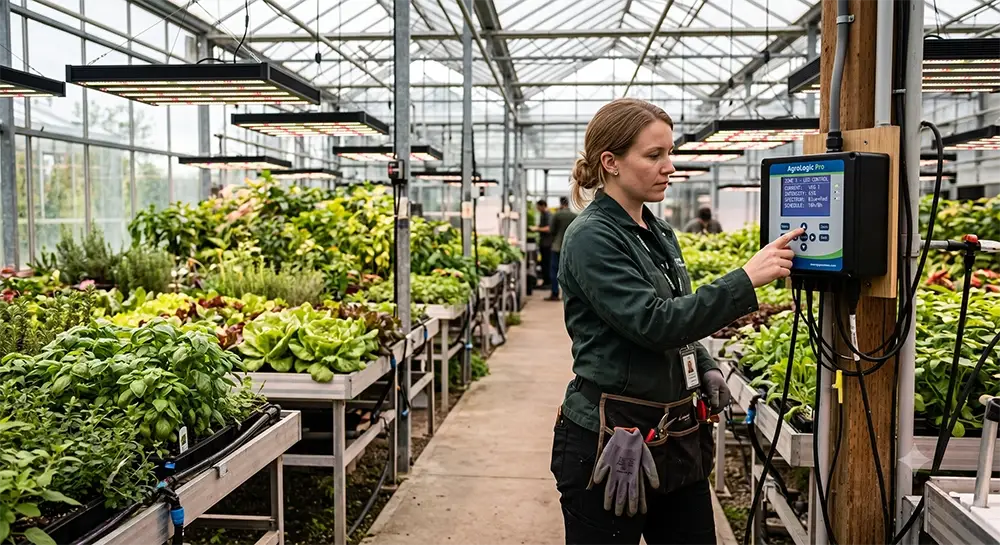
Dimming capability. Modern LED fixtures from Iluminar, Matrix, Gavita, and others often support 0–10V dimming signals or proprietary low-voltage control. A dimming-capable controller can automate sunrise and sunset ramps — gradually increasing intensity at “dawn” and reducing it at “dusk” — which reduces plant stress and mimics natural light cycles more accurately than a hard on/off. Some advanced platforms also enable DLI (Daily Light Integral) targeting, where the controller adjusts intensity throughout the day to hit a specific photosynthetically active radiation target when sensors and configuration support it.
Choosing Based on Grow Size
1–2 Lights (Small Tent or Single Room)
A dual-outlet digital timer handles this cleanly. No hardwiring, no electrician, minimal cost. Budget for battery backup. The Covert 7-Day Grounded Dual Outlet Digital Timer is the right call here for most straightforward small setups.
3–8 Lights (Dedicated Room, Multi-Site)
This is where a relay controller earns its place. You want consistent simultaneous firing, proper load capacity, and ideally 240V support to reduce conductor sizing and current draw per leg for a given wattage. The LTL Controls Master 8 is sized appropriately for this tier when paired with an electrical service and wiring that match its specifications.
If your fixtures are LED and support dimming, consider pairing the relay controller with a brand-specific adapter or moving directly to an integrated smart controller. The Growers Choice Master Lighting Controller is worth evaluating at this scale — it adds dimming and scheduling to compatible Growers Choice LED setups.
Modern LED Dimming: The Controller Landscape Has Changed
If you’re running modern LEDs, there’s an important distinction that older grow light guides miss entirely: relay controllers handle on/off switching, but dimming requires a separate signal pathway.
Most commercial LEDs use a 0–10V analog dimming signal or a proprietary digital protocol (RJ ports, RS-485). The fixture’s built-in driver responds to this low-voltage signal to modulate output between a dimmed level and full power without cutting the main power feed.
For TrolMaster Hydro-X users, the TrolMaster Hydro-X Lighting Control Adapter F integrates fixtures with 0–10V dimming inputs directly into the Hydro-X ecosystem — enabling photoperiod scheduling, sunrise/sunset ramps, and dimming for many popular HID and LED brands when paired with the Hydro-X controller.
For Iluminar fixtures, the Iluminar Touch+ Controller provides dedicated dimming and scheduling for iLuminar LED systems, often using RS-485 or compatible low-voltage networking for multi-light rooms.
For Matrix fixtures, the Matrix MC2 and its larger sibling the Matrix MC5 offer native dimming control for Matrix LED and hybrid systems, with the MC5 scaling to five independently controlled zones.
For Gavita LED and DE HPS fixtures, the Gavita Master Controller EL3 manages multiple Gavita fixtures via Gavita’s proprietary control protocol with features like temperature-based dimming and emergency shutoff.
The practical takeaway: If you’re buying a multi-light LED system, check what control protocol the fixtures use before buying a controller. A relay controller alone won’t give you dimming. A brand-specific adapter or integrated smart controller, matched to your fixture’s control protocol, will.


Smart and WiFi Controllers
The newest tier of lighting control platforms integrates scheduling, dimming, sensor-based adjustments, and remote monitoring into a single connected system.
TrolMaster’s Hydro-X platform is a leading example: a central controller that can manage lights, CO2, HVAC, dehumidifiers, and irrigation from one interface, with sensor stations that enable automatic responses to real-time environmental data. When canopy temperature exceeds a threshold, the controller can dim lights automatically if configured to do so — no manual intervention needed.
DimLux’s Maxi Controller offers similar integrated control for DimLux fixtures, with built-in temperature compensation and VPD-based dimming when paired with the appropriate sensor package.
Smart controllers aren’t necessary for every operation, but for any grow where environmental precision directly affects yield outcomes — which is most serious operations — the ability to link lighting decisions to real-time sensor data is a meaningful upgrade over scheduled on/off alone.
For a deeper look at how lighting control fits into a fully automated grow room, see our guide on grow room automation and our beginner’s guide to CO2 supplementation (since CO2 injection should always be linked to your lighting schedule via photocell or controller integration).
Setup Tips and Common Mistakes
Don’t mix analog timers with HID ballasts. High-pressure sodium and CMH ballasts produce significant in-rush current at startup. A consumer mechanical timer may handle this briefly, but the contacts can arc and degrade quickly. Use a relay controller or a timer specifically rated for inductive HID loads for these systems.
Always calculate total amperage before wiring. Add up the rated amperage of every device on the circuit — don’t assume a 15-amp timer can handle two 10-amp fixtures. As a rule of thumb for continuous loads, many growers aim to stay at or below about 80% of a circuit or device’s rated capacity to maintain headroom.
Battery backup is not optional for digital timers. A power outage that resets your timer to 12:00 AM blinking effectively eliminates your light schedule until you notice and manually reset it. For photoperiod crops, this can trigger premature flowering or interrupt a flowering cycle.
Stagger your light zones if running 8+ fixtures. Simultaneous firing of 8 × 1,000W ballasts creates a significant electrical event. Use a controller with staggered startup, or wire zones to separate breakers with offset timers, designed in coordination with an electrician, to smooth the load.
Separate your 120V and 240V runs appropriately. Don’t try to manage 240V fixtures with a device only rated for 120V. Use controllers, timers, and wiring rated for your actual supply voltage, and have mixed-voltage infrastructure planned and installed by a licensed electrician to ensure safety and compliance.
For Commercial Operations
At commercial scale — 20+ lights, multiple rooms, perpetual harvest schedules — the timer-and-relay framework gives way to fully integrated control infrastructure.
Zone-based scheduling separates veg, flower, and propagation rooms into independent lighting zones, each on its own relay bank and timer or control channel. The LTL Controls Master 16 handles up to 16 circuits and is a common choice for mid-size facilities operating multiple rooms when coupled with appropriately sized electrical service.
Environmental integration via TrolMaster Hydro-X connects lighting schedules to real-time temperature, humidity, and CO2 data. If CO2 injection is part of your protocol, the Hydro-X’s photocell logic ensures injectors and exhaust fans operate only during lights-on periods when configured correctly — a meaningful efficiency gain at scale. The TrolMaster Hydro-X Lighting Control Adapter F is a widely used dimming integration accessory in this category for 0–10V fixtures.
Staggered startup and load balancing become non-negotiable with large fixture counts. Your electrical contractor needs to design the panel with breaker loads balanced across phases, and your lighting controller needs to support sequential startup to avoid grid spikes and nuisance breaker trips.
Power failure protocols require more than battery backup on a timer. Commercial facilities typically use generator tie-ins, UPS systems on control hardware, and hot-start delay settings on every controller to protect fixtures during power events.
If you’re building out a commercial facility, start with our grow room example designs and grow room ventilation setup guide for complementary infrastructure planning.
Why Shop Hydrobuilder for Lighting Controllers and Timers
Hydrobuilder carries the full range — from basic single-outlet timers to fully integrated commercial relay systems and brand-specific dimming controllers. Our team works directly with leading manufacturers including TrolMaster, Iluminar, Matrix, Gavita, and DimLux, which means we can help match the right control platform to your specific fixture lineup.
Questions about what controller works with your fixtures? Call us at 888-815-9763 or contact us online — our growers will walk through your setup and give you a straight answer.
Grow Light Timers and Controllers: FAQs
Q: Do I need a grow light timer or a grow light controller — what's the difference?
A grow light timer is a plug-in device that switches one or two outlets on a set schedule — right for single-tent, small-scale grows. A grow light controller is typically a hardwired or panel-mounted system that uses relay switches to safely manage multiple high-wattage fixtures simultaneously when correctly sized. If you’re running more than two lights, or running 240V fixtures, a controller is usually the safer, more scalable option. Timers primarily handle scheduling; controllers are designed to handle load.
Expanded: The line gets blurry with modern LED systems, which use 0–10V or RS-485 signals for dimming. In those setups, a relay controller handles on/off, but a separate dimming controller (or an integrated smart controller like TrolMaster Hydro-X) is required to access sunrise/sunset ramps and intensity adjustment.
Commercial application: At 10+ lights, most operators use hardwired relay banks (LTL Controls Master 8 or Master 16) combined with an environmental control platform for full integration, installed and configured by a licensed electrician.
Q: What is the best grow light timer for a grow tent?
For a single tent, a 7-day dual-outlet digital timer is the standard choice. It handles most setups — one primary light plus a secondary device — with minute-level programming, 7-day scheduling flexibility, and battery backup to help preserve settings during outages. Mechanical (analog) timers work but reset after power loss and lack per-day flexibility.
Expanded: If your tent fixtures are LED with 0–10V dimming support, a smart controller can replace the timer entirely and add sunrise/sunset ramps, which many growers find reduces early-morning heat spikes and stress.
Commercial application: Tents are rarely used at commercial scale, but propagation rooms running multiple T5s or clone lights often use standard 7-day digital timers effectively as a cost-effective solution.
Q: What are the benefits of a light controller for grow lights?
A lighting controller provides four things a plug-in timer generally cannot: higher load capacity (safer for multiple high-wattage fixtures when properly sized), hardwired reliability (less dependence on consumer outlets), protective features (such as surge protection, high-temp shutoff, power-failure delay), and in many cases, dimming capability or integration with dimming protocols for modern LED fixtures.
Expanded: Protective features matter more than growers often realize. A power-failure hot-start delay helps prevent HID ballasts from immediately re-striking a hot lamp, which can shorten lamp life and risk ballast damage. Surge protection helps absorb in-rush current at startup. High-temp shutoff helps prevent a cooling failure from cascading into a more serious event.
Commercial application: In commercial rooms, zone-based relay controllers allow different light schedules per room (veg vs. flower) from independent control banks — essential for perpetual harvest operations and for coordinating with environmental control systems.
Q: Can I use a regular outlet timer for HID grow lights?
Not reliably, and potentially not safely. HID ballasts (HPS, CMH, MH) generate significant in-rush current at startup — often well above their rated operating amperage — and produce a hot-restart spike that can arc consumer timer contacts. A relay controller or an HID-rated timer designed for inductive loads is the correct choice for any HID fixture.
Expanded: Even some digital timers marketed for grow rooms are undersized for large HID loads. Check the timer’s rated inductive load and amperage, not just its resistive wattage rating — HID ballasts are inductive loads.
Commercial application: Any commercial HID installation is best served by using a properly sized hardwired relay controller and having all electrical work done by a licensed electrician in accordance with local codes and equipment manuals.
Q: What type of controller do I need for LED grow lights with dimming?
It depends on your fixture’s protocol. Most commercial LEDs use 0–10V analog dimming, RS-485 digital control, or a proprietary protocol from the manufacturer. A relay controller turns power on/off but cannot dim. For dimming, you need a 0–10V compatible controller, a brand-specific adapter (TrolMaster Adapter F, Iluminar Touch+, Matrix MC2/MC5), or an integrated platform like TrolMaster Hydro-X that speaks the same language as your drivers.
Expanded: Check your fixture spec sheet before buying a controller. If the fixture lists “0–10V dimming,” it needs a 0–10V signal source. If it lists “RJ port” or “RS-485,” it needs a compatible brand controller or adapter designed for that protocol.
Commercial application: Most commercial facilities manage LED dimming through a central environmental controller (such as TrolMaster Hydro-X) rather than standalone light controllers — this enables sensor-responsive dimming based on temperature and DLI targets when programmed correctly.
Q: How many lights can a relay controller run at once?
It depends on the controller’s relay capacity and the voltage and wattage of the fixtures. The LTL Controls Master 8, for example, is designed to handle up to 8 ballasts at 120/240V within its total wattage and amperage rating; the LTL Controls Master 16 is designed to handle up to 16 circuits. Always verify that the total load across all circuits doesn’t exceed the controller’s rated amperage and follow the manufacturer’s wiring guidelines.
Expanded: In practice, many commercial operators underload relay controllers to around 80% of rated capacity for thermal headroom and longevity, especially in warm climates or tightly packed electrical rooms.
Commercial application: Very large facilities (30+ lights) typically use multiple relay banks, each on its own breaker sub-panel, coordinated by a master environmental controller and designed by an electrical contractor.
Q: What is the best light schedule for vegetative growth and flowering?
For photoperiod crops in vegetative growth, 18 hours on / 6 hours off is a widely used standard. Some growers run 20/4 for faster vegetative development; 24/0 is occasionally used but eliminates the dark period that most plants benefit from metabolically. For flowering, 12/12 is the typical trigger for most photoperiod crops, held consistently throughout the bloom cycle. Seedlings and clones typically do well on 18–20 hours of lower-intensity light.
Expanded: Consistency matters more than the exact split within reasonable ranges. A stable 18/6 will outperform an inconsistent 20/4 with schedule drift. This is precisely why automated control — not manual switching — is generally the correct approach.
Commercial application: Commercial facilities running DLI-targeted protocols adjust intensity rather than photoperiod to tune total daily light delivery, keeping photoperiod consistent while dimming lights during the hottest part of the day. See our VPD guide for how lighting intensity and VPD interact.
Q: Do grow light controllers work with all types of grow lights?
Relay-based controllers (such as LTL Controls or Growers Choice Master systems in on/off mode) work with any fixture that uses standard 120/240V power — HPS, CMH, LED, T5 — as long as total load and voltage match the controller rating. Dimming controllers and adapters, however, are brand/protocol specific. TrolMaster Adapter F works with 0–10V LEDs and compatible HID ballasts; TrolMaster DLI adapters work with DLI-compatible ballasts; Gavita EL3 works with Gavita fixtures only; Matrix MC2/MC5 works with Matrix LEDs. Always verify compatibility before purchasing a dimming controller.
Commercial application: Multi-brand facilities often use a relay controller for on/off scheduling and run each brand’s native dimming protocol independently through the fixtures’ built-in controls, rather than trying to unify dimming across brands on a single low-voltage bus.
Q: What happens to my grow lights if the power goes out?
Without protection, HID lights may attempt to re-strike immediately when power returns — into a still-hot lamp and with a cold ballast. This in-rush spike can stress or damage both lamp and ballast. Digital timers without battery backup will lose their programmed schedule, defaulting to 12:00 AM blinking and requiring manual reset. Relay controllers with hot-start delay and power-failure protection introduce a timed pause (often 1–10 minutes) before re-energizing fixtures, helping protect both equipment and your lighting schedule.
Expanded: For photoperiod crops where an accidental dark period during “lights-on” hours can contribute to flowering stress, even a brief outage with a non-protected timer can set back the crop if it causes schedule drift or irregular on/off events.
Commercial application: Commercial facilities should pair lighting infrastructure with a generator or UPS for control hardware and ensure every controller’s power-failure delay and restart parameters are configured before initial operation.