
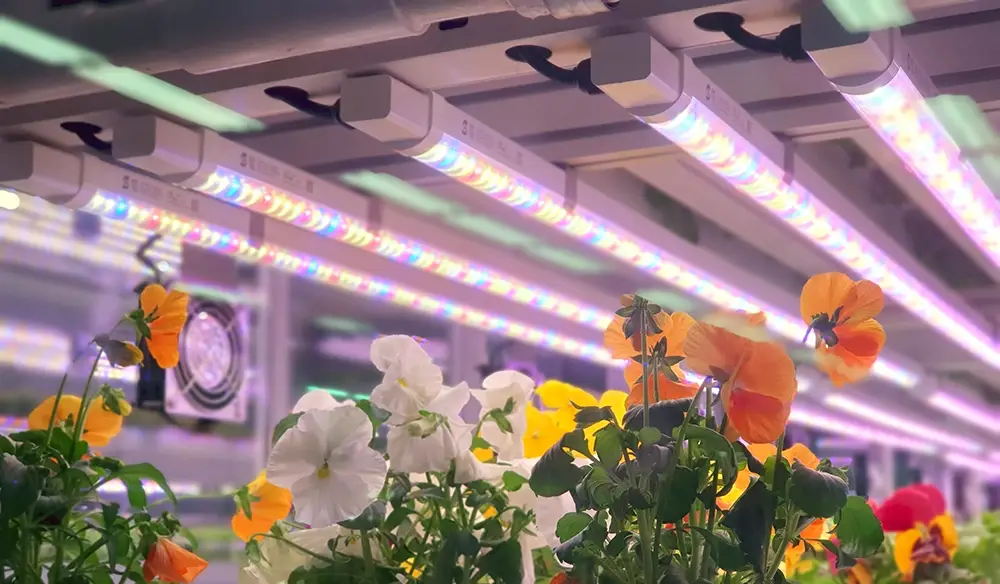
Setting up grow lights correctly is one of the highest-leverage decisions you’ll make in your indoor garden. A well-planned installation, height, and coverage strategy helps your plants develop tight internodes, strong canopy structure, and efficient energy use, while poorly positioned lights can limit yield potential or cause stress even when other factors look dialed in. When fixtures are too close, you risk light and heat stress; when they are too far, plants stretch toward underpowered light and edge-of-canopy intensity suffers.
This guide covers the full grow light setup journey — from choosing your mounting method through ongoing adjustment as your plants grow. Whether you’re hanging a single LED in a 2×4 tent or configuring a multi-light room for commercial production, the core principles are the same, and we’ll walk through mounting hardware, hanging height by light type and growth stage, light coverage and spacing, light movers, PAR measurement, reflectors, and the most common mistakes that quietly cost growers yield.
Whether you’re hanging a single LED in a 2×4 tent or configuring a multi-light room for commercial production, the principles are the same. We’ll cover every step: hardware choices, hanging height by light type and growth stage, light coverage and spacing, light movers, PAR measurement, reflectors, and the most common mistakes that quietly cost growers yield.
Commercial growers: Most of this guide applies at any scale. See the “Commercial Grow Light Setup” section toward the end for multi-light room configuration, light uniformity targets, and automated control integration.
Why Proper Grow Light Setup Matters
Poor light setup is one of the top reasons growers leave yield on the table — and most don’t realize it’s happening. A fixture hung even a few inches too high can meaningfully reduce edge-of-canopy PPFD, especially with narrow-beam optics or low room reflectivity, while a light hung too close during a heat wave can cause light bleaching and heat stress that resemble nutrient issues.
Proper setup delivers three specific outcomes:
Yield and potency. Plants receiving appropriate PPFD across the full canopy — not just the center — develop lower bud sites, tighter internodes, and heavier flowers, and light uniformity across the footprint matters as much as peak intensity at center.
Energy efficiency. A light at the wrong height may be delivering a large share of its usable photons to the floor instead of the canopy, so correct positioning ensures more of the light you pay for actually reaches your plants.
Avoiding light stress and burn. Light stress (bleaching, bleached tips, upward leaf curl) is often preventable with proper height management and intensity control; understanding PPFD targets by growth stage helps avoid the most common installation errors.
Step 1: Choose the Right Mounting Method
The method you use to physically hang your lights sets the foundation for everything else. Your ideal method depends on whether you’re in a tent, a dedicated grow room with exposed beams or structural support, or a commercial facility.
Ratchet Hangers and Adjustable Rope Clips
Ratchet hangers are the standard for tent growers and some small rooms because they attach easily to tent cross bars and let you raise or lower the fixture with a single hand pull — no tools, no disconnecting power, and very little guesswork once you know your target height.
Look for hangers rated for the weight of your specific fixture. Heavier fixtures (600W+ LED bars, double-ended HPS) warrant metal-gear ratchets over plastic-gear versions because the internal mechanisms on low-quality units can slip under load.
AC Infinity Heavy-Duty Adjustable Rope Clip Hangers handle up to 150 lbs per pair and are compatible with virtually any fixture eyelet configuration. For co-op-partner fixtures specifically, Iluminar Rope Ratchets with Metal Gears are purpose-matched to Iluminar fixtures and built with reinforced metal internals.
Installation notes:
- Attach to the tent’s top crossbars, not the fabric or corner poles
- Clip both hangers simultaneously to keep the fixture level — a tilted light creates uneven canopy coverage
- Leave at least 6 inches of rope travel so you can raise the fixture at the end of stretch


Chain Hanging from Ceiling Beams
For dedicated grow rooms with exposed joists, beams, or unistrut ceiling rails, chain hanging is economical, load-rated, and highly reliable. A single S-hook through a link at the desired height gives you adjustability without additional hardware — just move the hook up or down a link.
Use eye bolts or lag screws rated for at least 3× the fixture weight if anchoring into wood framing, and use appropriate anchors for concrete or steel. Chain and S-hook systems are widely used in commercial environments and can safely support heavy DE HPS and large-format LED fixtures when installed to manufacturer and local code requirements.
Tent Pole Mounting
Most modern grow tents include manufacturer-recommended load ratings for their cross poles — typically in the 50–100 lb per-pole range depending on tent size and brand. Check the spec before hanging heavy fixtures; overloading tent poles can cause sagging that shifts fixture angle and unbalances light distribution.
For tents with underpowered support structures, a dedicated light hanger bar — a rigid horizontal tube or unistrut section that spans the tent width and distributes weight across multiple poles — is a simple upgrade that significantly increases the effective ceiling load capacity when installed correctly.
Light Mover Rails for Even Canopy Coverage
Light mover rails are a distinct mounting approach covered in their own section below, but the mounting hardware consideration is worth noting here: movers require a fixed overhead rail to run along, which in practice means ceiling-mounted unistrut, a dedicated support beam, or a purpose-built frame positioned above the tent or bench. Plan your ceiling clearance and structural anchoring before committing to a mover-based setup.
Step 2: Set the Right Hanging Height by Light Type
Hanging height isn’t arbitrary — it’s the primary dial for controlling PPFD at canopy. Too close concentrates intensity in the center and creates hot spots; too far spreads light beyond your canopy footprint and wastes photons, so getting within the manufacturer’s recommended range helps you hit target PPFD more consistently.
These are starting ranges. Always confirm against your specific fixture’s manufacturer specifications and PPFD maps, and adjust based on plant response and measured PPFD.
LED Grow Lights
Modern high-efficiency LEDs are the most installation-variable of any light type. A 200W full-spectrum LED and a 650W bar or quantum board LED have completely different intensity profiles at the same height, and treating them identically is one of the most common setup errors.
Starting height guidelines for LED:
| Growth Stage | Moderate Power LED (200–400W) | High Power LED (500–700W+) |
|---|---|---|
| Seedling / Clone | 24–36" | 30–42" |
| Vegetative | 18–24" | 24–30" |
| Flowering | 14–18" | 18–24" |
These ranges assume lights running at or near full power. If your fixture has dimming capability, you can hang closer and dial back intensity — this approach often improves uniformity because a dimmed light at lower height can produce a more even PPFD footprint than a full-power light at greater height.
The hand test remains a useful first-pass check: hold the back of your hand at canopy height for 30–60 seconds. If it feels uncomfortably hot, raise the light or reduce intensity; LEDs at the correct height should feel warm but not excessively hot at canopy level when ambient temperatures are in range.
HPS and MH (HID) Grow Lights
HID fixtures produce substantially more heat than LEDs at similar output levels, which forces greater separation between fixture and canopy to avoid heat stress independent of light intensity.
Starting height guidelines for HID:
| Wattage | Minimum Height |
|---|---|
| 250W | 18–24" |
| 400W | 24–30" |
| 600W | 24–36" |
| 1000W | 36–48" |
| 1000W DE | 48–62" |
Double-ended (DE) HPS fixtures run hotter and with higher intensity than many single-ended equivalents, often requiring the greater clearance shown above and adequate ceiling height. Reflector quality and beam shape also matter — a well-aimed reflector at moderate height can outperform a poorly aimed reflector hung closer in terms of uniformity and usable PPFD.
CMH / LEC Grow Lights
CMH fixtures produce excellent spectral quality and moderate heat output, landing between LED and HPS in required clearance.
| Wattage | Recommended Starting Height |
|---|---|
| 315W | 20–24" |
| 630W | 24–30" |
CMH’s broader output spectrum reduces the likelihood of spectral-specific leaf burn compared to narrow-band fixtures, but heat management and canopy distance still matter — particularly during hot ambient conditions or in low-ceiling rooms.
T5 / Fluorescent Grow Lights
T5s run cool enough to position within a few inches of the canopy during seedling and clone stages. This close proximity is beneficial for young plants that need a strong light signal without the high intensity that burns tender tissue.
- Seedlings/clones: 4–8″ from canopy
- Vegetative: 6–12″ from canopy
- T5 is generally not suitable as sole-source flowering light for high-light crops like cannabis due to limited intensity and penetration, though some low-light species can complete their lifecycle under T5.
For more on choosing between these technologies, see our guide on the best LED grow lights.
Step 3: Dial In Canopy Distance — Visual Signs vs. Measurement
The height guidelines above are starting points. Dialing in the right distance is an ongoing process of observation and, ideally, measurement so you can avoid stress and optimize uniformity.
Reading Your Plants
Plants communicate light stress clearly if you know what to look for:
Signs your light is too close:
- Bleaching or whitening of upper leaves (the tissue closest to the light)
- Upper leaves cupping or tacoing upward (a heat and light stress response)
- Tips of growing shoots turning pale or white
- In cannabis specifically, whitened calyx tips during flowering
Signs your light is too far:
- Stem stretch between nodes (internodal elongation) — plants reaching upward toward insufficient light
- Pale, light green coloring overall
- Loose, open canopy structure in flowering plants
- Sparse bud development in the center of the canopy with weaker development toward edges
These visual cues help you react quickly, but they are still retrospective — you’re responding after stress begins rather than preventing it.
Measuring with a PAR Meter
Visual cues are reactive. A PAR meter lets you proactively dial in PPFD at canopy before you see damage and map uniformity across the entire footprint.
PPFD targets by growth stage (at canopy level, under a CO2-supplemented environment or well-ventilated room):
| Stage | Target PPFD (μmol/m²/s) |
|---|---|
| Seedling / Clone | 100–300 |
| Vegetative | 400–600 |
| Flowering | 600–900 |
| Late flowering (CO2 supplemented) | 900–1,200 |
These ranges align with current cannabis lighting guidance, but the upper end of 900–1,200 μmol/m²/s assumes supplemental CO2, strong airflow, and adequate HVAC capacity, while many commercial rooms without CO2 enrichment see excellent results near the 700–900 μmol/m²/s range.
Take readings at five points: center of the canopy and each of the four quadrants at canopy level. If center reads significantly higher than edges, the light may be hung too low (tight beam, over-concentrated center); if your spread is uniform but peak intensity is below target, raise intensity or lower the light within manufacturer limits.
For a full guide to PAR measurement technique, see our post on how to measure grow light effectiveness with a PAR meter.
Step 4: Plan Coverage — How Many Lights, What Footprint
Light coverage is the relationship between fixture output, hanging height, and the area of canopy you’re trying to reach. A single fixture creates a footprint — a roughly square or rectangular area of meaningful PPFD — and extending beyond that area means plants at the edges operate at reduced light intensity.
General footprint guidelines for a well-positioned, quality LED:
| Power Draw | Flowering Footprint |
|---|---|
| 200–250W | 2×2 to 2×3 ft |
| 400–450W | 3×3 to 4×4 ft |
| 600–650W | 4×4 to 5×5 ft |
| 800–1,000W | 4×5 to 5×5 ft |
These estimates reflect flowering footprints at manufacturer-recommended heights and assume reflective sidewalls or tent interiors. Vegetative footprints are larger because the PPFD requirement is lower — you can spread the light farther and still hit your veg target.
Multiple light spacing: When running multiple fixtures, a 3.5–4 foot spacing between fixture centers is a common starting point to provide useful overlap without creating major hot spots. More overlap isn’t always better — it can concentrate light in the middle of your layout while under-serving the perimeter if you don’t validate coverage with PAR mapping.
For precise coverage calculations across any tent size, use the grow light coverage calculator — it handles the math for different wattages, heights, and grow dimensions.
Step 5: Use a Light Mover for Even Coverage
A light mover system addresses one of the fundamental limitations of static fixture placement: no matter how well you dial in height and spacing, a stationary light creates a center-heavy intensity gradient where plants directly under the fixture receive more light than plants at the edges.
A light mover solves this by slowly traversing the fixture — or multiple fixtures — along a rail above the canopy. The practical benefits can be meaningful when the system is installed and tuned correctly:
- Canopy uniformity. Edge plants receive more consistent daily light integral (DLI) compared to center plants because the light source passes over them continuously throughout the photoperiod.
- Hot spot elimination. Static hot spots that cause bleaching under stationary fixtures are reduced when the fixture keeps moving and heat is dispersed over a larger area.
- Potential light reduction. With a properly installed rail and dialed travel distance, some growers report covering up to about 25–30% more canopy with the same fixture when using a mover, but real-world gains depend heavily on room layout, bench length, and plant density.
Light movers make the most sense in rectangular rooms and long benching arrangements where a single pass covers the full width. They’re typically less impactful in small square tent setups where a single fixture is already centered over a relatively compact canopy.
Light mover setup:
- Install the rail — fixed to ceiling joists, unistrut, or a dedicated frame — oriented along the long axis of your canopy
- Hang the fixture from the mover trolley using your standard rope hangers
- Set travel distance to match canopy length plus 12–18″ of overhang on each end so edge plants see full passes
- Set motor speed — many growers start at a slower travel rate so the fixture has sufficient dwell time; use plant response and PPFD readings to refine settings
The Grow1 Motorized Grow Light Mover is a straightforward single-fixture mover suitable for many single-room setups. For multiple fixtures on a shared rail, the Light Rail 5.0 Add-A-Bar Kit supports multi-lamp configurations with adjustable spacing between fixtures.

Step 6: Maximize Efficiency with Reflectors
Reflectors do for your grow room what a parabolic dish does for a flashlight — they redirect diffuse light output toward a defined target. In a room with flat white or reflective Mylar walls, ambient light that bounces off walls contributes meaningfully to overall canopy PPFD, and a good reflector further captures the fixture’s upward-directed output and redirects it downward.
For HPS and CMH fixtures, reflector selection is a first-order decision — these fixtures emit in all directions from the bulb, and a poorly aimed or low-efficiency reflector can waste a significant portion of total output compared to a high-efficiency design. For LED fixtures with directional optics, reflectors matter less as primary tools but still contribute in rooms with poor sidewall reflectivity.
Reflective sidewalls and floor covering (flat white paint or Mylar panda film) are among the highest-ROI efficiency upgrades in many grow rooms, especially in rooms larger than a tent where sidewall distance from canopy increases light escape.
Step 7: Common Setup Mistakes (and How to Avoid Them)
These are the errors that often cost growers yield without obvious warning signs.
Hanging too close at full power. This is one of the most common LED mistakes. Growers accustomed to HPS distances hang LEDs at similar heights and immediately stress tops at full power; starting higher, using dimming, and adjusting based on PPFD and plant response is safer.
Never adjusting height as plants grow. Plants grow toward the light. A height that’s correct at week one of flowering may be too close by week three once stretch is complete, so check distance every 5–7 days during active growth stages and adjust gradually.
Ignoring corners and edges. It’s easy to set up a fixture centered over your canopy and walk away satisfied, but corners and edges are where PPFD drops off the fastest. Taking PAR readings at the perimeter helps you decide whether coverage is adequate or whether edge supplemental lighting makes sense.
Uneven coverage from poor spacing in multi-light setups. When adding a second or third fixture, it’s tempting to cluster them over the densest part of the canopy. Systematic spacing — treating the canopy as a grid and distributing fixtures evenly — almost always outperforms intuitive placement once you confirm with mapping.
Relying on wattage instead of PPFD. “1000W per 4×4” is a rule of thumb from the HPS era. Modern LEDs with higher efficacy can deliver similar or greater effective output in that area at 600–700W actual draw, so wattage tells you your electricity bill, while PPFD at canopy tells you how much light your plants are actually receiving.
Not accounting for dimming controls. If your fixture has a dimmer, the manufacturer’s recommended hanging height usually assumes full power. At 50% intensity, you can hang significantly closer without burning, so use the dimmer strategically — especially during seedling and early veg stages — and verify with PPFD readings.
Step 8: Adjusting Setup as Plants Grow
Grow light setup isn’t a one-time task — it’s an ongoing management activity that responds to plant development, seasonal temperature changes, and stage transitions.
During seedling/clone stage: Start at the high end of your hanging range and at reduced intensity (around 25–50% on dimmable fixtures), since young tissue is more sensitive to light stress than mature tissue.
During vegetative stretch: Raise the light incrementally — every 3–4 inches of plant height should prompt a check of canopy-to-fixture distance. Fast-growing strains in unconstrained rooms can close the gap quickly, and incremental adjustments help prevent sudden stress.
At the flip to flower: Dial in your hanging height and PPFD target deliberately before the plant enters its stretch phase because during early flower stretch the canopy will rise toward the fixture. Planning clearance ahead of time reduces the risk of mid-stretch light burn.
During late flower: Once stretch is complete, you can often lower the light slightly to maximize intensity for the final push, provided temperatures and leaf surface temperatures stay within range. A PAR reading is most valuable here — confirm you’re actually at target before committing to higher intensity.
For growers using under-canopy supplemental lighting to reach lower bud sites during flower, the same principles apply — manage the distance between the bar and leaf surface, monitor for edge bleaching on lower leaves, and factor in the combined PPFD from top and bottom lighting.
For Commercial Grow Light Setup
Commercial operations add complexity that hobby setups don’t face: multiple fixtures in a shared space, high-pressure discharge lamp infrastructure, automated control integration, and uniformity requirements across benching that may span hundreds of square feet.
Multi-Light Room Configuration
In large commercial rooms, fixture placement typically follows a grid pattern matched to bench width and length. A common configuration for standard 4-foot-wide benches is one fixture per roughly 4×4 ft of canopy, centered over each bench section, with layout adjusted to match manufacturer coverage maps and target PPFD.
Gaps at the perimeter of the room are often supplemented with side-wall bar lighting (under-canopy bars repositioned vertically) or half-power fixtures staggered to cover edge zones so that minimum PPFD stays close to target along the entire bench.
Uniformity target: Many commercial operators treat a uniformity ratio of 0.7 or higher (minimum canopy PPFD ÷ average canopy PPFD ≥ 0.7) as a baseline, and some high-end facilities target 0.8 or better for premium production, especially in large rooms. A PAR map — grid of readings taken at canopy level across the entire space — is the only reliable way to confirm you’re hitting that target before planting.
Light Movers in Commercial Rooms
In long-bench configurations where a single row of fixtures runs the length of a bench, motorized light rail systems can allow fewer fixtures to cover more canopy at acceptable uniformity when used carefully. This can be economically meaningful at scale — one fixture on a 9-foot rail may cover canopy that would otherwise require two static fixtures, but PPFD mapping is essential to avoid under-lighting valuable crops.
Automated Control Integration
Commercial setups benefit from integrating fixture dimming and on/off control into a centralized lighting controller or environmental controller. This allows sunrise/sunset ramping (gradual intensity increases at lights-on rather than a hard switch, which reduces plant stress and heat load spikes), automatic DLI targeting across changing seasons or facility temperatures, and remote monitoring.
For controller selection and integration, see the dedicated grow light timers and controllers guide.
Why Shop Grow Light Setup Equipment at Hydrobuilder
Hydrobuilder carries the full range of hardware you need to execute a complete grow light setup — from co-op partner brands like Iluminar and Faven to widely used hangers, movers, and meters. Our commercial accounts team can assist with facility-scale planning, including fixture layout recommendations and bulk pricing for multi-room operations.
Grow Light Setup: FAQs
How high should grow lights be above plants?
The right height depends on your light type and wattage, as well as fixture optics and room conditions. LED fixtures in the 400–650W range generally start 18–30″ above canopy during vegetative growth and 14–24″ during flowering, while 600W HPS fixtures often start at 24–36″ and 1000W HPS at 36–48″. T5 fluorescents can be placed within about 4–8″ of seedlings because of their lower heat output, but all of these are starting points — measure PPFD at canopy and adjust to hit stage-appropriate targets (roughly 400–600 μmol/m²/s for veg and 600–900 for flower in most rooms).
What is the best way to hang grow lights?
Adjustable rope ratchet hangers mounted to tent crossbars are the standard for tent growers because they allow quick, tool-free height adjustment as plants grow. In dedicated rooms with ceiling joists or unistrut rails, chain and S-hook systems are reliable and load-rated for heavy fixtures; regardless of method, the key requirement is the ability to raise and lower lights easily, since correct hanging height changes throughout the growth cycle.
How do I know if my grow light is too close or too far from plants?
If a light is too close, upper leaves often show bleaching or whitening, tips may burn, and leaves can cup or taco upward from combined heat and light stress. If it is too far, stems stretch noticeably between nodes, overall coloring trends pale or light green, and the canopy appears loose and open; the definitive check is a PAR meter — target roughly 400–600 μmol/m²/s at canopy for veg and 600–900 for flower in most non-CO2 rooms, measured at multiple points across the footprint.
How many plants can a 4×4 grow light cover?
A quality LED in the 400–650W range can cover a 4×4 foot flowering footprint for high-light crops like cannabis when hung and dimmed appropriately, which typically supports about 4–6 medium to large plants in standard containers depending on training style. Coverage is best thought of in terms of footprint area and PPFD uniformity rather than plant count directly, so use our grow light coverage calculator and confirm with PAR measurements where possible.
What is a light mover and when should I use one?
A light mover is a motorized rail system that traverses one or more grow light fixtures back and forth over the canopy during the photoperiod. This motion can improve PPFD uniformity across the full canopy — especially at edges — and reduce hot spots under static fixtures, and light movers make the most sense in long rectangular rooms with bench-style growing; they tend to offer less benefit in small square tents where a centered fixture already provides reasonable coverage.
What's the difference between lumens and PAR for grow lights?
Lumens measure total light output as perceived by human eyes and weight green-yellow wavelengths heavily, which has limited relevance to plant growth. PAR (Photosynthetically Active Radiation) focuses on the 400–700nm spectrum that plants use for photosynthesis and is expressed at the canopy as PPFD (μmol/m²/s); PAR/PPFD measurement is the accurate tool for dialing in grow light positioning, while lumen ratings primarily describe how bright a light appears to people.
Can I use the same light for veg and flower?
Yes — many full-spectrum LED fixtures are designed to cover both vegetative and flowering requirements. The difference comes in hanging height, intensity (often higher for flower), and photoperiod (commonly around 18/6 for veg and 12/12 to trigger and maintain flower), and some advanced growers add stage-specific supplemental bars, but a single full-spectrum LED can handle both phases well when positioned and dimmed correctly.
How do I set up grow lights in a grow tent vs. a dedicated room?
In a tent, hang from the cross poles using ratchet hangers — most modern tents rate their poles for typical hobby fixture loads — and rely on the reflective interior to support efficiency. In a dedicated room, you have more ceiling height flexibility and can use chain or beam mounting for heavier fixtures, but you’re responsible for providing reflective or flat white walls and often benefit more from light movers due to the larger canopy area.
How do I measure PPFD to optimize my light placement?
Use a quantum PAR meter held at canopy height and take at least five measurements: center of the canopy plus each quadrant at the canopy perimeter. Record the values and compare to stage-appropriate targets, and if the center is significantly higher than edges, raise or reposition the light to improve uniformity; for a complete PAR mapping method, see how to measure grow light effectiveness.
Do grow lights need reflectors?
For HPS and CMH fixtures, reflectors are essential because these bulbs emit in all directions and a reflector is required to direct output toward the canopy efficiently. For LED fixtures with directional optics, reflectors at the fixture level are less critical, but reflective sidewalls (flat white paint or Mylar) still contribute meaningfully to canopy PPFD by bouncing ambient light back toward plants, making sidewall reflectivity a high-ROI upgrade in rooms larger than a small tent.