Good grow room ventilation is the single environmental variable that affects every other one. Get airflow wrong and nothing else — not your nutrients, not your lights, not your CO2 — can compensate. Whether you’re dialing in a 4×4 tent or designing a sealed commercial facility, this guide covers everything: how to size your fan with our interactive CFM calculator, how to choose between open and closed loop systems, when you need a dehumidifier or AC, how to install and position your equipment, and how to diagnose and fix the most common ventilation problems.
Bridge statement: From hobby growers running a single tent to commercial operators managing multi-room facilities, the fundamentals of ventilation apply at every scale — but the equipment and strategy diverge significantly. This guide covers both, with a dedicated commercial workflow section at the end.
What Does Grow Room Ventilation Actually Do?
Ventilation in a grow room or tent performs four jobs simultaneously: it removes heat generated by your lights and equipment, it exports excess humidity produced by transpiring plants, it replenishes CO2 that plants consume during photosynthesis, and it creates gentle stem-strengthening airflow across the canopy. A properly sized and configured system keeps all four in balance without overworking your climate equipment.
Temperature, humidity, and CO2 are deeply interlinked. When hot air stagnates, relative humidity rises, CO2 depletes, and the conditions for mold, pests, and nutrient lockout compound quickly. Ventilation is the first lever — exhaust hot, humid, CO2-depleted air and replace it with fresh air, and your climate gear isn’t overworked.
For a broader look at environment management, see our guide to grow room automation and our guide to indoor growing fundamentals.
Open Loop vs. Closed Loop: Choosing Your Ventilation Strategy
This is the most consequential decision in your ventilation design, and it determines every piece of equipment you need.
Open Loop Ventilation
An open loop system continuously exhausts air from the grow space to the outside and draws fresh ambient air in through an intake. This is the standard approach for most growers.
How it works: An exhaust inline fan pulls air through a carbon filter, out through ducting, and vents it away from the grow space — ideally outdoors or into an attic/adjacent space. An intake opening (passive vent or active intake fan) allows fresh air to replace what’s exhausted.
Key characteristics:
- Continuously replenishes CO2 from ambient air (typically 400–500 ppm)
- Naturally removes excess heat and humidity by replacing conditioned air with outside air
- Requires no dedicated dehumidifier or AC in many climates and seasons — the exhaust handles it
- Cannot support CO2 supplementation above ambient levels — any CO2 enrichment you add is immediately exhausted
- Works best when outside air temperature and humidity are favorable
When open loop works well: Small to medium grows (single tents to small rooms), growers not using CO2 enrichment, environments where ambient RH and temperature are reasonable.
Closed Loop Ventilation
A closed loop system seals the grow space from the outside environment. Rather than exhausting air continuously, it recirculates and conditions the internal air using AC and dehumidification equipment. The exhaust fan is used only on-demand — when temperature, humidity, or CO2 rise beyond safe thresholds.
How it works: The grow room is fully sealed. A dehumidifier removes moisture. An air conditioner manages temperature. CO2 supplementation equipment (tank/regulator or generator) replaces what plants consume. An environmental controller ties everything together, activating each device when its trigger threshold is crossed.
Key characteristics:
- Required for any meaningful CO2 supplementation — open loop exhausts CO2 before plants can use it
- Requires dedicated dehumidification and cooling equipment, since you’re no longer venting humidity and heat away passively
- Higher equipment investment, but tighter environmental control
- Preferred by commercial operations with high-intensity lighting running CO2 at 1,200–2,000 ppm
The rule: If you’re running CO2 enrichment, you must run closed loop. There is no effective middle ground. Running an exhaust fan continuously while supplementing CO2 wastes the CO2 before plants can uptake it.
For a deep dive on CO2 supplementation and compatible equipment, see our complete guide to using CO2 in grow tents and rooms.
CFM Sizing: Calculate What Your Fan Actually Needs to Move
The most common ventilation mistake is undersizing the fan — not because growers use the wrong formula, but because they forget real-world resistance factors.
The Interactive CFM Calculator
Step 1 — Base CFM: Length × Width × Height ÷ Target exchange rate (in minutes). Standard exchange rate is 1–3 minutes for open loop; 3–5 minutes for sealed CO₂ rooms (where you’re only exhausting on-demand rather than continuously).
Example: A 4×4×6.5 ft tent is approximately 104 ft³. At a 1.5-minute exchange, base CFM ≈ 69.
Step 2 — Apply real-world adjustment factors. Fan specs are measured at zero resistance. Your actual system will have:
- Carbon filter: 20–25% CFM reduction
- Every 10 ft of flexible ducting: ~3–5% additional resistance
- Each 90° bend: ~1–4% additional resistance
- Silencer/muffler: additional restriction
Step 3 — Add safety headroom. Add at least 20% above adjusted CFM to account for filter aging over its 12–18 month lifespan, hot days, running at partial speed for noise control, and late flower when heat load peaks.
Result: Your Adjusted CFM target — this is what your fan needs to deliver at actual operating conditions, not spec-sheet conditions.
Continuing the example: That same 4×4 tent at 69 base CFM, with a carbon filter and two 90° bends, becomes ~100 CFM real-world. Add 20% headroom → size for a fan capable of ~120 CFM. Choose a fan that hits that at 70–80% speed so you have room to increase on hot days.
Pro tip: Fan specs are rated at zero static pressure. At the resistance of a real duct run, most fans deliver 15–25% less than their rated CFM. Mixed-flow and EC motor designs lose significantly less under load than basic AC motor fans.
Fan Selection: Inline Fans, Circulation Fans, and Exhaust Fans
Inline Exhaust Fans
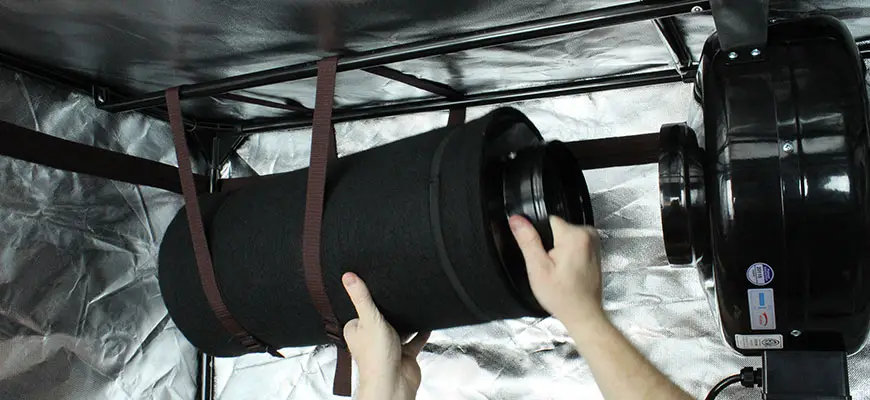
The inline exhaust fan is the core of any ventilation system. It mounts in the duct run, pulls air through the carbon filter, and pushes it out through ducting.
The Covert Smart Ventilation and Odor Control Kit is one of the most complete single-box solutions available for grow tent growers. The Covert Smart Inline Fan is programmable via its built-in controller — automate airflow based on temperature or humidity triggers, or run continuously during peak flower odor. The carbon filter uses a 50mm bed of low-density virgin activated coal carbon packed for even airflow with 12–18 months of expected life under normal RH conditions. It comes with fan, filter, ducting, and speed controller — everything you need to begin exhausting. Available in 4″, 6″, and 8″ configurations for small through large tents.
For growers who prefer to spec their fan and filter separately, the Can-Filter Can-Lite Carbon Filter is a benchmark product built in North America using 100% Australian granulated carbon with an integrated flange and 51% open perforation. It’s available in 12 sizes from 89 to 3,000 CFM. Match it to any quality inline fan using the CFM calculator above — just ensure your fan’s rated CFM at operating static pressure does not exceed the filter’s exhaust rating, or contact time will be insufficient for full odor adsorption.
Circulation Fans
Circulation fans are separate from your exhaust system. Their job is not to move air in or out — it’s to keep air moving within the canopy, preventing hot and humid microclimates from forming at leaf surfaces and strengthening plant stems through gentle mechanical stress.
For medium to large grow rooms, the Schaefer Versa-Kool Circulation Fan is a standout. These horizontal air flow (HAF) fans move air in a coherent horizontal pattern that creates a racecourse airflow pattern — mixing air from ceiling to floor and eliminating stratification. Their deep-guard motor design produces superior air movement at low noise levels. Choose the 12″ (1,470 CFM) for tents and small rooms, the 20″ (5,470 CFM) for medium commercial rooms…. For grow tent growers with limited space, a pair of quality clip fans positioned to hit the canopy from two angles will accomplish the same result at smaller scale.
Intake: Passive vs. Active
For most grow tents and small rooms running open loop, passive intake — a vent opening sized to 1.5–2× the exhaust opening — is sufficient. Negative pressure inside the tent (walls bowing slightly inward) confirms exhaust is overwhelming intake resistance.
10-second negative-pressure check: Close the tent, run the exhaust, and pinch a zipper flap. If it pulls inward and walls bow slightly, your negative pressure is correct. If not: shorten or straighten ducting, add an intake vent, increase fan speed, or add an active intake fan.
For rooms where passive intake is impractical, the AC Infinity Premium Grow Room HEPA Intake Ventilation Kit provides filtered active intake — HEPA filtration blocks dust, mold spores, insects, and other contaminants from entering with incoming air. Pair this with a carbon exhaust kit for a fully filtered intake-to-exhaust system.
Carbon Filter Sizing and Placement
Size your carbon filter for your exhaust fan’s CFM, not for your room’s cubic footage alone.
A carbon filter has both an exhaust rating and a recirculating rating. In exhaust mode (venting to the outside), the air makes a single pass through the carbon — do not exceed the exhaust rating or contact time is too short for full adsorption. In recirculating/scrubbing mode (sealed rooms), you can use up to double the exhaust rating because multiple passes compensate for single-pass efficiency.
Most filters come in flange sizes from 4″ to 12″. Match your filter’s flange to your fan’s duct diameter. If your filter and fan have different flanges, use a reducer — but know that reducers add static pressure resistance and should be factored into your adjusted CFM.
Placement options:
- Hung inside the tent (preferred for most growers): Fan and filter inside the tent, ducting runs to the exhaust port and out. This maximizes odor control (air moves through the filter before it can reach the tent walls), removes the hottest air from the canopy level, and allows slower air velocity through the filter for better adsorption.
- Filter outside the tent on the floor: Used when filter is too large to hang or space is at a premium. Less effective at odor control since air reaches the tent walls before filtration.
- Pull vs. push: Both work. Pulling (fan after the filter) reduces static pressure on the fan impeller and is generally preferred. Pushing (fan before the filter) may better suit certain duct configurations — performance difference is minor with a well-sized fan.
Carbon filter lifespan: Most quality filters last 12–18 months under normal conditions. High RH above 70% can cut lifespan nearly in half by saturating the carbon pores. Always use the included pre-filter sleeve to extend carbon life by blocking particulates.
Temperature, Humidity, and CO2: Targets by Growth Stage
Ventilation alone manages temperature and humidity in open loop systems. In closed loop systems, ventilation is the backup — dedicated equipment handles the primary load.
Temperature targets (lights-on):
- Seedlings/clones: 75–85°F
- Vegetative: 70–85°F
- Flower: 65–80°F (lower end in late flower helps terpene and resin development)
- Lights-off: aim for no more than 10°F drop from lights-on temp; larger swings stress plants
Relative humidity (RH) targets:
- Seedlings/clones: 70–80% RH (high moisture aids rooting before root systems develop)
- Vegetative: 50–70% RH
- Flower early: 40–60% RH
- Flower late (weeks 6+): 35–50% RH (lower RH is critical to prevent botrytis/bud rot under dense canopy)
CO2 targets:
- Ambient (~400 ppm): minimum for plant health — what open loop systems provide
- Optimized (~1,000–1,200 ppm): possible in semi-sealed rooms with tight exhaust control
- Supplemented (~1,200–2,000 ppm): requires fully sealed, closed loop system; only effective with high-intensity lighting (600W+ LED/HID)
To track these parameters in real time, the HBX Thermo-Hygrometer delivers reliable temperature and humidity readings with Min/Max memory — essential for catching environmental swings between lights-on and lights-off cycles without monitoring constantly. It’s one of the most cost-effective ways to confirm your ventilation system is actually maintaining target conditions…. For more detailed humidity management, including how to solve high RH when ventilation alone isn’t enough, see our guide on controlling humidity in a grow tent.
When Ventilation Alone Isn't Enough: Dehumidifiers and ACs
Open Loop and the "Free Climate Control" Advantage
In an open loop system, your exhaust fan is your first dehumidifier and your first air conditioner — you’re simply replacing hot, humid internal air with cooler, drier external air. For many hobby growers in temperate climates, this is sufficient during most of the year.
But there are conditions where open loop exhaust cannot keep up:
- Late flower with a large, dense canopy (transpiration load spikes)
- Hot summer months when intake air is nearly as warm as exhaust
- High ambient humidity in rainy seasons or humid climates
- Large rooms with multiple lights generating significant heat loads
When these conditions arise, you need dedicated equipment.
Dehumidifiers for Closed Loop and High-RH Open Loop Setups
In a closed loop room, a dehumidifier is not optional — it’s required. Since you’re not exhausting air to remove moisture, the dehumidifier handles the entire moisture load from plant transpiration, irrigation, and ambient air.
The Quest 225 Pint Dehumidifier is the benchmark for commercial closed loop rooms. It uses M-CoRR multi-coil refrigeration technology to extract more pints of water per kWh at a wider temperature range than most competing units. Its filter compensation technology automatically increases fan speed as the MERV-13 internal filter loads up, maintaining consistent CFM throughout the filter’s life. The 208–230V configuration suits commercial facilities where 240V circuits are standard. For smaller or residential closed loop setups, Quest also produces the 70 Pint overhead unit for grow tents and small rooms.
For open loop growers experiencing humidity problems that exhaust alone can’t solve — particularly in late flower — adding a dehumidifier to your grow room is often more effective than simply increasing exhaust fan speed, since increasing exhaust can also increase CO2 depletion and disrupt negative pressure.
Air Conditioners
In a closed loop room, an AC unit replaces the temperature management function that open loop ventilation handles passively. The AC Infinity TERRAFORM 7 (8,000 BTU, with integrated dehumidifier, heater, and VPD controller) is a capable all-in-one option for medium tents and small sealed rooms. For large closed loop facilities, mini-split systems (MRCOOL DIY Gen 4 series) offer the efficiency and capacity for serious operations.
For more on managing heat, see our guide on dealing with excessive grow tent heat.
Ducting: Installation, Routing, and Resistance
Every foot of ducting and every bend reduces your effective CFM. Route short and straight whenever possible.
- Flexible aluminum duct is easiest to work with but has more internal surface resistance than rigid smooth-wall duct. For runs over 15–20 ft, rigid duct is worth the installation effort.
- Each 90° bend adds approximately 1–4% resistance. A run with four 90° bends can lose as much airflow as 20+ additional feet of straight duct.
- Keep duct runs under 25 ft total whenever possible. If your layout requires a longer run, step up fan size accordingly.
- Seal all duct connections with HVAC foil tape — not standard duct tape, which fails at temperature.
- Route exhaust outdoors or into an attic, not back into the same room your tent is in. Recirculating hot, humid exhaust into the intake defeats the purpose of ventilation.
For light-tight applications (light-dep or light-proof setups), light-proof black ducting prevents light leaks at intake and exhaust ports.
Ventilation Configurations: What to Use and When
Push vs. Pull Configuration
Both “push” (fan before filter) and “pull” (fan after filter, pulling air through) configurations work effectively. Pull is generally preferred because it reduces positive pressure on the filter connections and slightly reduces static pressure on the fan impeller. Choose based on your space, service access, and how cleanly you can route the duct run.
Monitoring and Automating Your Ventilation System
Manual spot-checking with a thermometer-hygrometer gets you started, but it tells you nothing about what happens between checks. Environmental controllers automate your system so fans, dehumidifiers, and ACs activate based on real conditions, not timers.
The TrolMaster Hydro-X Environmental Control System is the most widely used controller for serious indoor grows. It uses a 3-in-1 sensor (temp, humidity, CO2 optional add-on) and a modular station system to control lights, HVAC, dehumidifiers, humidifiers, and CO2 equipment independently. Its free app enables remote monitoring and control. Up to 17 types of control modules make it scalable from a single-room tent setup all the way to a multi-light commercial room. The Hydro-X Pro and Hydro-X Plus expand capacity for facilities running multiple zones and up to 50 sensors.
The HBX Variable Fan Speed Controller is a simpler entry point — manual infinite speed adjustment for any inline fan up to its rated amperage. Useful for dialing fan speed to the minimum needed for your conditions without the investment of a full environmental controller.
For an overview of automation tools and how to implement them, see our grow room automation guide.
Troubleshooting: Diagnosing Ventilation Problems
Temps Still Too High After Sizing
- Increase air exchange rate (bump fan speed or step up CFM class)
- Shorten and straighten ducting; remove reducers choking flow
- Route exhaust outdoors or into attic rather than back into the same room
- Add targeted cooling: mini-split, portable AC, or air-cooled reflectors for HID lights
- Check that intake opening is large enough — undersized intake starves the exhaust fan of air