After months of growing, the time to harvest has finally arrived. But harvesting, drying, and curing cannabis are not just the final steps — they are among the most important. Mistakes in any of these three phases can undo all the work you’ve put in, leading to mold, lost potency, and a far less enjoyable end product. This guide walks you through everything a first-time grower needs to know: when to harvest, how to trim, how to dry, and how to cure properly — from a 4×4 tent up to a commercial facility.
Whether you’re pulling a single plant or running your first multi-light grow, the fundamentals of post-harvest care are the same. The difference is in scale, not in principle.
Why Getting Harvest Right Matters So Much
The drying and curing steps are not optional refinements — they are essential to quality. Rushing through them is one of the most common mistakes beginner growers make. Improperly dried or undercured flower is harsh, lacks aroma, and is far more susceptible to mold.
A proper cure accomplishes several things simultaneously: it allows chlorophyll to continue breaking down (reducing harshness), lets terpenes fully develop (improving aroma and flavor), and brings moisture to a stable level (extending shelf life and helping prevent mold when stored correctly). Growers who skip or shortcut the cure almost always regret it.
Phase 1: Knowing When to Harvest
Harvesting at the right time is the single most important decision in post-harvest quality. Harvest too early and you leave potency on the table. Harvest too late and the effect profile shifts as THC gradually oxidizes and degrades into other compounds like CBN.
The most reliable method: trichome inspection. Use a jeweler’s loupe (30–60x magnification) or a digital microscope to examine the trichomes on your buds.
- Clear/translucent trichomes — Not ready. The plant is still producing.
- Milky white/cloudy trichomes — Peak THC. Harvest here for an energetic, cerebral effect.
- Amber trichomes — THC is converting to other cannabinoids including CBN. More sedative, body-heavy effect.
Most growers aim to harvest when trichomes are predominantly milky with roughly 10–20% amber — though this is highly cultivar-dependent and subject to personal preference.
Secondary signals supporting your trichome read: yellowing fan leaves (normal late-flower senescence), pistils darkening from white to orange/red, swelling and density in the calyx. These signals help confirm the general harvest window, but trichomes are the primary indicator of readiness.
Trichome Color Reference Chart
| Trichome color | What it looks like | What it means | Best for |
|---|---|---|---|
| Clear / Translucent | Glass-like, no milkiness | Still maturing — THC still developing | Not ready — wait |
| Milky white / Cloudy | Opaque white, no amber | Peak THC production | Energetic, cerebral effect |
| Mixed milky + amber (10–20%) | Mostly white with some golden/amber heads | THC at peak, slight conversion beginning | Balanced effect — most growers' target |
| Mostly amber | Majority of heads golden to brown | THC converting to CBN | Sedative, body-heavy effect |
Inspect with a 30–60x jeweler’s loupe or digital microscope. Check multiple bud sites — trichome development is not always uniform across the plant.
Phase 2: Trimming — Wet vs. Dry
Once you’ve made the cut, you’ll need to decide how to trim. This choice directly affects your drying time, terpene retention, and labor flow.
Wet Trimming
Wet trimming means removing fan leaves and sugar leaves immediately after harvest, before drying. The plant is still sticky and pliable, which makes trimming easier for many growers. Buds often dry faster (around 5–7 days under controlled conditions) because more surface area is exposed to air, although very dense flowers or higher humidity can extend this window.
The tradeoff is that some terpene protection provided by the surrounding leaf matter is lost during drying. Wet trimming is a good choice for growers in humid climates where slower drying increases mold risk, and for operations prioritizing faster turnaround.
Dry Trimming
Dry trimming means hanging whole branches (with leaves intact) and allowing the plant to dry first, then trimming. The leaves slow moisture loss, supporting a more gradual dry that many growers believe preserves more terpene complexity and results in a smoother final product. Drying usually takes longer (often 7–12+ days depending on environment and bud size), and the dried leaf matter makes trimming more labor-intensive.
Dry trimming tends to be the preferred method for quality-focused growers in low-humidity environments. For a full comparison of both methods, read our wet trim vs. dry trim guide.
Hand Trimming Tools
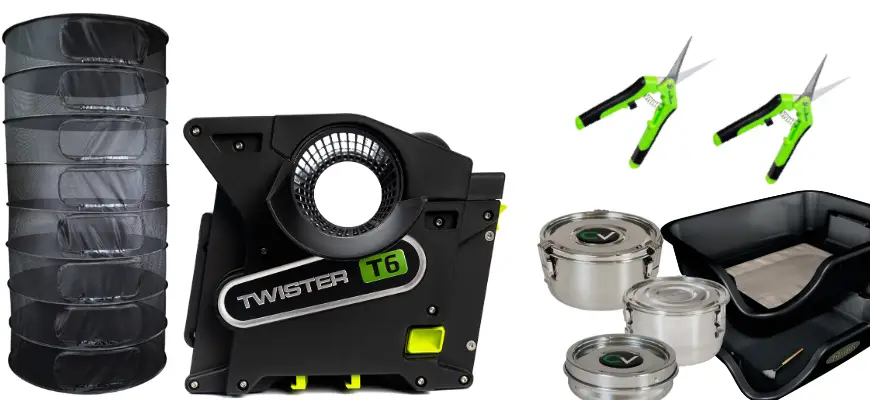
For hand trimming, your scissors are your most important tool. Resin buildup is inevitable, so choose quality scissors you can keep clean throughout a long session. The HBX Titanium Curved Precision Garden Trimming Scissors are designed for exactly this kind of extended harvest work — ergonomic, titanium-coated to resist resin buildup, and precise enough for detailed bud manicuring. If you’re trimming a larger grow with a crew, the HBX Premium Hand Trimming Kit includes everything a single trimmer needs in one package.
For growers reaching the point where hand trimming the whole harvest is no longer practical, see our comparison of hand trimming vs. trimming machines.


Wet Trim vs. Dry Trim Quick Comparison
| Factor | Wet trim | Dry trim |
|---|---|---|
| When you trim | Immediately after harvest, before drying | After drying is complete |
| Drying time | Faster — 5–7 days (more surface area exposed) | Slower — 7–12 days (leaf canopy slows moisture loss) |
| Terpene retention | Lower — no leaf protection during dry | Higher — leaves buffer moisture loss during drying |
| Trim difficulty | Easier — plant is still sticky and pliable | Harder — dried leaves are brittle and crumbly |
| Labor distribution | Front-loaded — all trimming happens at harvest | Spread out — trimming happens after drying phase |
| Mold risk | Lower — faster dry reduces mold window | Higher if humidity not controlled during long dry |
| Best for | Humid climates, faster turnaround, commercial volume | Quality-focused grows, low-humidity environments |
Neither method is objectively better — the right choice depends on your environment, timeline, and quality goals. For a deeper breakdown, see our wet trim vs. dry trim guide.
Phase 3: Drying Your Harvest
Common target environment: about 60–70°F (15–21°C) / 50–60% relative humidity / gentle airflow, with no direct airflow on buds. These are widely used starting points for both hobby and commercial growers, and many facilities refine them slightly (for example, 55–65°F and 45–55% RH) to balance dry time, terpene preservation, and mold risk.
Under well-controlled conditions in this range, proper drying typically takes 7–10 days. The goal is slow, steady moisture reduction — not rapid desiccation. Drying too fast causes the outside of the bud to dry while moisture remains trapped inside (case hardening), produces a harsh product, and can leave excess chlorophyll. A good drying environment should feel like a cool, slightly humid room — not like standing in front of a heater.
Drying Methods
Hanging (whole plant or branch): The traditional method. Suitable for dry trimmers. Requires horizontal line or rack space and adequate airflow throughout the drying space so that no buds are resting against each other long term.
Drying racks: Best for wet trimmers and smaller individual buds. Racks allow single-layer drying with maximum airflow per bud, reducing mold risk significantly when room conditions are dialed in. The Twister Drying Trays are a popular stackable option — each tray holds up to about 0.5 lbs of dry flower and is designed for single-layer drying with ventilation holes on all sides. They’re stackable up to 20 high and made from food-grade polyethylene, making them easy to clean between cycles.
For simple hangs at home scale, the Grow1 Dry Rack with Clips offers an accessible entry point.
Testing for Dryness
The snap test is your primary readiness check: take a small stem from the bud and bend it. If it snaps cleanly, drying is generally complete. If it bends and doesn’t break, give it more time. Do not rush this step. Buds that feel dry on the outside may still retain significant internal moisture.
Environmental Monitoring During Drying
You cannot manage what you don’t measure. Keep a HBX Thermo-Hygrometer in your drying space at all times. Its Min/Max memory function lets you track environmental swings between checks — essential for catching humidity or temperature spikes overnight when you’re not in the room.
Phase 4: Curing Your Harvest
Curing is the step that separates truly finished flower from something merely dried. During curing, residual chlorophyll continues to break down, moisture redistributes evenly throughout the bud, and terpene profiles deepen and stabilize. The improvement between a short cure and a longer, well-managed cure is noticeable in aroma, smoothness, and flavor to most consumers.
Minimum cure time: at least 2–3 weeks, with many growers targeting 2–4 weeks as a baseline. For the best possible product, cure for 4–8 weeks. Some premium growers will extend the cure up to 6 months for specialty batches, similar to aging wine, provided humidity is controlled and product is kept cool and dark.
Moving Flower into Storage: Start with the Right Bags
Before your buds ever reach a curing jar, you need a reliable way to move and stage dried flower between your drying room and curing or packaging area. This is where your storage bags earn their place.
HBX Multiuse Turkey Bags are the go-to solution for harvest staging at any scale. At 18″ x 24″, they’re sized for handling bulk dried flower without compressing or damaging buds during transport between your drying space and curing setup. They’re a harvest staple because they’re thick enough to hold up under the weight of a full load and available in packs of 25 or 100 depending on harvest volume.
For larger harvests where you’re working with bins or totes, HBX Multiuse Bin Liners handle the commercial-scale staging side of post-harvest. At 48″ x 30″, they’re built for bulk flower transfer and bin lining between drying cycles — available in packs of 100 for full-facility workflows where a single harvest can fill multiple containers.
Classic Mason Jar Curing
Pack dried buds loosely into airtight glass mason jars, filling them to about ¾ capacity. Do not pack tightly — buds need space to “breathe” and allow moisture to circulate evenly. Store jars in a cool, dark location. For the first two weeks, burp each jar once or twice daily: open for 5–10 minutes to release built-up CO₂ and water vapor, then reseal. After two weeks, reduce to every few days; after a month, weekly is sufficient.
Target relative humidity inside the jar: about 58–62% RH. This is a widely accepted sweet spot for active curing — high enough to allow continued enzymatic activity, low enough to help prevent mold when monitored. If buds come out of drying on the dry side, add a 58–62% Boveda or similar humidity pack to each jar to bring moisture back into range.
Some growers prefer to tighten the range slightly toward 55–58% RH for long-term storage, especially with large or dense buds, to further reduce mold risk while keeping flower from becoming overly brittle.


Modern Alternative: Grove Bags
Growers who want to reduce or eliminate daily burping can use Grove Bags TerpLoc Storage Bags — a passive film pouch engineered to help self-regulate internal humidity around the ideal 58–62% RH range when bags are properly filled and sealed. They’re practical for long-term storage after the active cure phase is complete and are available in multiple sizes from 1 oz up to bulk.
For commercial workflows, Grove Bags fit best when paired with periodic RH checks and standard QA sampling, rather than being treated as a completely “set and forget” system.
A note on how these products work together: HBX Turkey Bags and Bin Liners handle transport and bulk staging — they’re workhorses for moving flower between spaces and keeping your harvest organized. Mason jars or Grove Bags handle the curing and storage environment itself. Each has a distinct role; they’re not interchangeable.
Common Mistakes to Avoid
Harvesting too early. Rushing harvest is the number one quality killer. Wait until your trichome read confirms readiness instead of relying only on breeder timelines.
Drying with direct airflow on buds. Fans in your drying space are for circulation and humidity control — never point them directly at buds. Direct airflow causes rapid surface drying that traps internal moisture and increases the risk of case hardening.
Skipping the cure entirely. Smoking freshly dried flower is like eating unaged cheese — it works, but it’s a fraction of what it could be. Give the cure the time it deserves for smoother, more aromatic flower.
Overpacking jars. Buds need space. Overfull jars restrict air exchange when burped, compress trichomes, and create pockets of moisture that invite mold.
Inconsistent burping in the first two weeks. The early cure phase is when the most important biochemical activity is happening. Don’t skip burping during this window if you’re using jars and relying on manual humidity control.
For Commercial Operations: Scaling Your Post-Harvest Workflow
This section covers considerations for professional facilities managing larger harvests. Home and small-scale growers can apply the principles above directly.
At commercial scale, the variables that are manageable in a home tent — ambient humidity, drying time, jar-burping cadence — become facility infrastructure decisions. The quality of your drying room directly affects your product quality, terpene retention, and ultimately your price per unit.
Commercial Drying Room Setup
A dedicated drying room with environmental control is standard practice at any serious scale. Many commercial facilities target a temperature band around 55–65°F (12.8–18.3°C) with relative humidity between roughly 50–60%, then lock those conditions in via SOPs so they remain stable batch after batch. These parameters are similar to home targets but usually run a bit cooler and more tightly controlled to reduce variability.
Visit our drying and curing definitive guide for a complete breakdown of commercial drying room design.
For high-volume harvests, the Twister Drying Trays on rolling aluminum rack systems provide efficient use of drying room floor space — stackable up to 20 per rack, caster-mounted for room-to-room portability, and designed for single-layer drying that helps minimize mold risk even in humid climates.
Commercial Trimming
Hand trimming becomes economically untenable past a certain harvest volume. For facilities processing 20+ lbs per harvest, a trimming machine changes the ROI equation significantly by reducing labor hours and standardizing output. See our guide to the best trimming machines for a full comparison by throughput and use case.
For facilities completing the full build-out, Covert’s Harvest Drying Packages combine a grow tent, drying racks, ventilation, and odor control into a complete turnkey drying environment — a good option for operations scaling from home to their first dedicated drying room.
Commercial Curing & Storage
At scale, mason jars are replaced by airtight stainless containers, commercial-grade curing rooms, or Grove Bags in bulk quantities. HBX Multiuse Bin Liners are the standard for commercial bulk flower staging between drying and final curing/packaging — available in case quantities for full-facility use.
Why Shop at HydroBuilder for Your Harvest Supplies
HydroBuilder carries the full range of post-harvest equipment — from trimming scissors and drying racks to curing solutions and storage bags — from the top brands in the industry. Our cultivation specialists have hands-on experience with these products and can help you dial in your setup, whether it’s your first harvest or you’re optimizing a commercial operation. Call us at 888-815-9763 or browse our complete harvest supplies collection.
Cannabis Harvest, Drying & Curing FAQ
Q: When should I harvest my cannabis plants?
A: Direct answer: Harvest when trichomes are mostly milky white, with about 10–20% amber — typically around 8–10 weeks into flower depending on cultivar and environmental conditions. Inspect with a 30–60x loupe or digital microscope.
Trichome color is the most reliable indicator of harvest readiness. Clear trichomes mean the plant is still maturing. Milky white indicates peak THC production. Amber signals THC converting into other cannabinoids including CBN, shifting the effect toward sedative. Secondary signals — pistil darkening, calyx swelling, yellowing fan leaves — support your trichome read but shouldn’t replace it.
For commercial operations, staggering harvest windows across a perpetual grow requires systematic trichome monitoring across multiple rooms on a consistent schedule.
Q: How long does it take to dry cannabis buds?
A: Direct answer: Drying typically takes about 7–10 days at 60–70°F and roughly 50–60% RH under controlled conditions. Use the stem snap test to confirm — if a small stem snaps cleanly, it’s ready; if it bends, give it more time.
Drying speed is directly tied to your environment. Higher humidity or lower airflow slows the process; lower humidity or warmer temperatures speed it up. Rushing drying with heat degrades terpenes and leaves more chlorophyll in the bud (adding harshness). Slow and steady is almost always the right approach.
Monitor your drying environment continuously with a thermometer/hygrometer, and check buds daily in the final days before they’re ready.
Q: What is the best way to cure cannabis?
A: Direct answer: Pack dried buds ¾ full into airtight glass jars, store in a cool dark location, and burp daily for the first 2 weeks. Target about 58–62% relative humidity inside the jar. Cure for a minimum of 2–3 weeks; 4–8 weeks produces significantly better results for most batches.
The jar-and-burp method remains the gold standard for small and mid-scale grows because it allows precise monitoring of each batch. If you notice a strong ammonia smell when burping, the buds were not fully dried before jarring — return them to the drying space immediately. Ammonia indicates bacterial activity and is a mold precursor.
Grove Bags TerpLoc are a modern alternative that passively helps self-regulate RH and eliminate burping, making them practical for long-term storage after the active cure phase, especially in commercial settings where labor efficiency is critical.
Q: How do I know if my buds are too wet or too dry going into cure?
A: Direct answer: Too wet — stems bend rather than snap, buds feel spongy, and you may smell ammonia within 24 hours of jarring. Too dry — buds feel brittle, crumble at the touch, and stems snap with little resistance. Neither extreme is ideal.
If buds are too wet, return them to the drying space and add more time, then recheck with the snap test. If they’re too dry, add a 58–62% Boveda or similar humidity pack to the jar. The pack will release moisture until the internal environment stabilizes at the target RH.
Q: How long should I cure cannabis before smoking it?
A: Direct answer: At minimum 2–3 weeks. For best aroma, potency, and smoothness, cure for 4–8 weeks. Some specialty growers cure selected batches for several months when storage conditions are well controlled.
The improvement between a short 2-week cure and a 6-week or longer cure is tangible for most consumers — not just theoretical. The longer cure allows more complete chlorophyll breakdown and fuller terpene development. The hardest part is patience, especially on a first grow.
Q: Can I speed up the drying process with heat or a fan?
A: Direct answer: No — accelerating drying with heat or direct airflow almost always degrades your product. Use gentle indirect circulation to manage humidity, not to force buds to dry faster.
Fast drying locks in chlorophyll (producing a harsher, “green” taste), degrades heat-sensitive terpenes, and causes case hardening — where the outside dries faster than the inside. A quick-dried bud will never fully recover in the cure. There is no shortcut that doesn’t cost quality.
Q: What's the difference between wet trimming and dry trimming?
A: Direct answer: Wet trimming happens immediately after harvest, before drying. Dry trimming happens after the plant has dried. Wet trim = generally faster dry and easier scissor work; dry trim = slower dry and typically more terpene retention and a smoother smoke when done correctly.
Your choice affects labor distribution, terpene profile, and final bag appeal. Wet-trimmed buds often look fuller and more manicured but may lack some of the terpene depth associated with a slower dry. Dry-trimmed flower benefits from the leaf canopy slowing moisture loss, which many growers believe produces a smoother, more complex product.
Q: What RH should cannabis be stored at after curing?
A: Direct answer: Store cured cannabis at roughly 55–62% relative humidity in an airtight, light-proof container. Around 58–62% is ideal for ongoing curing; 55–58% works well for long-term storage where mold risk reduction is prioritized.
Below about 55% and trichomes begin to desiccate and degrade more quickly. Above about 65% and mold risk increases significantly. Two-way humidity packs (Boveda, Integra Boost) help maintain a set point automatically; Grove Bags achieve similar control passively through their TerpLoc film when used correctly.
Q: Do I need a special drying room, or can I dry in my grow tent?
A: Direct answer: You can use your grow tent if you can reliably control temperature and humidity — but a dedicated drying space is better because it allows you to start your next cycle immediately after harvest and improves consistency over time.
A grow tent with a ventilation system and hygrometer can produce excellent results if conditions are dialed in. The limitation is that using your grow tent for drying blocks your next crop’s start date. A separate tent or dedicated drying room allows you to maintain a continuous production cycle and makes it easier to standardize your post-harvest SOPs.
Q: Do I need to burp Grove Bags like mason jars?
A: Direct answer: No — Grove Bags are designed to maintain internal humidity in the ideal curing and storage range without daily burping when properly filled and sealed, but periodic checks are still recommended, especially in commercial settings.
The multi-layer TerpLoc film allows excess moisture and oxygen to move in and out until equilibrium is reached, reducing labor compared to traditional jar burping. However, adding small hygrometers to representative bags and incorporating visual and olfactory checks into your QA process helps ensure that every batch stays within your target RH and quality standards.
Q: Can I cure and store cannabis in the same container long-term?
A: Direct answer: Yes — you can cure and then store cannabis in the same airtight container as long as humidity and temperature remain in range, but many operators tighten RH slightly (toward 55–58%) for long-term storage.
During the active cure phase, 58–62% RH is common to keep enzymatic activity going. For long-term storage, shifting closer to the mid-50s RH band and keeping containers in a cool, dark environment helps preserve terpenes and cannabinoids while minimizing mold risk and over-drying.