

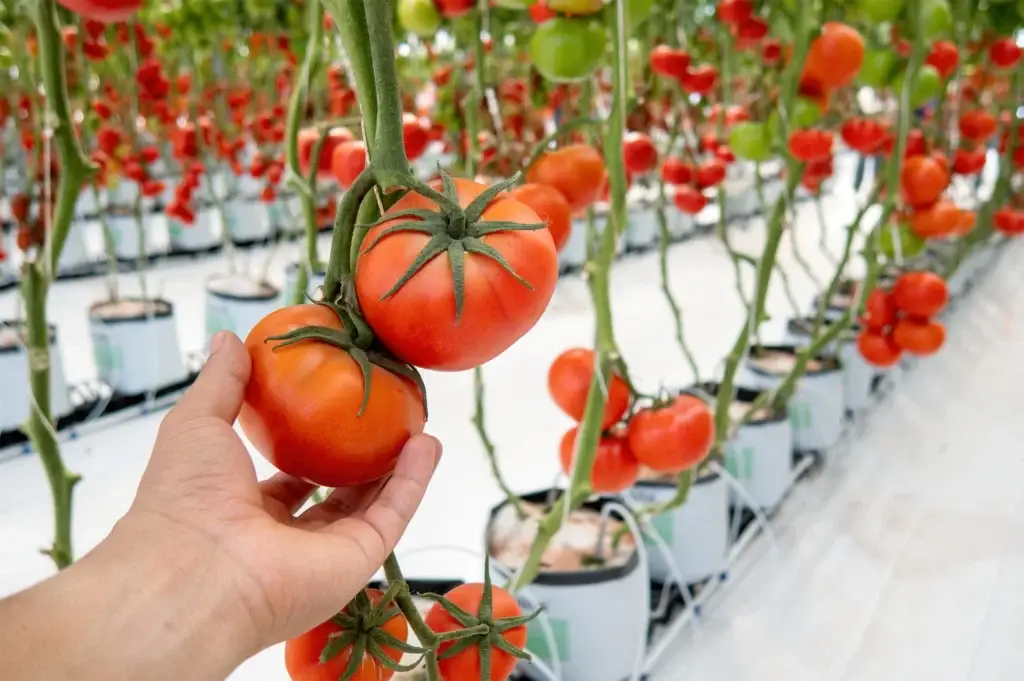
Hydroponic tomatoes are one of the most rewarding crops you can grow indoors — they can mature faster, yield more, and produce consistently year-round compared to similar plants in soil when conditions are well managed. Whether you’re setting up a home system in a 4×4 tent or scaling a commercial greenhouse row, tomatoes respond exceptionally well to soilless growing, delivering fruit with a density and consistency that outdoor soil growing rarely matches.
This guide covers everything you need to start growing tomatoes hydroponically: choosing the right system and variety, dialing in your light and environment, feeding strategies with stage-specific EC targets, daily maintenance, and what to expect at harvest.
For commercial and greenhouse operations, a dedicated section below covers Dutch bucket systems, large-scale drip line setup with Netafim and Dosatron, and production targets relevant to professional cultivation.
Why Grow Tomatoes Hydroponically?
Hydroponics removes the soil buffer and delivers nutrients directly to the root zone — which is both the greatest advantage and the steepest learning curve. Here’s what you get:
Year-round production. Outdoor tomato seasons in most of the US run spring to early fall. Indoors, you control the environment completely, so off-season harvests (including winter and early spring) are achievable with proper lighting and climate control.
Faster growth and heavier yields. With direct nutrient delivery and optimized root-zone oxygen, hydroponic tomatoes can mature noticeably faster than comparable soil-grown plants and often produce larger or more consistent fruit when managed correctly. Results vary by variety, light intensity, and system management.
Cleaner growing space. No soil means fewer soil-borne pests and pathogens, and a far easier growing environment to sterilize between cycles.
Precision control. You decide exactly what your plants receive — every nutrient, at what concentration, on what schedule. That precision is what separates a good harvest from a great one, as long as EC, pH, and environmental variables are measured and adjusted regularly.
The tradeoffs are real. Hydroponics is less forgiving than soil. Root zones are exposed directly to the nutrient solution, so pH drift, over-feeding, and pump failures impact plants quickly. Expect to invest time in monitoring, especially during your first few cycles.
Choosing the Right Tomato Variety
Before choosing a system, decide what you’re growing. Tomato varieties for hydroponics divide into two categories:
Determinate (bush) varieties grow to a fixed height, produce fruit over a concentrated window, and then decline. They’re more compact, easier to manage in smaller tents or grow rooms, and require less trellising. For home growers with limited vertical space, determinates are the practical choice.
Indeterminate (vining) varieties grow continuously and produce fruit over a much longer window — sometimes the full growing season and beyond. They require robust vertical support and regular pruning, but they’re a common commercial choice because of their sustained yield over months.
Popular varieties that perform well hydroponically:
- Cherry and grape types (Sungold, Sweet Million, Supersweet 100): Fast-maturing, prolific, and well suited to ebb-and-flow and DWC systems. Ideal for home growers who want frequent harvests.
- Beefsteak and large slicer types (Big Beef, Brandywine): Heavier fruit, longer time to harvest, and in need of strong support. These are more commonly found in Dutch bucket and commercial drip systems where trellising infrastructure is in place.
- Roma/paste types (San Marzano, Amish Paste): Meaty, lower moisture content, and often good disease resistance. They work well in drip systems and Dutch buckets for sauce and processing tomatoes.
Starting from seed vs. cuttings: If you can source rooted cuttings from a known, high-performing mother plant, use them — you’ll cut several weeks from your timeline and get consistency you can’t always predict from seed. Check out our guide to cloning tomato plants for propagation technique. If starting from seed, germinate in rockwool cubes at 70–80°F and transplant once roots reach the bottom of the cube and are visible at the sides or base.
Choosing a Hydroponic System for Tomatoes
Tomatoes are heavy feeders and large plants — they need consistent nutrient delivery, strong root oxygenation, and a container that supports their weight as they vine. These characteristics make some systems better suited than others.
Ebb & Flow (Flood and Drain)
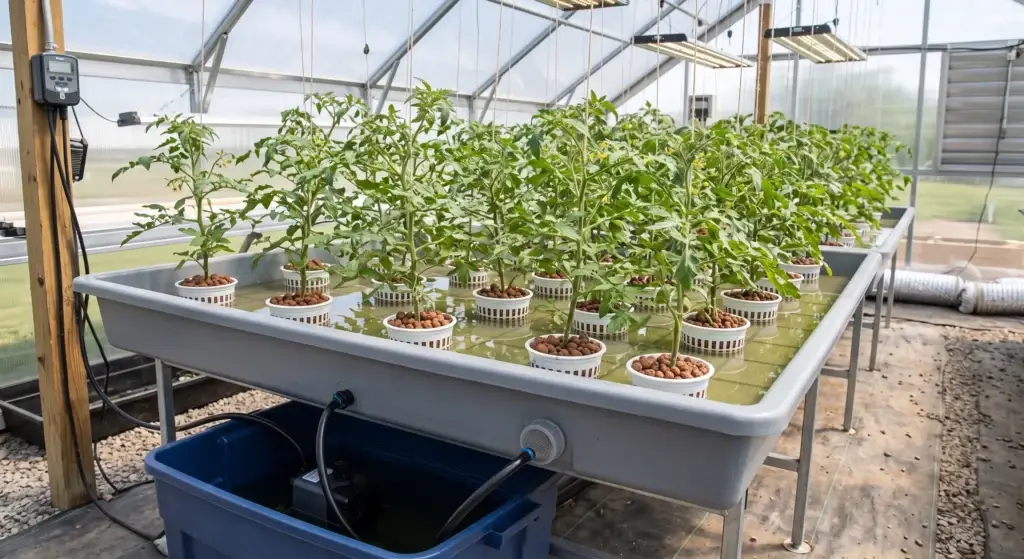
Ebb and flow systems periodically flood the root zone with nutrient solution, then drain back into the reservoir on a timer. The flood-drain cycle delivers nutrients and provides the root-zone aeration tomatoes need. It’s a proven, versatile system that scales from 3×3 hobby setups to multi-row commercial trays.
The Active Aqua Grow Flow 12-Site Ebb & Flow System is the top-revenue system in this category at HydroBuilder and a strong option for growers who want to run 6–12 tomato plants with a structured, expandable setup. The 5-gallon growth modules give root zones enough room for full-size plants, and the system supports easy expansion when you’re ready to add more sites.
Drip Systems
Drip systems feed plants through individual emitters at the top of the root zone rather than flooding from below. They’re easy to automate, scale cleanly from small home systems to large greenhouse rows, and allow per-plant customization of feed rates. Most commercial hydroponic tomato operations use some form of drip delivery to slabs, buckets, or other media containers.
For home growers who prefer drip, HydroBuilder carries both complete Botanicare drip kits and component systems. For those building their own setup, Botanicare trays pair well with any appropriately sized reservoir and pump combination.
Deep Water Culture (DWC)
DWC keeps roots suspended in an oxygenated, constantly-aerated nutrient reservoir. It produces fast growth rates and works well for smaller determinate varieties and cherry tomatoes, where plant size and weight remain manageable. It’s less suited for large indeterminate plants that need significant root-zone support mass and extensive trellising, but it’s one of the simplest systems to build and maintain for hobby use.
Which System Should You Choose?
| System | Best For | Scalability | Complexity |
|---|---|---|---|
| Ebb & Flow | Home/hobbyist, multi-site | Moderate | Low–Medium |
| Drip | Home to commercial | High | Low–Medium |
| DWC | Smaller varieties, beginners | Low | Low |
| Dutch Bucket | Commercial, large indeterminates | High | Medium |
For home growers, ebb & flow or DWC are typically the most approachable systems. For commercial scale, Dutch bucket drip (covered in the commercial section below) and other engineered drip systems on slabs or gutters are the most common.
Setting Up Your Grow Environment
Grow Lights for Hydroponic Tomatoes
Tomatoes are high-light crops. They need a minimum 20–30 DLI (Daily Light Integral) to produce well indoors, which is significantly more than herbs or leafy greens. Plan your light setup around this requirement and verify that PPFD and photoperiod combine to hit your DLI target.
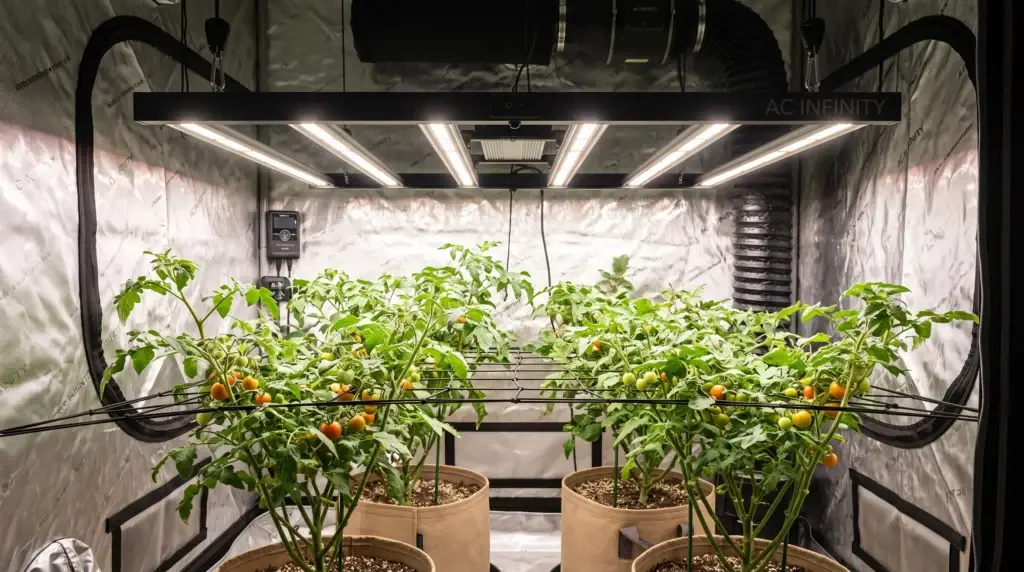
LED is the right technology for indoor tomato grows. Modern full-spectrum LEDs deliver the PPFD levels tomatoes need with far less heat than equivalent HPS setups, which reduces your cooling and humidity management load significantly.
Coverage guidance by space (approximate):
- 2×4 ft: ~200–300W LED from an efficient fixture (1–3 plants, smaller or determinate varieties), confirming PPFD at canopy level.
- 4×4 ft: ~400–600W LED (4–6 plants, most varieties) with distribution checked against manufacturer PPFD maps or a light meter.
- 4×8 ft: ~800–1,000W total from one or more fixtures (8–12 plants), again verified by PPFD and DLI rather than wattage alone.
The AC Infinity IONFRAME EVO6 500W LED with Samsung LM301H EVO diodes is a strong choice for 4×4 coverage. It can deliver the PPFD ceiling tomatoes need during fruiting at appropriate mounting heights, runs quiet and cool, and includes onboard dimming for stage control; growers should always confirm PPFD with a meter or the manufacturer’s footprint charts.
For propagation and seedling stage, the Covert T5 Fluorescent Grow Lights handle germination and early vegetative growth efficiently before transplant to the main system. T5s aren’t suitable as primary fruiting lights for tomatoes but they’re an economical propagation solution.
Photoperiod: Tomatoes don’t require a light schedule change to initiate flowering; they are generally day-neutral and will flower based on maturity and growing conditions rather than photoperiod alone. Run 16–18 hours of light during vegetative growth; once plants are in flower, maintain 14–16 hours while keeping total DLI in the 20–30 mol/m²/day range for productive fruiting.
Temperature, Humidity, and Air Circulation
Hydroponic tomatoes thrive within these ranges:
- Day temperature: 70–80°F (21–27°C)
- Night temperature: 60–68°F (15–20°C) — a modest day–night drop supports plant metabolism and can improve flavor and color development.
- Humidity: 50–70% during vegetative growth; drop to around 45–55% during fruiting to balance transpiration, calcium movement, and disease pressure.
- VPD: Target 0.8–1.2 kPa vegetative, 1.0–1.5 kPa fruiting. See our VPD guide for setup.
Stagnant air is one of the most common causes of fungal disease in indoor tomato grows. Continuous air circulation strengthens stems, reduces hot spots, and helps regulate humidity at the canopy level. The Covert Smart Ventilation and Odor Control Kit handles both inline exhaust and odor management for most tent setups.
For canopy-level circulation in the grow space itself, the Covert V-Fan Vertical Flow Fan directs airflow vertically through the canopy — particularly useful as tomato plants develop dense foliage that can trap moisture.
For a complete walkthrough of grow room ventilation, see our indoor grow room ventilation guide.
Hydroponic Tomato Nutrients and Feeding Schedule
Tomatoes have high nutritional demands — particularly for nitrogen, phosphorus, potassium, calcium, and magnesium. The nutrient needs also shift meaningfully across growth stages, and EC should be adjusted gradually rather than in abrupt jumps.
Nutrient Stage Overview
| Stage | EC Target (mS/cm) | Key Emphasis |
|---|---|---|
| Seedling / Clone (0–2 wks) | 0.8–1.2 | Light, balanced — roots are establishing |
| Early Vegetative (wks 2–5) | 1.4–2.0 | Nitrogen-forward for canopy development |
| Late Vegetative (wks 5–8) | 1.8–2.4 | Balanced macro + calcium building |
| Flowering / Early Fruit Set | 2.0–2.8 | Phosphorus, potassium, calcium |
| Heavy Fruiting | 2.2–3.0 | Potassium-heavy; maintain calcium to prevent BER |
| Late Fruit / Pre-Harvest | 1.6–2.0 | Gradual reduction; improve flavor concentration |
These ranges align with common guidance for hydroponic fruiting vegetables, but new growers should start at the lower end of each band and increase EC only as plants demonstrate healthy uptake and growth.
Target pH: 5.8–6.3 throughout the cycle for most hydroponic tomato systems. Tomatoes generally tolerate 5.5–6.5, but maintaining a tighter band around 5.8–6.3 supports consistent nutrient availability. Tomatoes absorb calcium and magnesium efficiently near 6.0–6.5 and phosphorus and potassium efficiently near 5.8–6.2, so a narrow, stable range helps prevent deficiencies.
What happens outside this range: Above about 6.5, calcium, magnesium, and boron availability declines and can lead to deficiencies. Below about 5.5, iron, manganese, and zinc become overly available and can approach toxic levels while phosphorus becomes less available. pH drift is one of the most common causes of apparent “nutrient deficiency” in hydroponic tomatoes — rule it out first before increasing feed strength.
Recommended Nutrients
HGV Dry Grow (3-6-22 formula) is HydroBuilder’s private-label base nutrient, designed for recirculating and drain-to-waste hydroponic systems. It’s particularly well-suited to the vegetative and early fruiting phases of tomato production, with a potassium-forward profile that supports healthy vascular development when used as part of a complete program.
For pH management, HGV Condition pH Down uses a phosphoric acid base that’s clean and predictable for recirculating systems. Most tomato growers will be adjusting down from tap water’s typical 7.0–8.0 pH; always verify your source water profile.
If you want a standalone pH kit with buffer solution included to verify your meter calibration, the General Hydroponics pH Control Kit includes both pH Up and pH Down with calibration solution — useful for growers setting up for the first time.
For a broader overview of nutrient systems and what to look for, see our guide to the best plant nutrients for hydroponics.


Monitoring: pH and EC Are Non-Negotiable
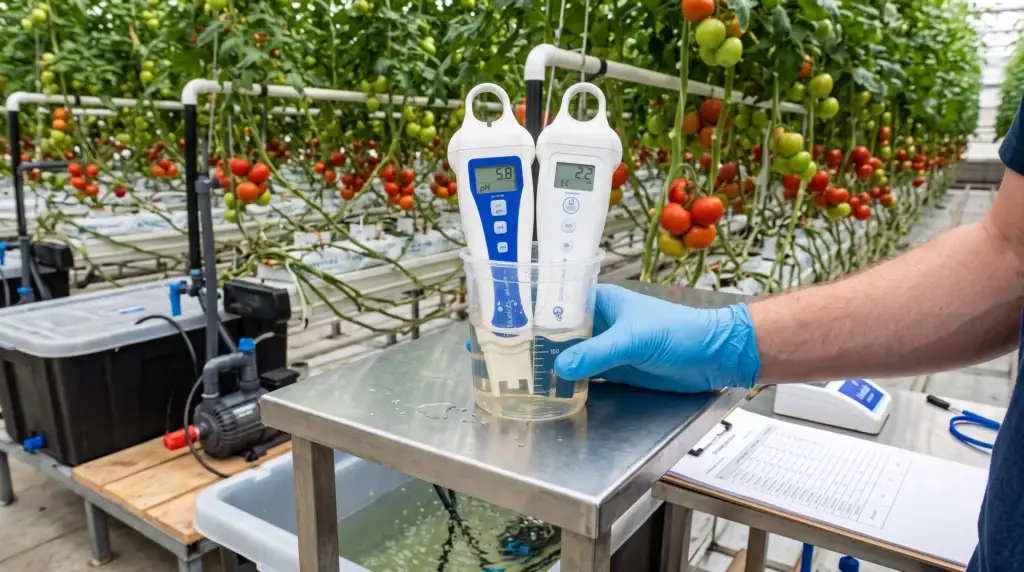
In a hydroponic system, you can’t see the root zone, so your meters become your primary feedback on solution conditions. Test pH and EC daily during the first few weeks, and at minimum every other day once your system is stable.
Bluelab pH Pen — The industry standard for handheld pH monitoring. It’s accurate, fast, and waterproof when used and stored correctly. Calibrate with fresh calibration solution weekly or as recommended by the manufacturer.
Bluelab Conductivity Pen — Reads both EC (mS/cm) and PPM, switchable based on your preferred unit. It’s essential for confirming you’re hitting your stage-appropriate nutrient concentration and for monitoring trends in your reservoir and leachate.
Reservoir changes: Replace your full nutrient solution every 7–10 days in an active system as a baseline. Top-off with plain pH-adjusted water between changes as plants uptake, and change sooner if EC climbs or if solution becomes discolored or odorous. In warm environments, check water temperature — keep the reservoir between 65–72°F. Warmer water holds less dissolved oxygen and promotes pathogen growth. See our guide to why hydroponic water temperature matters.
Step-by-Step: Growing Hydroponic Tomatoes
Step 1: Propagate or Acquire Starts
Germinate seeds in rockwool cubes at 70–80°F with high humidity (above 80% RH) until emergence and early root development. Transplant to the system once roots emerge from the bottom and sides of the cube (typically 7–12 days from seed, depending on variety and conditions). If using cuttings, root in rockwool or rapid rooter plugs and transplant once roots are 1–2 inches long and well branched.
Step 2: Set Up Your System and Environment
Fill the reservoir with fresh, pH-adjusted nutrient solution at seedling EC (approximately 0.8–1.2 mS/cm). Confirm grow lights are at appropriate height and intensity for your stage and that DLI targets are being met. Set fans for continuous canopy-level circulation and confirm environmental controllers maintain temperature and humidity in range.
Step 3: Vegetative Growth (Weeks 2–6)
Run 16–18 hours of light per day, maintaining temperature and humidity within the vegetative ranges above. Monitor pH and EC daily, and gradually ramp EC per the schedule above as plants develop thicker stems and larger leaves. Begin training plants upward toward your trellis or support system. Prune lower fan leaves that are blocking airflow or touching the media surface to reduce disease risk.
Step 4: Flowering and Fruit Set
Maintain a 14–16 hour photoperiod while ensuring total DLI stays in the 20–30 mol/m²/day range for productive fruiting. Shift to a potassium- and phosphorus-forward feeding phase within your nutrient program and keep calcium availability steady to prevent BER. Assist pollination — gently shake the flowering clusters daily or use a small oscillating fan to help distribute pollen. Indoors, there are no insects or wind to do this for you, and poor pollination is one of the leading causes of poor fruit set in indoor tomatoes.
Step 5: Fruiting and Maintenance
Increase EC to the fruiting range, stepping up slowly and monitoring both plant tissue and leachate. Maintain consistent feeding intervals to avoid swings in solution strength. Prune suckers (the shoots emerging between main stem and lateral branches) on indeterminate varieties to keep energy directed to fruit and to maintain an open canopy. Train the main vine upward and manage side branches according to your trellising strategy. Maintain fruiting humidity below roughly 50–55% RH to reduce Botrytis risk while still supporting adequate transpiration and calcium movement to the fruit.
Step 6: Harvest
Most home hydroponic tomato varieties reach first harvest approximately 60–90 days from transplant of a rooted cutting (or about 90–120 days from seed), depending on variety and environment. Harvest at mature green/first blush for shipping and handling or allow fruit to color fully on the vine for maximum flavor; tomatoes continue ripening off the vine at room temperature. For commercial production, consistent sizing and Brix targets are covered below.
Common Problems in Hydroponic Tomatoes
Blossom-end rot (BER): Dark, sunken tissue at the blossom end. This is almost always related to calcium deficiency at the fruit caused by irregular watering, high EC, or pH outside the optimal range, rather than a lack of calcium in the nutrient formula itself. Fix: reduce EC to within target range, verify pH is between 5.8–6.3, maintain consistent drip or flood intervals, and keep fruiting humidity in a moderate range to support transpiration.
Leaf curl: Can indicate heat stress, overfeeding (high EC), or potassium imbalance. Check temperature, VPD, and EC before adjusting nutrients, and confirm that root zone temperatures remain within the 65–72°F band.
Yellow lower leaves: Often normal senescence on older leaves, but can also indicate nitrogen deficiency in late veg or pH-induced nitrogen lockout. Verify EC is in range, pH is stable, and that overall growth is vigorous before increasing feed.
Poor fruit set: Almost always pollination limitation indoors when environmental parameters are otherwise in range. Shake flower clusters daily or use a fan, and ensure temperatures during flowering stay within recommended ranges.
Powdery mildew or Botrytis: Often associated with humidity above about 60% during fruiting combined with poor airflow and dense foliage. Reduce humidity, increase air exchange, and prune the interior canopy to open up air pathways; avoid wetting foliage late in the day.
For pest management specific to tomatoes, see our guides on tomato hornworms and common grow room pests.


For Commercial Operations: Scaling Hydroponic Tomato Production
Commercial hydroponic tomato production differs from home growing in three key areas: system design, automation, and consistency at scale. If you’re operating a greenhouse, vertical farm, or indoor production facility, the setup priorities change with a focus on redundancy, labor efficiency, and product uniformity.
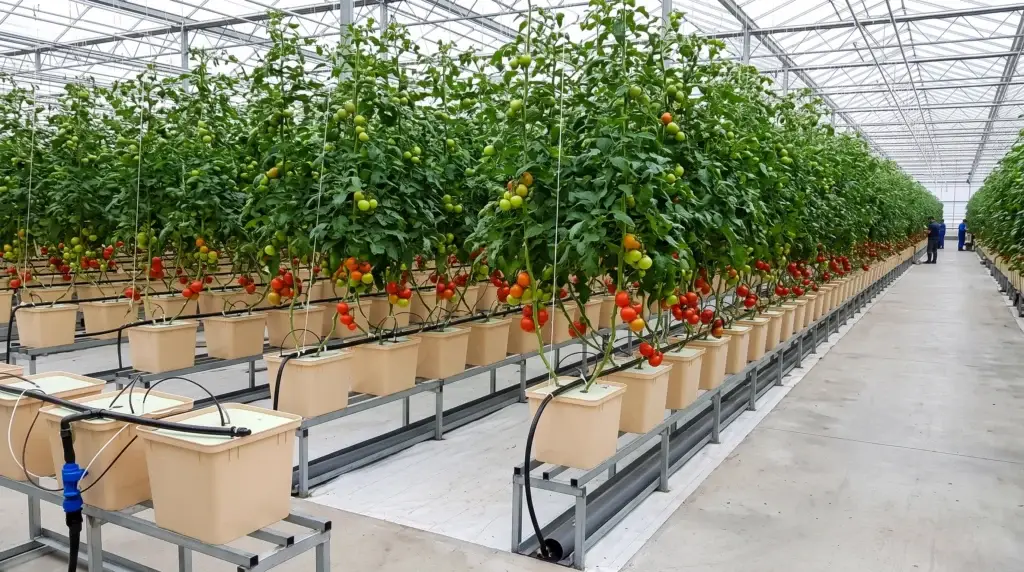
Dutch Bucket (Bato Bucket) Systems
Dutch bucket (Bato bucket) systems are a widely used commercial standard for vining tomato production. Each plant occupies its own bucket filled with perlite or a coco/perlite blend, connected to a shared drip line and central drain. Benefits at commercial scale:
- Disease containment: One infected plant is less likely to contaminate an entire shared reservoir when systems are segmented appropriately.
- Individual plant optimization: Each bucket can be monitored and replaced independently without disrupting the entire row.
- Long-season production: Plants root deeply into individual media and can produce for 8–12+ months in a well-managed greenhouse environment.
- Vertical training: Indeterminate varieties can be trained to 15+ feet in a greenhouse setting, with vines lowered and leaned over multiple times per season.
Tomatoes are typically started in rockwool cubes (often 1.5-inch for propagation, then 4-inch blocks for pre-transplant development) and moved to Dutch buckets when 8–12 inches tall with established root systems and several true leaves.
Drip Line Infrastructure
At commercial scale, individual watering cans and basic timers are replaced with engineered drip systems. Netafim Drip Stake Assemblies are an industry standard for precision drip delivery to individual plants — pressure-compensating emitters maintain consistent flow rates across long rows even with elevation or pressure variation.
Fertigation Automation
Mixing and deploying nutrient solution manually across dozens or hundreds of plants is impractical at production scale. Dosatron Water-Powered Dosers inject concentrated nutrient solution into the water line proportionally — no electricity required and no motor to fail, as they use water flow to drive dosing. The D14MZ series handles up to 14 GPM, suited for many greenhouse row configurations. For larger operations, the D40MZ series scales to 40 GPM and beyond when configured appropriately.
Commercial EC and Target Parameters
| Production Phase | EC (mS/cm) | pH | Water Temp |
|---|---|---|---|
| Transplant week | 1.8–2.2 | 5.8–6.2 | 65–70°F |
| Early vegetative | 2.0–2.4 | 5.8–6.2 | 65–70°F |
| Flowering | 2.4–3.0 | 5.8–6.3 | 65–70°F |
| Heavy fruit | 2.8–3.2 | 6.0–6.3 | 65–70°F |
| Pre-harvest flush | 1.6–2.0 | 6.0–6.5 | 65–70°F |
These values are consistent with many commercial tomato fertigation programs, though individual cultivars and environmental conditions may warrant operating at the lower or upper ends of these ranges. Nutrient solution for commercial production is typically replaced weekly on a recirculating system or run drain-to-waste. Drain-to-waste eliminates salt buildup risk and simplifies monitoring but increases input costs and requires careful runoff management.
Commercial growers should monitor both feed and leachate EC and pH regularly to ensure that the root zone environment stays within target despite changing evapotranspiration and plant uptake rates.
HGV Dry Grow in bulk 25-lb format (HGV Dry Grow, 25 lbs.) is a cost-effective choice for commercial tomato production cycles, delivering consistent performance at the input volumes commercial grows require when integrated into a complete fertigation program.
For questions about commercial setup, system sizing, or bulk nutrient programs, visit our commercial growers page or request a quote.
Why Shop for Hydroponic Supplies at HydroBuilder?
HydroBuilder carries the full range of equipment you need to grow hydroponic tomatoes — from 12-site ebb and flow systems to commercial Dutch bucket drip infrastructure. Our inventory spans starter-friendly kits, professional-grade meters, and co-op partner brands that commercial operations rely on.
- Large selection of hydroponic systems, grow lights, nutrients, and accessories so you can build a complete solution in one place.
- Secure ordering with trusted checkout to protect your purchase information.
- Expert resources — every product category backed by Learning Center content written by growers and technical staff.
Hydroponic Tomato FAQs
Q: What is the best hydroponic system for growing tomatoes?
A: Ebb & flow, drip, and Dutch bucket systems all work well, and the best choice depends on your scale and goals. For home growers with 4–12 plants, ebb & flow or drip systems are the most manageable, while for commercial greenhouse production, Dutch bucket (Bato bucket) and other engineered drip systems are widely used standards, particularly for large indeterminate varieties that need long-season support.
Q: What pH and EC should I maintain for hydroponic tomatoes?
A: Target pH 5.8–6.3 as your working range, understanding that tomatoes generally tolerate 5.5–6.5 if conditions are stable. EC varies by stage: 0.8–1.2 mS/cm for seedlings, climbing gradually to around 2.5–3.0 mS/cm during peak fruiting, with new growers starting at the lower end of each band; drift above pH 6.5 can contribute to calcium and magnesium lockout, while drops below about 5.5 increase the risk of micronutrient toxicity.
Q: How many hours of light do hydroponic tomatoes need?
A: Tomatoes typically perform well with 16–18 hours of light during vegetative growth and 14–16 hours during flowering and fruiting, provided total DLI falls in the 20–30 mol/m²/day range. Tomatoes are day-neutral crops and won’t initiate flowering based solely on a light schedule change, so focus on intensity and DLI rather than trying to “flip” them like photoperiod cannabis.
Q: How long does it take to grow hydroponic tomatoes?
A: From transplant of a rooted cutting, most varieties reach first harvest in about 60–90 days under appropriate light, nutrition, and climate. From seed, expect roughly 90–120 days to first fruit, with cherry and grape varieties typically faster than large slicer types; commercial operations often run indeterminate varieties for 8–12 months per crop cycle.
Q: Do hydroponic tomatoes need pollination?
A: Yes. Tomatoes are self-fertile but still need mechanical assistance indoors to move pollen within the flower. Gently shake the flowering stems or flower clusters daily, or use a small oscillating fan to simulate air movement around the flowers; without this, fruit set will be poor even if nutrition and climate are dialed in.
Q: What's the difference between determinate and indeterminate tomatoes for hydroponics?
A: Determinate varieties grow to a set height, produce a relatively concentrated harvest, and are better suited for smaller systems and tents where vertical space is limited. Indeterminate varieties grow continuously and produce over a long season — they need trellising and regular pruning but offer sustained yield, making them a common choice for commercial and greenhouse operations.
Q: What causes blossom-end rot in hydroponic tomatoes?
A: Blossom-end rot is caused by insufficient calcium reaching the developing fruit, most often triggered by pH above about 6.5, irregular watering intervals, or very high EC that disrupts water and nutrient uptake. It’s not always a lack of calcium in the solution — it’s often a calcium uptake failure; fix this by stabilizing pH between 5.8–6.3, ensuring consistent drip or flood intervals, and reducing EC if feeding heavily.
Q: Can I grow hydroponic tomatoes without a grow tent?
A: Yes, but you’ll need to control light, temperature, and humidity in whatever space you use. A grow tent makes environmental management significantly easier by containing your climate and providing mounting points for lights and fans; without a tent, you’ll need to manage heat, humidity, and light spill manually while still maintaining 70–80°F day temperatures and adequate airflow.
Q: What nutrients do hydroponic tomatoes need?
A: Tomatoes are heavy feeders requiring balanced NPK with emphasis on calcium, potassium, and magnesium, especially as they transition into fruiting. During fruiting, potassium and calcium demands increase substantially, so a complete base nutrient paired with a reliable calcium and magnesium source, plus careful EC management across growth stages, covers most needs.
Q: How often should I change the nutrient solution for hydroponic tomatoes?
A: In an active recirculating system, replace the full solution every 7–10 days as a general guideline and top off with pH-adjusted water between changes. In drain-to-waste setups, you’re delivering fresh solution every irrigation cycle; test EC before topping off, and if reservoir EC is climbing or plants show stress, change the solution sooner.