


On this page
- The Post-Harvest Line, Stage by Stage
- Stage 1: Bucking — Setting Your Line's Starting Pace
- Stage 2: Trimming — Matching Bucker Output, Not Just Buying "the Best" Trimmer
- Finding Your Line's Actual Bottleneck (The Math Competitors Skip)
- Stage 3: Drying & Curing — Automation That Protects Quality, Not Just Speed
- Stage 4: Sorting & Grading — The Stage Most Harvest Automation Plans Skip
- Stage 5: Waste & Byproduct Handling — The Line Most Guides Don't Talk About
- FAQs for Harvest Automation
- Topic
- Trimming & Bucking
- Level
- Commercial
- Read time
- 11 min
- Sections
- 8
Harvest automation isn’t really a shopping question — it’s a systems question. Buying the fastest trimmer on the market does nothing for your operation if the bucker feeding it can’t keep pace, or if bagged, trimmed flower sits for two days before anyone gets to sorting. For commercial cultivators running enough volume to justify machinery in the first place, the real ROI comes from matching every stage’s throughput to the ones on either side of it — not from any single “best” machine.
This guide walks through the full post-harvest line — bucking, trimming, drying/curing, sorting, and waste handling — as one connected system, and shows you how to find (and fix) the bottleneck that’s quietly capping your output. If you haven’t hit the volume where a full automated line pencils out yet, a well-organized hand trimming kit and a clear process still beat a half-automated line with a mismatched machine in it.
The Post-Harvest Line, Stage by Stage
Direct answer A commercial harvest line runs through five connected stages — bucking, trimming, drying/curing, sorting, and waste handling — and each stage’s rated throughput sets a ceiling on everything downstream of it.
Skip a stage, or mismatch two adjacent ones, and material backs up somewhere in the middle — usually sitting in bins longer than it should, which is its own quality risk. Here’s the sequence, and where the wet-trim/dry-trim decision changes the order:
- Bucking — de-stemming, always first
- Trimming — wet-trimmed material goes straight from bucking to trimming, then dries; dry-trimmed material dries first, then gets trimmed
- Drying/curing — timing depends on the wet/dry trim call above
- Sorting/grading — happens after material is trimmed and dry, before final QC and packaging
- Waste/byproduct handling — running the whole harvest, not a single “last step”
If you haven’t settled the wet-trim vs. dry-trim question yet, that decision changes everything downstream of it — see our full breakdown in wet trim vs. dry trim before sizing equipment for either path.
Stage 1: Bucking — Setting Your Line's Starting Pace
Direct answer Bucking machines strip flower from stems in a single pass, and whatever rate you buck at becomes the maximum feed rate for every stage after it — so this is the first place to size correctly, not an afterthought.
Manually pulling flower off stems is the most labor-intensive step in the entire process, and it’s also the easiest to get wrong from a sizing standpoint — buy a bucker that outpaces your trimmer and you’ve just moved the bottleneck downstream instead of removing it.
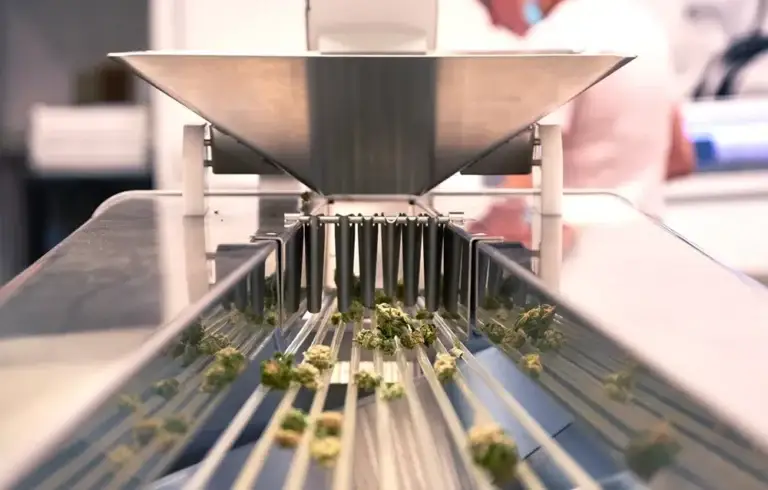
The CenturionPro High Performance Bucking Machine comes in four configurations sized for different lines: the tabletop model processes up to 75 lbs/hour wet (15 lbs/hour dry), the mini steps up to 125 lbs/hour wet (25 lbs/hour dry), the HP1 handles 175 lbs/hour wet (35 lbs/hour dry) and can replace 5–7 hand-bucking workers, and the triple-workstation HP3 scales to roughly 500 lbs/hour wet for operations running multiple trimmers off one bucking station. For connecting the bucker directly into your line without a manual handoff, a bucker-to-line conveyor keeps material moving instead of piling up in a bin between stages.
Twister’s B4 Bucking Machine is still a solid, currently-stocked option in this category as well, particularly if strain-to-strain cross-contamination control is a priority — its swappable cartridge system avoids the downtime of cleaning between runs. For the full lineup across brands and price points, see our dedicated bucker buying guide.
Browse the full bucking machine and de-stemmer collection to compare capacity against your harvest volume.

Stage 2: Trimming — Matching Bucker Output, Not Just Buying "the Best" Trimmer
Direct answer A trimmer’s real-world value depends on whether its rated throughput is close to what your bucker (or hand-bucking crew) can actually feed it — a faster trimmer than your feed rate just means expensive downtime.
Once material is de-stemmed, it needs a consistent, unbroken feed into the trimmer — inconsistent feeding is one of the most common causes of uneven trim quality on an otherwise well-equipped line. The Mobius M108S Trimming Machine is built around this consistency: its AirThread Tension Tumbler gives roughly 50% more blade access than standard tumbler designs, and its three case-hardened TriFlex blades (108″ of total cut length) are engineered to approximate a scissor-quality cut at machine speed. Run two units in tandem and you more than double capacity without changing your bucking setup — a cleaner way to scale than jumping to a much larger single machine.
To physically connect the stages rather than hand-carrying totes between them, a feed conveyor keeps bucked material flowing continuously into the trimmer, and a separate quality control conveyor moves finished material out to inspection without creating a pileup at the output end. These are the pieces most buying guides skip, because they’re not about picking a machine — they’re about the gaps between machines, which is exactly where lines actually break down.
Twister and CenturionPro both offer full standalone trimmer lineups spanning hobby to industrial scale — see the complete comparison in our trimming machine buying guide. Between harvests, trimming machine care and cleaning and a stocked set of trimming accessories keep unplanned downtime from re-introducing the bottleneck you just fixed.
Browse the trimming machine collection for the full range by capacity.

Finding Your Line's Actual Bottleneck (The Math Competitors Skip)
Direct answer Your harvest line’s real output is set by its slowest stage, not its fastest machine — and a five-minute calculation will tell you exactly where that is.
Here’s a worked example. Say you run a CenturionPro HP1 bucker rated at 175 lbs/hour wet, feeding a single tabletop trimmer rated around 15–20 lbs/hour wet. Over an 8-hour shift, that bucker can process roughly 1,400 lbs — but the trimmer can only get through 120–160 lbs in the same window. That’s over 1,200 lbs of bucked material sitting in bins by the end of the shift, degrading in quality every hour it waits. The bucker isn’t the problem. It’s oversized for what’s downstream of it.
Use this process to check your own line:
- Find your bucker’s rated throughput in lbs/hour, matched to whether you’re processing wet or dry material.
- Find your trimmer’s rated throughput in lbs/hour, for that same material state.
- Compare the two rates. The slower of the two is your line’s real ceiling — not the faster machine’s spec sheet number.
- Multiply the gap by your shift length to see how much material will back up if nothing changes.
- Resolve the mismatch — add a second trimmer running in parallel, throttle the bucker’s feed rate, or build in enough staging capacity (bins, short-term cold storage) to hold the surplus without quality loss.
Industry-cited figures from MJBizDaily (via cannabis industry trade coverage) put hand-trimming at roughly one pound per eight-hour shift per worker, against 10–15 lbs/hour for a trained machine operator — actual results vary considerably by strain density, trim style, and operator experience, but the order-of-magnitude gap is why the trimming stage specifically is where most operations look first. The bucking stage is where they most often get the sizing wrong.
Stage 3: Drying & Curing — Automation That Protects Quality, Not Just Speed
Direct answer Drying and curing automation exists mainly to protect flower quality and compress a multi-week process, not to add raw throughput — treat it as risk reduction as much as a speed gain.
Whether drying happens before or after trimming depends on the wet/dry call made earlier in your line, but either way, this stage is where inconsistent airflow, humidity swings, and human error do the most damage to a harvest that machines handled well up to this point. Our beginner’s guide to harvest, drying, and curing covers the fundamentals in full. For the automation angle specifically, freeze dryers and curing machines can compress dry/cure time from weeks down to hours while preserving terpene content — worth a look for any operation where drying room capacity, not equipment cost, is the actual constraint.
Between batches — and especially between strains — clean-in-place matters here as much as it does at the bucker. Prokure V is a straightforward option for sanitizing surfaces and equipment between runs, which matters for both product quality and the cleaning documentation most commercial licenses require.
Browse freeze dryers and curing machines or complete harvesting, drying, and curing kits to compare options for your scale.

Stage 4: Sorting & Grading — The Stage Most Harvest Automation Plans Skip
Direct answer Sorting separates trimmed, dried flower into size grades (shake, popcorn, small/medium/large bud) before final QC and packaging — and skipping it means your QC team is hand-sorting material that a simple mechanical sorter would have handled in a fraction of the time.
This is the stage that gets left out of most harvest automation conversations entirely, competitor content included — probably because it’s less visually dramatic than a trimming machine. But it’s real labor, and it’s mechanically simple to automate. The EZTRIM Bud Sorter uses no moving parts — just graduated mesh grates — to sort dried, trimmed flower into up to five size categories at roughly 70–90 lbs/hour on the standard size, or 22 lbs/hour on the compact Mini for smaller trim rooms. It’s designed to run right after trimming and drying, immediately before your QC and packaging step, and it doubles as a small worktable when you’re not actively sorting.
Browse the harvest sorting machine collection to size one to your trim room’s output.

Stage 5: Waste & Byproduct Handling — The Line Most Guides Don't Talk About
Direct answer Every stage of a harvest line generates biomass waste — stems, leaf material, off-grade trim — and a plan for handling it is part of harvest automation, not a separate problem to solve later.
Larger operations in particular can generate a genuinely large volume of stem and leaf waste across a single harvest, and disposal has its own compliance and logistics considerations depending on your jurisdiction. See our dedicated harvest waste disposal guide for the specifics.
What Comes After Sorting
Once flower is graded, what happens next depends on your product mix. If pre-rolls are part of your output, our best pre-roll machines guide picks up exactly where this one leaves off — sorted flower is the input a pre-roll line is built around.
Why Work With HydroBuilder on Harvest Automation
Sizing a harvest line means matching equipment across multiple brands and categories to your specific volume — not picking one flagship machine and hoping the rest of the line keeps up. Reach out to our commercial team with your current or target throughput numbers, and we’ll help you find where your line’s actual bottleneck is before you spend money on the wrong stage.
FAQs for Harvest Automation
Q: What is cannabis harvest automation?
A: Harvest automation is the use of mechanical equipment — buckers, trimmers, sorters, and drying/curing systems — to move harvested plant material through post-harvest processing with minimal manual labor. For commercial cultivators, it’s less about any single machine and more about matching throughput across every stage so material moves through the line without backing up.
Q: How much does a commercial bucking machine cost?
A: Commercial bucking machines range from roughly 2,000–6,000 for compact tabletop models up to $25,000+ for high-capacity triple-workstation units, depending on throughput and feed size. The right choice depends on matching its rated lbs/hour to what your trimming stage can actually process — an oversized bucker doesn’t save money if it’s just creating a backlog downstream.
Q: Is wet trim or dry trim better for automation?
A: Neither is universally better — the choice affects where drying falls in your sequence and which equipment specs matter. Wet trim happens immediately after bucking, then the trimmed flower dries; dry trim happens after the whole plant dries, so bucking and trimming both need to handle drier, more brittle material. See our full wet trim vs. dry trim comparison for the tradeoffs specific to each path.
Q: Can small-scale growers benefit from harvest automation, or is it only worth it at commercial volume?
A: Small-scale growers can benefit from selective automation — a single trimming machine or bucker for a few dozen plants can still save real hours. But the full multi-stage line this guide describes, with conveyors and dedicated sorting, generally only pays for itself once you’re processing enough volume that labor hours (not equipment cost) are your main constraint.
Q: What's the difference between a bucking machine and a trimming machine?
A: A bucking machine separates flower from stems and branches — the first mechanical step after harvest. A trimming machine removes excess leaf material from the already-bucked flower afterward. They solve different problems and are sized independently; a common mistake is buying a fast trimmer without checking whether the bucker feeding it can keep up.
Q: How do I know if my harvest line has a bottleneck?
A: Compare the rated throughput (lbs/hour, wet or dry) of each stage in your line, in sequence. The slowest stage sets your actual output, regardless of how fast the other machines are rated. If material is visibly backing up in bins at any point in your process, that’s usually the stage right after the bottleneck, not the bottleneck itself.
Q: Does sorting cannabis flower by size actually matter for a commercial operation?
A: Yes — sorting separates shake and small popcorn buds from premium flower before packaging, which affects both perceived product quality and pricing tiers. Skipping it means your quality control team is doing that separation by hand, which is exactly the kind of repetitive labor mechanical sorting is built to remove.
Q: How much labor does a trimming machine actually save?
A: It depends heavily on scale, strain, and trim style, but commercial trimming machines are generally built to replace crews ranging from a handful of hand trimmers up to a dozen or more, depending on the machine’s rated capacity. The labor savings only materialize fully if the stages feeding and following the trimmer are sized to match it.
Q: What happens to the plant waste from bucking and trimming?
A: Bucking and trimming generate stems, fan leaf, and off-grade trim as byproduct, and larger operations can generate substantial volume across a harvest. Handling and disposal requirements vary by jurisdiction — see our harvest waste disposal guide for specifics.
Q: Should I automate bucking, trimming, or sorting first?
A: Start wherever your current bottleneck actually is, not wherever seems most impressive. For most operations moving off fully manual processing, that’s the trimming stage first (since it consumes the most labor hours), followed by bucking once trimming capacity is in place — but running the throughput comparison in this guide will tell you definitively rather than guessing.

Dustin came to Hydrobuilder in its early days and never stopped growing, literally. With 12+ years of hands-on experience across outdoor gardens, indoor setups, and post-harvest processing including extraction, he brings real cultivation perspective to every guide he writes. As lead content creator for the…
All guides by Dustin → Jacob Rodowick
 Dustin Davis

