We make environment control simpler—so you can grow with confidence.
Ventilation is the quiet backbone of a healthy indoor garden. Done right, it stabilizes temperature, manages humidity, scrubs odor, and keeps fresh air moving across the canopy. This guide shows what matters, how to size your system in under a minute, and simple setups that just work—built for growers, backed by experts.
Start Here: Size It Right
Open the Fan & Carbon Filter Calculator and enter your tent/room dimensions. Choose your air-exchange target, then add real-world factors—duct length, number of bends, carbon filter, silencer. The tool returns Adjusted CFM (what your fan actually needs to move through that run).
Why it matters: Fan specs are measured at zero resistance. Filters, bends, reducers, and long duct runs add drag. Pick a fan that hits Adjusted CFM at ~70–80% speed so you have headroom for hot days and late flower.
- Rules of thumb (the calculator handles the math):
- Carbon filter: budget +20–30% flow
- Each sharp 90° bend ≈ ~10%
- Reducers (e.g., 8″→6″) can shave 20–30%
- Short, straight, matched-diameter runs always win
Quick example: A 4×4×6.5 ft tent is ~104 ft³. With a 1.5-minute exchange, base CFM ≈ 69. Add a carbon filter and two 90° bends → ~100 CFM real-world target. Choose a fan that does that comfortably at partial speed.
Size your airflow in 60 seconds → Fan & Carbon Filter Calculator
Trusted by thousands of Hydrobuilder customers each season.
Why Ventilation Matters (in plain English)
Healthy plants trade heat and moisture with the air. Ventilation pulls warm, humid, odorous air out and brings fresh air in—so dehumidifiers and AC aren’t fighting uphill. You’ll even out microclimates, strengthen stems, and prevent stale corners where problems start.
- Temperature: removes lamp/gear heat
- Humidity: supports dehumidification and prevents lingering moisture
- Odor: lets a carbon filter scrub air before exhaust
- Fresh air: steady CO₂ replenishment for consistent growth
Passive vs. Active Intake
Most tents run great with passive intake: the exhaust fan creates negative pressure and fresh air slips in through the lower ports. If the tent is large, ports are restrictive, or heat is persistent, add active intake to boost cool, clean air.
10-second negative-pressure check: Close the tent, turn the exhaust on, pinch a zipper flap. If it pulls inward and the walls bow in slightly, you’re good. If not, shorten/straighten ducting, open more intake, increase speed, or add an intake fan.
Common Grow Room / Tent Ventilation Setups
Short explainer: both “pull” and “push” work—choose based on space, service access, and how tidy you want the run.
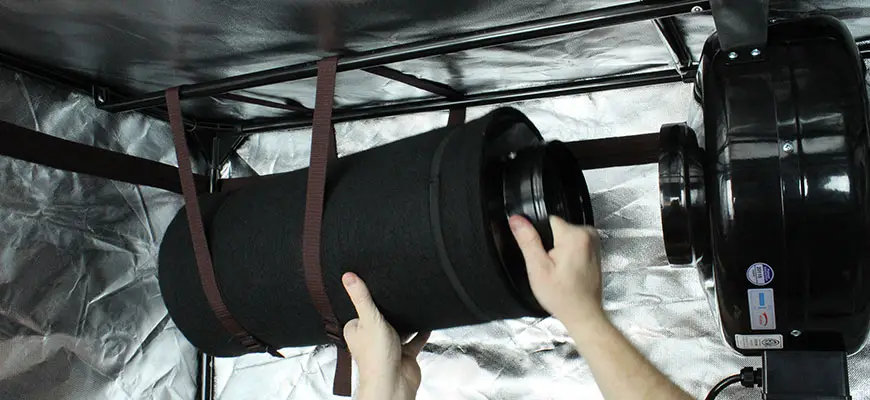
Setup A — Standard Pull (most common)
- Filter (inside, high) → short flex → Fan → Duct out
- Pros: even carbon loading, protects fan, simple to service
Setup B — Space-Saver Push (when headroom is tight)
- Fan (inside) → port → Filter (outside)
- Pros: frees canopy space; keeps heavy filter off poles
- Notes: seal every joint; keep the pre-filter clean
Setup C — HID Heat Strip (air-cooled hoods)
- Intake → air-cooled hood → Fan → Filter → out
- Pros: strips lamp heat directly; great for hot rooms
Tip: However you route it, keep runs short and bends gentle.
Dealing With Heat & Humidity In Your Grow Room
Ventilation is the first lever—exhaust hot, humid air and bring in fresh air so climate gear isn’t overworked. If temps or RH still run high after sizing:
- Increase air exchange (bump fan speed or step up CFM)
- Shorten/straighten the duct; remove reducers that choke flow
- Route exhaust outdoors/attic rather than the same room
- Add targeted cooling (air-cooled reflectors, mini-split)
- Use a dehumidifier when plants and irrigation spike RH
- Set day/night targets on your controller—nights often need less exhaust but more dehumidification
Dealing With Odor Ventilation
Odor control depends on sealed, correctly sized filtration and reliable negative pressure.
- Pull through carbon (filter inside → fan → duct out) for even loading and best capture
- Push to carbon (fan inside → port → filter outside) when space is tight—seal every joint
- Replace/refresh when odor creeps back; wash/replace pre-filter sleeves regularly
- Keep clear negative pressure (tent walls should bow in slightly); if not, tune intake/exhaust
Check our our blog on Grow Room Odor Control
EC vs. AC Inline Fans (Noise, Control, Efficiency)
EC fans are the modern default: efficient motors, quiet at partial speed, and smooth control (0–10V/PWM). AC fans cost less up front and still move air, but are louder when throttled and less precise to control.
If you care about quiet, automation, or future-proofing—pick EC.
Ducting That Flows (and Stays Quiet)
Your fan is only as good as the path you give it. Match diameters (fan = filter = duct) whenever possible. Favor gentle sweeps over sharp elbows and keep the run short and straight. If you must reduce diameter, expect a performance hit and compensate with a bit more fan.
Noise tips: Add a duct silencer on the outlet, hang with isolation straps, and use insulated duct on long runs. Running an EC fan at 60–80% often cuts noise dramatically with minimal airflow loss.
Ventilation Setup & Practical Tips
- Overhead layout: filter and fan placement, straight-shot duct to the port
- Push vs. pull
- Air-cooled hood path for HID (if applicable)
- Negative-pressure: door flap drawn inward
Tips to reinforce:
- Hang the inline fan high, close to the outlet port
- Mount the carbon filter up top (pull) or place it outside (push)
- Keep the duct short, straight, and smooth; avoid unnecessary reducers
- Confirm negative pressure and fix any leaks before powering the rest of the room
- Leave ~20% fan headroom for hot days and late flower
Mini Sizing Table (ballpark targets)
Use this to sanity-check your calculator results. Adjusted CFM assumes a carbon filter and two 90° bends.
Tent/Room
|
Volume (ft³)
|
Exchange Target
|
Adjusted CFM
|
|
2×2×4
|
16
|
1.5 min
|
~16
|
|
3×3×6
|
54
|
1.5 min
|
~50–55
|
|
4×4×6.5
|
104
|
1.5 min
|
~100
|
|
5×5×6.5
|
163
|
2.0 min
|
~120
|
Your run may vary—always confirm with the calculator.
Ventilation Maintenance & Safety
Carbon filters slowly load; when odor returns or airflow drops, refresh the pre-filter sleeve and plan a replacement. Dust off fan grills, check mounts, and scan ducting after any room changes to catch kinks or tears. Power gear from GFCI-protected outlets and route cords above spill lines. If you try ozone, use it only in unoccupied exhaust paths and follow manufacturer guidance—carbon remains your primary odor solution.