

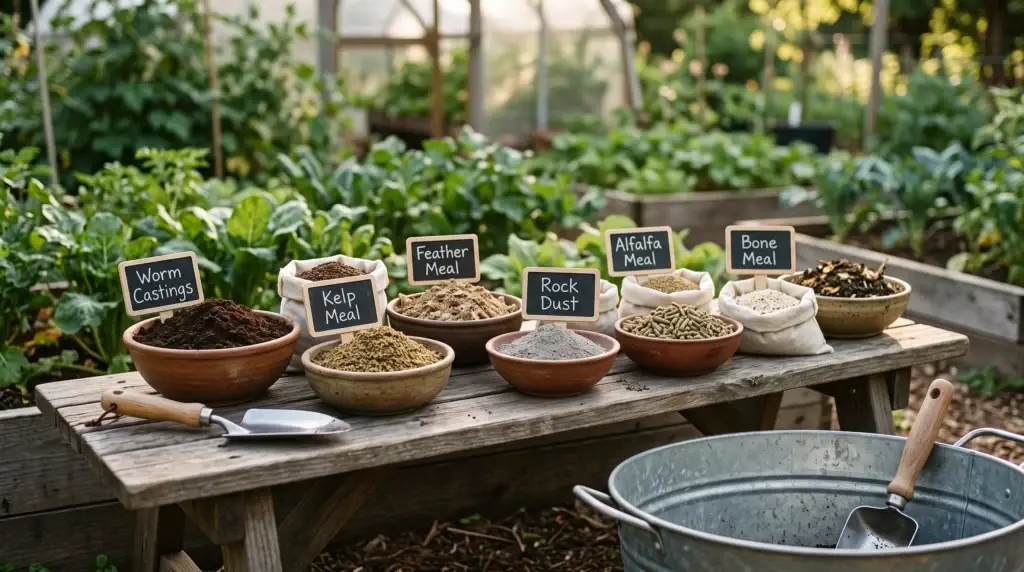
A super soil recipe gives growers of any experience level a way to grow organically without feeding charts, pH management headaches, or constant liquid nutrient applications. Get the mix right, let it cook, and your main job becomes watering.
Super soil is a heavily amended, composted organic soil designed to provide plants everything they need from seedling to harvest through microbial activity in the root zone — not through you adding liquid nutrients every few days. The concept was popularized by grower Subcool, who demonstrated that a properly built soil can largely feed the plant on its own once it is fully cooked and biologically active. At its core, super soil is just living soil: a balanced ecosystem of bacteria, fungi, and organic matter working together the way nature intended.
Whether you’re an indoor grower in a 4×4 tent or managing a large outdoor plot, the same principles apply. The recipe below makes about 100 gallons and scales easily up or down.
What Makes Super Soil Different from Regular Potting Soil
Standard potting mixes are designed to be relatively neutral and lightly fertilized. They give plants something to root into but provide limited nutritional value on their own over a full cycle — that’s why most growers using bagged soil also need a complete liquid nutrient program. Super soil flips that model by front‑loading most of the fertility and biology into the medium itself.
The key difference is amendment density and the cooking process. When you combine a diverse array of organic inputs — nitrogen sources, phosphorus sources, calcium, trace minerals, and beneficial organisms — and let them break down together for 30 to 60 days or longer, those amendments transform into a biologically active matrix. The microorganisms in that matrix convert complex organic compounds into plant‑available nutrients over time, tracking what the plant actually needs based on root zone signaling.
The practical result in a well‑built mix is that you typically water with properly pH‑adjusted water, and the soil handles most of the nutrition for you, especially for standard cycle lengths and moderate plant densities. If you’ve ever fought nutrient lockout, over‑fed plants, or spent hours managing your feed schedule, super soil is a compelling alternative.
Key advantages over liquid‑fed soil growing:
- No detailed feeding schedule required during the main grow in most cases
- Dramatically reduced risk of overfeeding compared to frequent liquid applications
- Reusable for multiple grows with simple top‑dressing or re‑amendment
- Many organic growers report improved flavor and terpene profiles compared to salt‑based regimes, especially in mature living soils, although this is anecdotal and strain‑dependent
- Lower long‑term input cost once the system is dialed in for your room and cultivar mix
The Super Soil Recipe (100 Gallons)
This recipe yields approximately 100 gallons of finished super soil. You can halve or quarter it for smaller operations. Every ingredient serves a specific function — understanding what each one does lets you substitute intelligently when something is unavailable.
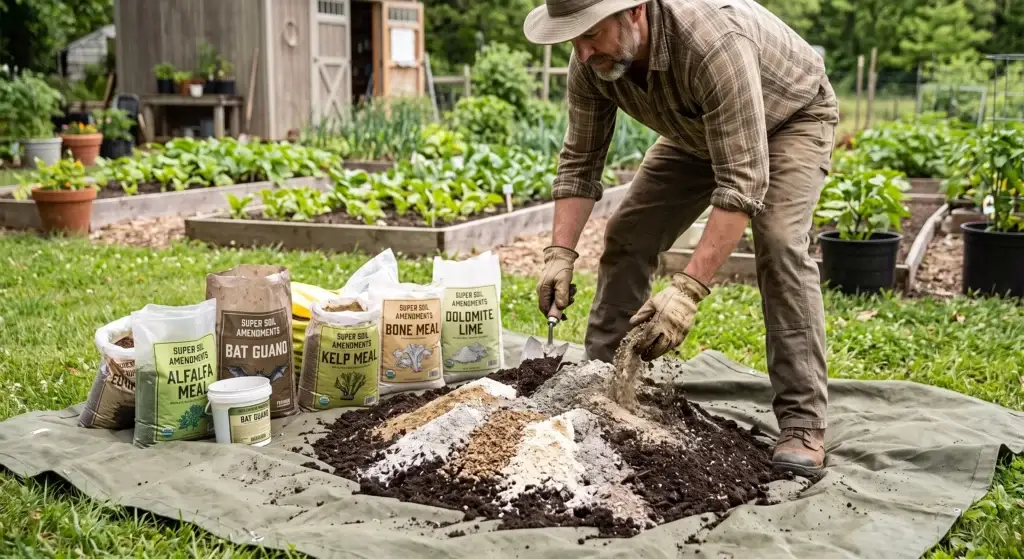
Base Soil
14 cubic feet of a quality organic potting mix — FoxFarm Happy Frog, FoxFarm Ocean Forest, or Roots Organics Original Potting Soil all work well for this style of recipe. You don’t need a heavily pre‑amended “hot” soil — you’re adding all the major nutrients yourself. A relatively neutral, well‑draining base with good structure is the goal. Avoid very heavy mixes that pack down; you want consistent aeration and porosity from the start to support aerobic biology.
Worm Castings — 25 to 50 lbs
The microbial engine of the mix. Gaia Green Worm Castings provides a diverse population of beneficial bacteria and fungi, plus a gentle slow‑release nutrient profile. For the best results, use quality castings from a verified source — cheap or poorly processed castings undermine the whole process by adding bulk without active biology. If you want to stretch your castings budget, you can replace up to half the casting volume with quality finished compost while still maintaining strong biological activity.
Fast Nitrogen Source — 5 lbs
Espoma Organic Blood Meal (12‑0‑0) breaks down relatively quickly and fuels vigorous early vegetative growth. This is your primary quick‑release nitrogen punch in the recipe. Handle with gloves and mix thoroughly — fresh blood meal has a strong odor during the cooking process and can attract animals if the pile is stored outdoors.
Slow Nitrogen Source — 5 lbs
Down To Earth Bio-Live serves as your extended‑release nitrogen contributor and biological inoculant. Bio‑Live is a diverse 5‑4‑2 blend based on marine byproducts (fish bone meal, fish meal, crab meal, shrimp meal), alfalfa meal, langbeinite, humates, and a broad consortium of beneficial microorganisms including endo‑ and ectomycorrhizal fungi, Trichoderma, Bacillus species, and yeast. It contributes slow‑release N‑P‑K and biology that can support plants throughout the entire growth cycle when combined with the rest of the amendment package and managed with proper moisture and cooking time.
Bat Guano — 5 lbs (two types if possible)
Bat guano comes in two main profiles: high‑nitrogen guanos from insect‑eating bats and high‑phosphorus guanos from fruit‑eating bats. For this recipe, use Roots Organics Nitrogen Bat Guano (9‑3‑1) for the vegetative nitrogen contribution and Roots Organics HP Bat Guano (0‑4‑0) for the phosphorus component that supports flowering. If you only use one type, go with the phosphorus guano — your other nitrogen inputs cover veg reliably in most cases.
Bone Meal — 2.5 lbs
Espoma Organic Bone Meal (4‑12‑0) is a traditional slow‑release phosphorus and calcium source that becomes critical during flowering. Phosphorus availability in organic soil is heavily pH‑dependent, so this pairs with your dolomite lime and other Ca sources to help keep P accessible to roots throughout bloom.
Bone Meal (additional) — 2.5 lbs
Down To Earth Bone Meal rounds out the phosphorus profile. Using two bone‑based products from different sources broadens the mineralization window and slightly diversifies the mineral profile rather than relying on a single concentrated release point.
Kelp Meal — 3 cups
Down To Earth Kelp Meal or Maxicrop Kelp Meal provides a wide‑spectrum micronutrient profile, natural growth hormones (such as cytokinins), and potassium. Kelp is one of the most versatile amendments in any organic mix — it supports root development early and is commonly associated with improved stress tolerance and aromatic oil production later in the cycle.
Dolomite Lime — 3 cups
Down To Earth Dolomite Lime is strongly recommended in peat‑based super soil recipes. It helps buffer pH in roughly the mid‑6 range where soil nutrient availability is generally favorable, and it provides a sustained calcium and magnesium source. Without adequate liming, heavily amended super soils tend to drift acidic as organic matter decomposes, increasing the risk of calcium and magnesium lockout that can look identical to a true deficiency. The 3‑cup rate here is a moderate starting point for a mix of this size; growers should still consider their base mix, irrigation water alkalinity, and other Ca/Mg inputs when dialing in final lime rates.
Azomite — 2 cups
This volcanic mineral dust re‑mineralizes the soil with a broad spectrum of trace elements not found in most primary organic inputs. It helps fill gaps in your micronutrient profile and can improve long‑term soil structure and cation exchange capacity when used in moderation.
Epsom Salt — ¾ cup
Provides magnesium sulfate for chlorophyll production and early‑stage growth vigor. Use sparingly — the dolomite lime also contributes magnesium, and excess Mg can compete with calcium uptake and tighten soil structure if overapplied.
Mycorrhizae — 2 tablespoons
Beneficial fungi that colonize roots and dramatically extend their effective surface area for water and nutrient uptake. Mycorrhizae work best when they are present in the soil or applied directly to roots at transplant, as they need to make contact with young roots to colonize effectively; broadcasting them into an already established root zone is generally less efficient.


A Note on the Original Recipe
Subcool’s original recipe includes several ingredients — such as crab meal, fish meal, and fish bone meal — that are excellent but frequently out of stock or hard to source consistently. The recipe above produces comparable results using confirmed in‑stock substitutes. Down To Earth Bio‑Live in particular replaces several individual ingredients at once with a balanced blended amendment and microbial package, which is why it earns more weight here than in the classic recipe.
How to Make Super Soil: Step-by-Step
Making super soil is physical work, but the process itself is straightforward. Plan for it to take 2–3 hours on mixing day, plus 30 to 60 days of cooking time before use; many traditional Subcool‑style mixes are cured 6–10 weeks for maximum safety with young plants. Start your mix at least 6–8 weeks before your target planting date whenever possible.
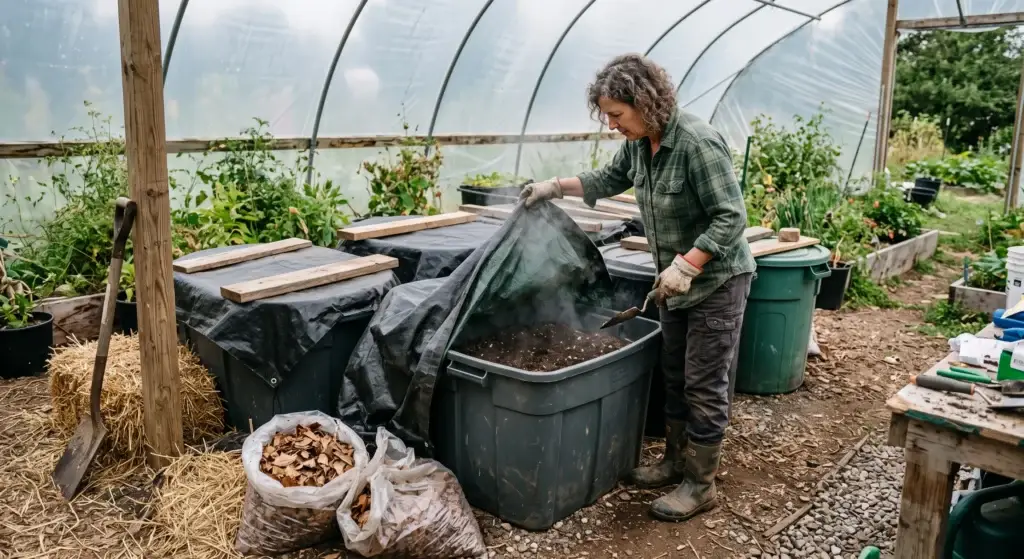
Step 1 — Lay Down a Tarp or Work in a Kiddie Pool
Work outdoors if possible. Spread your tarp or set up a large mixing container like a kiddie pool or a clean garbage can. Dump roughly half your base soil into the working area and spread it out flat. This gives you a surface to mix amendments into evenly rather than dumping everything in at once.
Step 2 — Add the First Half of Your Amendments
Distribute half the measured amendments across the top of the soil layer. Mix thoroughly using a shovel or by hand until you can no longer see distinct piles of amendment — aim for uniform color and texture across the whole layer before proceeding.
Step 3 — Add the Second Half and Dampen the Mix
Add the remaining base soil and the second half of the amendments. Mix thoroughly again. Once combined, dampen the entire pile with water until it reaches roughly the moisture level of a wrung‑out sponge — damp but not waterlogged. This moisture level activates microbial activity without creating anaerobic conditions that kill beneficial organisms. Do not soak it, and avoid compacting the pile as you hydrate it.
Step 4 — Transfer to Buckets or Bins and Begin Cooking
Shovel the mixed soil into large garbage cans, storage totes, or 5‑gallon buckets and seal loosely so some air exchange can still occur. Over the next 7 to 14 days, open the containers every 2–3 days to mix and check moisture. The pile will heat up noticeably during the first few weeks — this is the microbial activity doing its job and indicates active decomposition. Keep it damp but not wet throughout this period.
Total cooking time: 30 days minimum, 60 days preferred, and up to 6–10 weeks for the most forgiving, fully matured mix. The longer it cooks, the more fully the amendments break down into plant‑available forms and the lower the risk of root burn in young plants. If you’re in a rush, 30 days is workable for plants that are a few weeks old; seedlings and fresh clones still need a buffer layer (see Step 5).
Do a final thorough mixing right before use to break up any hot pockets.
Step 5 — Prepare Your Containers for Planting
Never plant directly into hot, freshly mixed, or under‑cooked super soil. Fill the bottom two‑thirds of your container with finished, fully cooked super soil, then fill the top third with a light, unfed seed‑starting mix or neutral potting soil. Plant into that neutral top layer. As roots develop and reach down into the super soil, the plant will be mature enough to handle the nutrient density without burning.
For outdoor use in raised beds or in‑ground holes, the same principle applies: line the primary root zone with super soil and backfill around the transplant with native or lightly amended soil so young roots are not immediately exposed to the hottest portion of the mix.
How to Water Plants Grown in Super Soil
Since your soil handles most of the nutrition, watering technique becomes your primary maintenance task. Keep these principles in mind to protect yield and soil biology, especially at commercial scale.
Water deeply but infrequently. Allow the medium to dry down to at least knuckle depth — or use container heft checks in larger pots — before watering again; the wet/dry cycle encourages deep root growth and supports aerobic conditions in the root zone.
Avoid heavy runoff. Flushing excess water through the container washes soluble nutrients and beneficial organisms out of the soil and can create waterlogged lower layers if drainage is poor. Water until you see just a small amount of runoff, then stop.
If you’re uncertain, underwater rather than overwater. Chronic overwatering in super soil is far more damaging than letting the medium dry slightly, because waterlogged soil destroys the aerobic microbial life the entire system depends on and can lead to stunting, root disease, and yield loss in commercial rooms. Check out our guide on how to properly water plants for more details.
Monitoring pH in Super Soil
Super Soil’s dolomite lime provides significant pH buffering, which is one of the major advantages of this method over strictly liquid feeding in inert media. In a well‑built mix, pH tends to stay in a broadly optimal mid‑6 range with minimal intervention for most of the grow.
That said, pH monitoring should still be part of your grow routine. Dry amendments take days to weeks to shift pH, unlike liquid pH adjusters that work within hours — which means catching drift early matters a lot. The Bluelab Soil pH Pen is an excellent tool specifically designed for reading pH directly in growing media without requiring a liquid slurry test.
When adjustment is needed, HGV Condition pH Down and HGV Condition pH Up are clean options for watering‑in adjustments, as they’re formulated for direct use in irrigation water. For a more permanent organic approach, additional dolomite lime worked into the surface will raise pH gradually over several waterings, and elemental sulfur (not included in this recipe) is commonly used to lower pH in organic soils.
If deficiencies appear mid‑grow despite correct pH, refer to our nutrient deficiency diagnosis guide — in organic soil, what looks like a deficiency is often a pH‑induced lockout or a moisture‑related issue rather than a true shortage of that element.


Reusing and Refreshing Super Soil
One of the most underappreciated aspects of a well‑built super soil is its longevity. The microbial ecosystem you built continues to function for years, which means you’re not starting from scratch each grow if you manage it correctly.
No-till method: Leave the soil in the container and plant directly into it at the start of the next cycle. Top‑dress with a light application of organic dry amendments — worm castings and kelp meal for veg, bone meal and bat guano for flower — and let the existing microbial population incorporate them. Many no‑till growers also brew compost teas to recharge the soil between cycles.
Re-amendment method: Remove the spent soil after harvest, mix in a full amendment refresh at roughly half the original recipe quantities, and allow it to cook again for 2–4 weeks or longer before replanting so hot spots can mellow.
Both approaches work. No‑till requires less physical labor and maintains a more stable microbial community, but calls for more attention to signs of depletion as the seasons progress. For more on building long‑term soil health, see our guide to soil amendments.
Super soil can be reused for many cycles with proper maintenance, and experienced no‑till growers routinely run the same soil for 3–5+ years, but long‑term performance depends on consistent re‑amendment, avoiding compaction, and tight control over irrigation practices.
Can You Buy Pre-Made Super Soil?
Yes — several brands sell pre‑amended soils that approximate the super soil concept, including Roots Organics Formula 707 and various “craft blend” mixes. The tradeoffs: you pay a premium, you can’t customize the amendment profile to your specific crop or strain, and pre‑made mixes don’t typically include the full diversity of organic inputs in this recipe. For large‑scale or repeated use, building your own is usually more cost‑effective and gives you full control over inputs and sourcing.
FAQ: Super Soil Recipe
Q: What is super soil and how does it work?
A: Super soil is a heavily amended organic growing medium that has been composted (“cooked”) for 30 to 60 days or more before use. During cooking, beneficial microorganisms break down complex organic compounds into plant‑available nutrients. When used correctly, the soil can supply most or all of what plants need throughout their growth cycle — you water with pH‑adjusted water and the microbial activity in the root zone manages nutrient release on demand within the limits of the recipe.
Q: How long does super soil need to cook before use?
A: A minimum of 30 days is needed for amendments to break down enough to significantly reduce the risk of root burn, but 60 days produces a more fully matured, lower‑risk mix, and many growers prefer 6–10 weeks for maximum safety with young plants. During cooking, stir the pile every 5 to 7 days and maintain damp (not wet) conditions. If you’re short on time, 30 days is workable for transplanting established plants rather than seedlings or fresh clones, as long as you use a neutral buffer layer.
Q: Do I still need to check pH when using super soil?
A: Yes, but far less frequently than with liquid nutrients in inert media. Dolomite lime helps buffer the mix in a broadly optimal mid‑6 pH range, which covers the peak availability window for most soil‑grown nutrients. Check pH every 7 to 14 days rather than every watering. A dedicated soil pH meter like the Bluelab Soil pH Pen reads the root zone directly without slurry prep and is well‑suited to this style of growing.
Q: Can super soil burn my plants?
A: It can, if plants are placed directly into hot, freshly mixed, or under‑cooked soil. Always plant seedlings and clones into a neutral layer of unfed potting mix in the top third of the container, and let roots grow down into the super soil naturally. Plants that are several weeks old and already established tolerate direct planting better, but a buffer layer is always the safer approach, especially for high‑value crops.
Q: How many times can super soil be reused?
A: With proper maintenance, super soil can be reused for many cycles. The microbial ecosystem is largely self‑sustaining when supported with periodic top‑dressing of organic amendments (worm castings, kelp meal, bone meal, guano) between cycles. No‑till growers routinely run the same soil for 3 to 5+ years without full replacement. Quality will taper over time if amendments are not refreshed, but the infrastructure — fungal networks and bacterial populations — can persist and rebuild for multiple seasons.
Q: What can I substitute if an amendment is out of stock?
A: The key is understanding what each ingredient does. Nitrogen sources (blood meal, feather meal, fish‑based blends) can be swapped for other high‑N organic inputs at comparable application rates. Phosphorus sources (bone meal, fish bone meal, high‑P bat guano) are interchangeable within that function, though they may have slightly different release curves. Multi‑ingredient blends like Down To Earth Bio‑Live simplify substitution by covering multiple amendment roles at once. Dolomite lime does not have a perfect one‑to‑one substitute — if it’s unavailable, many organic growers use oyster shell flour for calcium plus a separate magnesium source.
Q: What's the difference between super soil and living soil?
A: The terms are often used interchangeably, but there’s a meaningful distinction. Super soil describes a specific style of heavily pre‑amended composted mix, usually built in batches for a defined grow. Living soil is a broader philosophy: a self‑sustaining soil ecosystem managed over multiple years, often with added biology (worms, cover crops, microbial teas) and minimal disturbance. Super soil is a gateway to the living soil approach — once your mix has been running for a year or more with no‑till practices, it effectively becomes living soil.
Q: How do I deal with nutrient deficiencies in super soil?
A: Most apparent deficiencies in a properly built super soil are actually pH‑ or moisture‑induced lockout rather than true shortages. Before adding amendments, check your pH and review your irrigation practices. If pH is in range and deficiency symptoms persist, brew a compost tea with worm castings and kelp to deliver a fast‑available correction, or apply a water‑soluble organic supplement as a foliar for immediate relief. For identification, our nutrient deficiency guide covers the full visual diagnostic.
Q: Can I use super soil for vegetables and other crops?
A: Absolutely. Super soil works for any crop that thrives in organic soil — tomatoes, peppers, herbs, leafy greens, and flowering plants all benefit from a well‑built mix. The recipe here is balanced for high‑demand crops; for lighter feeders like herbs and greens, reduce the nitrogen‑heavy inputs (blood meal, high‑N bat guano) by 30 to 50% to avoid pushing excessive vegetative growth and to keep flavors in balance.