

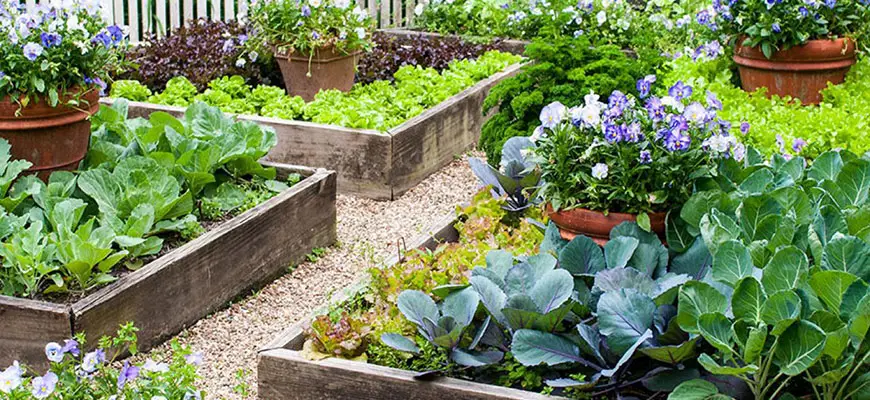
Raised garden beds let you grow more food in less space, with better soil, fewer weeds, and earlier harvests than typical in-ground gardening delivers. Whether you’re starting your first backyard bed or expanding a small-scale kitchen garden, choosing the right depth, fill, and setup makes the difference between a bed that thrives and one that just survives.
This guide covers everything: how to build or choose a raised bed, what depth and soil ratios to use for different crops, how to plant it productively, and how to keep it going season after season.
What Is a Raised Garden Bed?
A raised garden bed is a planting structure built above the existing ground level, typically framed in wood, metal, or fabric. It can be as shallow as 6 inches or as deep as 32 inches. The frame holds an independent soil environment that you choose and control — which is the core advantage over in-ground gardening.
Most beds are open to the ground below, allowing roots to penetrate into native soil and earthworms to enter from below. Some beds, particularly deep metal varieties, function more like large planters. The right choice depends on your existing soil, the crops you want to grow, and how much back strain you’re willing to tolerate bending over a low frame.
Why Grow in a Raised Garden Bed?
Raised beds offer practical advantages at every level of gardening experience:
Soil control. You build the root zone from scratch, choosing a mix optimized for drainage, nutrient retention, and biology — not whatever compacted clay or sandy topsoil happens to be in your yard.
Warmer soil, earlier season. Elevated soil tends to warm faster in spring, allowing earlier transplants for cold-sensitive crops. You can protect plants from frost more easily with row covers stretched over a framed bed than over sprawling ground rows.
Fewer weeds and pests. Defined edges, clean fill soil, and better drainage can reduce weed pressure significantly. Raised beds also make it easier to spot pests early, and the contained perimeter limits some soil-dwelling pest routes.
Better drainage. Water moves through elevated soil more freely. This is especially valuable in climates with heavy spring rain or in yards with drainage problems — conditions where in-ground beds stay saturated and roots suffer.
Efficient use of space. Raised beds support denser planting than traditional row gardening. Because you’re never walking through the bed, soil stays loose and you can space plants to their true needs rather than adding row-access corridors.
Accessibility. Deeper beds reduce bending, which matters over a full season. A 17-inch or 32-inch tall bed brings the root zone within comfortable reach for most growers — a real ergonomic improvement over ground-level gardening.
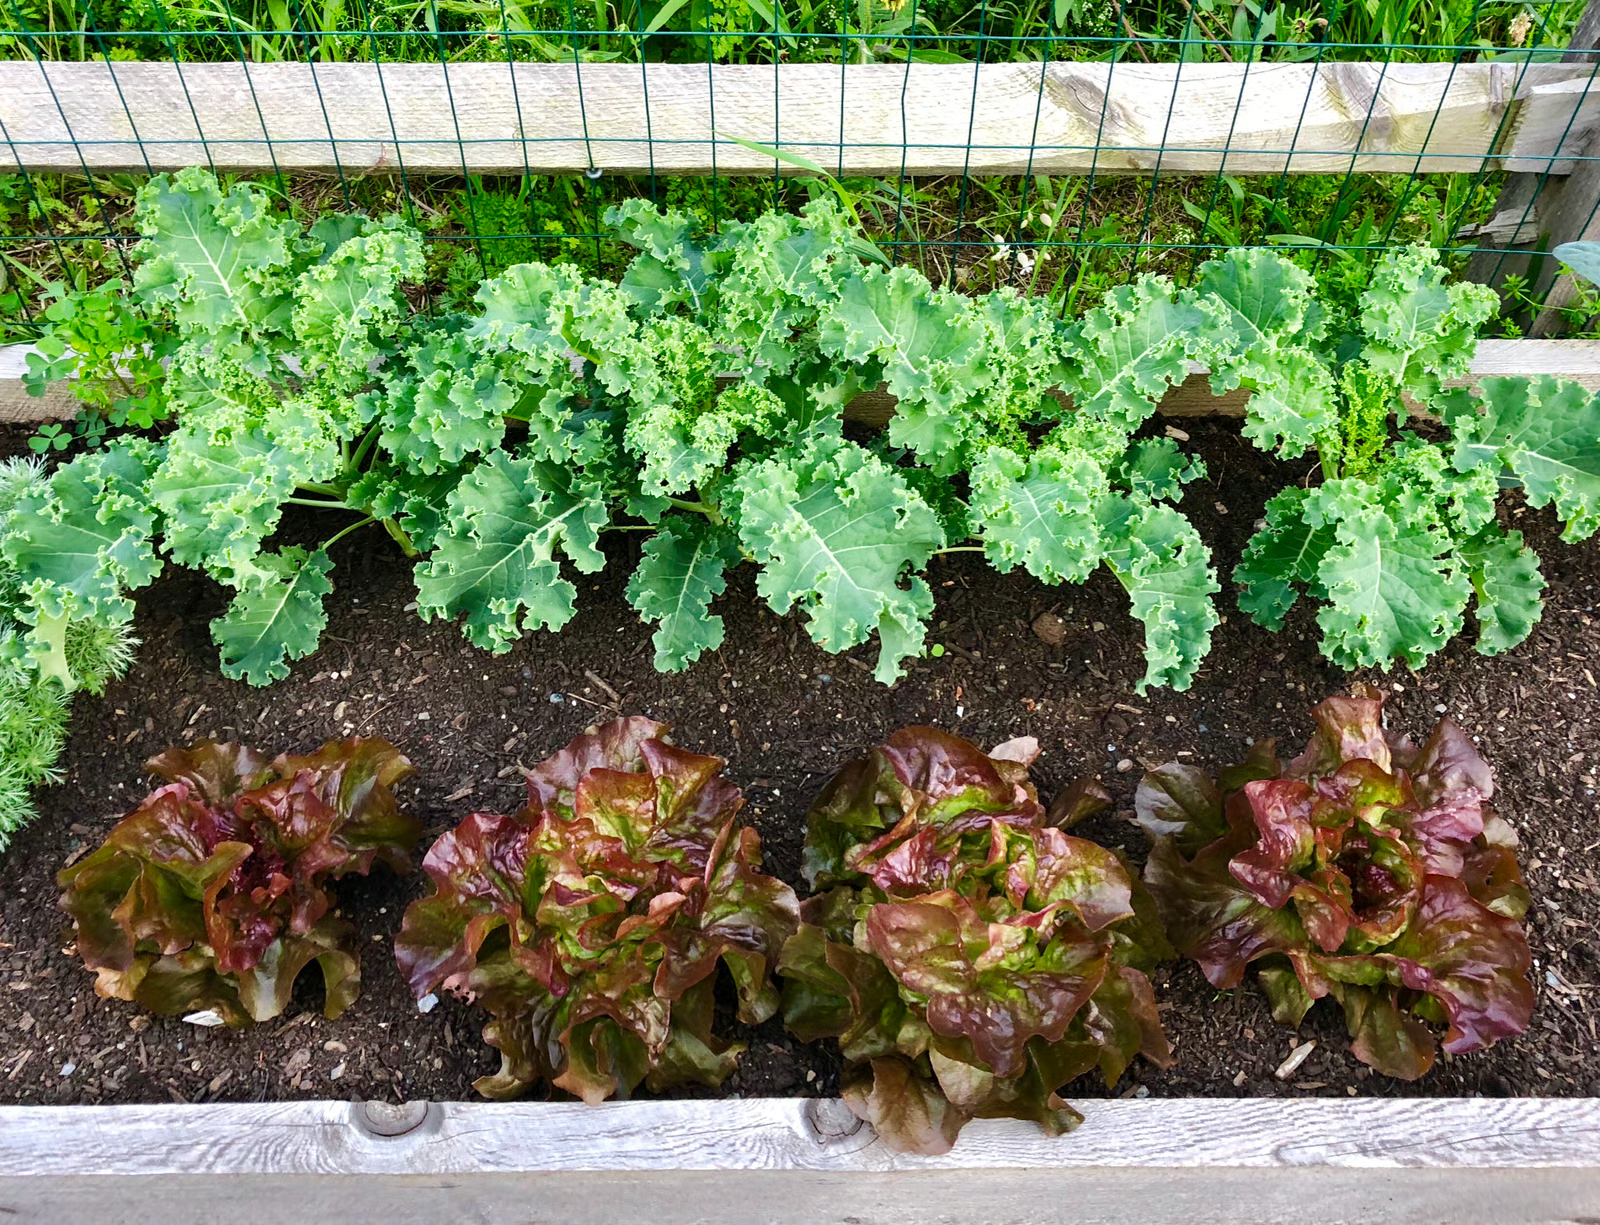
Raised Bed vs. Container Gardening
Containers win on portability and lower upfront soil cost. Raised beds win on volume, root depth, and production per square foot. If you’re growing a serious quantity of vegetables or perennials, raised beds are usually the higher-yield format. If you need to move your garden or are working on a patio or deck, containers make more sense. Many growers use both in combination. For more on the space question, see our guide on how many plants you can grow.
How to Build a Raised Garden Bed: DIY Guide
If you enjoy a weekend project, building your own raised bed is straightforward. Here’s how to approach each decision.
Step 1 – Choose Your Location
The most important variable is sunlight. Most food crops perform best with at least 6 to 8 hours of direct sun daily — and more is typically better for fruiting vegetables like tomatoes, peppers, and cucumbers. Walk your yard at different times of day before committing to a location.
Orient the bed north-to-south if possible, so taller plants on the north end don’t shade shorter crops as the sun tracks east to west. Place it near a water source — hauling hose across the yard becomes tedious fast.
Avoid spots where water pools after rain. Raised beds improve drainage, but starting on a naturally soggy site can still stress plant roots if standing water reaches the lower soil layers.
Step 2 – Decide on Dimensions
idth: Keep beds 36 to 48 inches wide so you can reach the center from either side without stepping into the bed. Stepping in compacts soil and defeats one of the core benefits of raised bed growing.
Length: No firm limit — build to fit your space. Common lengths are 4, 6, or 8 feet. Longer beds do require additional structural support along the walls to prevent soil pressure from bowing the sides outward.
Depth: This is the most consequential decision. Match depth to what you plan to grow:
| Crop Type | Minimum Depth | Examples |
|---|---|---|
| Shallow-rooted greens & herbs | 6–8 inches | Lettuce, spinach, basil, chives, radishes |
| Mid-depth vegetables | 12 inches | Tomatoes, peppers, beans, kale, carrots (short varieties) |
| Deep-rooted crops | 18–24 inches | Full-size carrots, parsnips, sweet potatoes, potatoes |
More depth is generally better for any crop — deeper soil holds more water, supports more root mass, and stays cooler in summer heat. If your existing ground soil is heavily compacted or nutrient-depleted, add 6 to 12 inches to whatever minimum the crop requires.
Step 3 – Choose Your Frame Material
Cedar and redwood are traditional choices — naturally rot-resistant and typically sold untreated, making them commonly used for edible crops. Expect around 8 to 15 years of life depending on your climate and maintenance.
Galvanized steel / metal panels can last 20+ years when designed for outdoor garden use, will not rot or warp, and look clean year after year. Vego Garden’s modular metal beds are a popular choice for growers who want a durable, low-maintenance structure, and they are manufactured from highly corrosion-resistant Aluzinc-coated steel with food-safe agricultural coatings intended for edible gardening. These modern coated metal products are engineered so that zinc and other metals remain bound within the protective layers under normal garden conditions, which is why they are marketed as food-safe for growing edibles when used as directed.
Composite / recycled plastic lumber offers good longevity with minimal maintenance, though some options can off-gas at high temperatures — check that materials are rated for food contact if edibles are the plan.
Avoid: CCA-treated lumber (pre-2003 pressure-treated wood containing arsenic). Modern ACQ-treated lumber is safer for most landscape uses, but untreated cedar or purpose-built metal garden beds remain the cleaner choice for any edible bed.
Step 4 – Remove Existing Vegetation
Before setting the frame, clear sod and any perennial weeds from the footprint. Lay cardboard or several layers of newspaper over bare soil before adding your fill — this suppresses weed germination from below as the organic matter breaks down. If gophers or voles are a problem in your area, staple hardware cloth (1/4-inch mesh or finer) to the bottom of the frame before setting it in place.
Step 5 – Fill With the Right Soil Mix
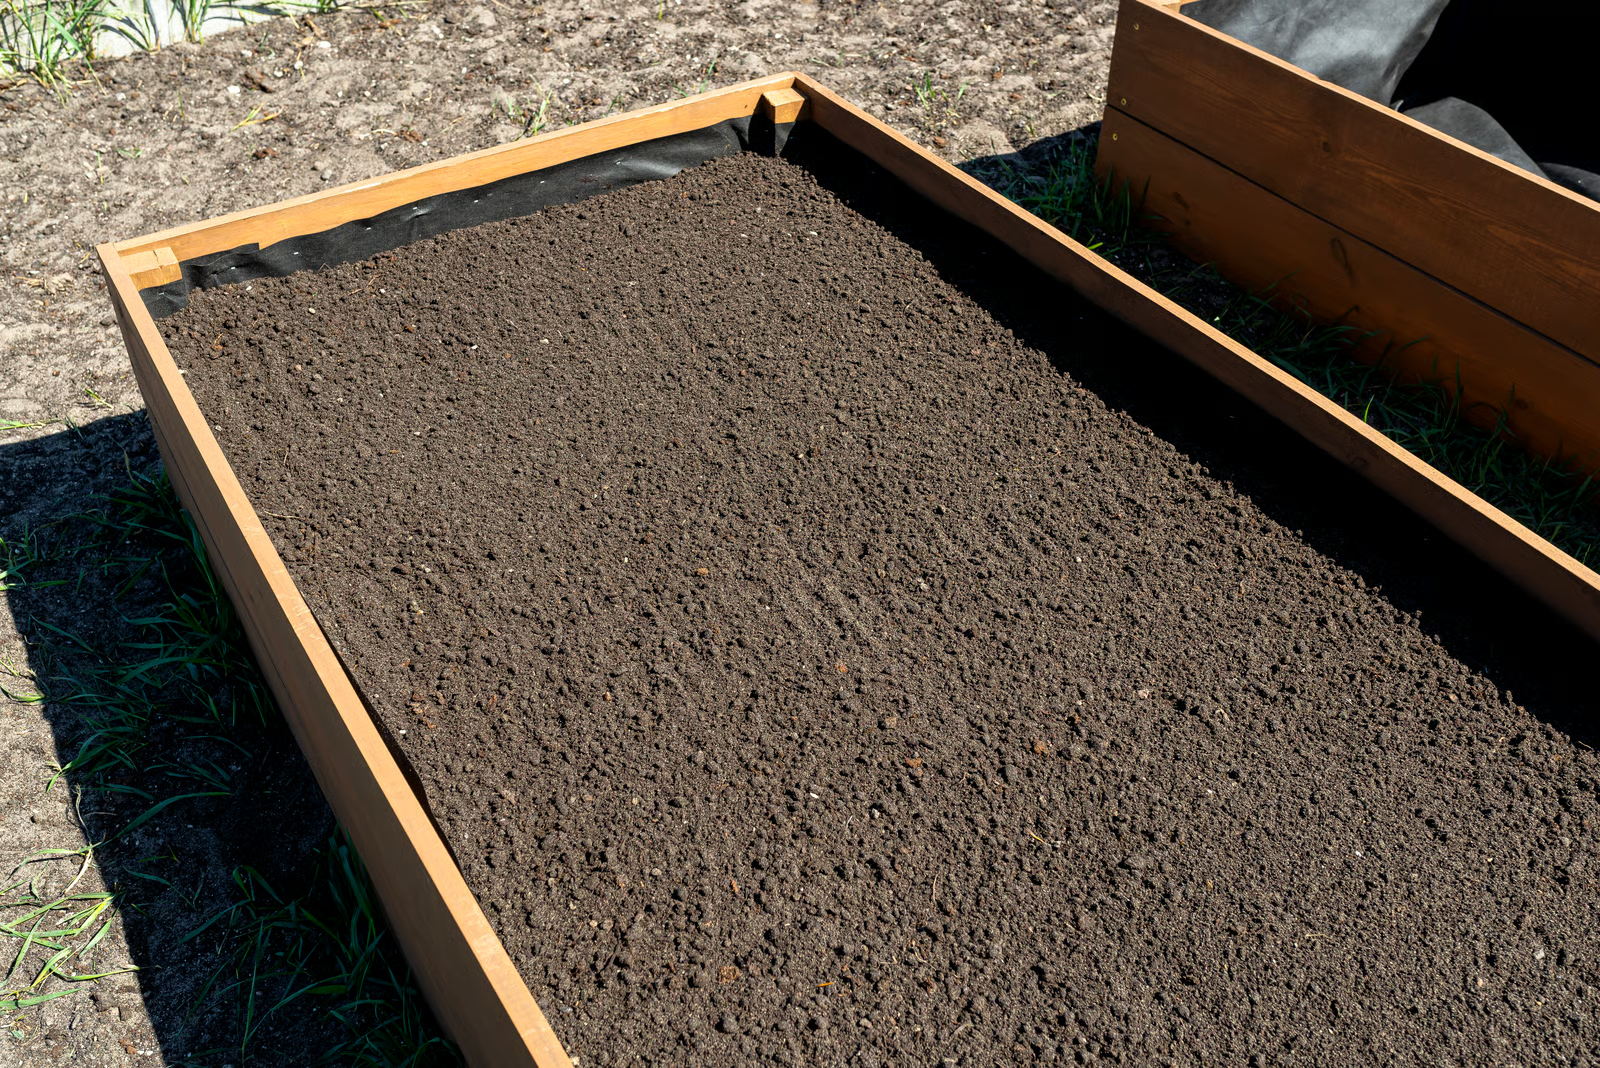
Never fill a raised bed with pure native topsoil — it’s usually too dense, compacts easily, and often has poor structure for root development. The standard raised bed soil “recipe” used by many experienced gardeners is:
50–60% quality topsoil + 40–50% compost or organic matter
For beds being filled in bulk, look for triple-mix blends from reputable suppliers. For bag fills, FoxFarm Ocean Forest is a well-known option — it combines aged forest products, sphagnum peat moss, perlite, and organic fertilizers including earthworm castings, bat guano, fish-based ingredients, and kelp meal into a rich, slightly acidic mix that supports most vegetables right out of the bag. FoxFarm Happy Frog is a lighter, more perlite-rich option suited to beds where drainage is the priority or where you want a less “hot” mix for transplants.
For beds on a budget: layer the bottom third with logs, sticks, and rough organic debris (the hugelkultur method). This organic mass composts slowly, adds water retention, and reduces the amount of premium soil mix needed to fill the upper growing zone. Fill that upper zone with a quality amended mix.
FoxFarm Ocean Forest Potting Soil is one of the most widely trusted bag soils for raised beds. Pre-amended with earthworm castings, bat guano, and kelp meal, it provides strong early nutrition and good drainage characteristics from planting day.
FoxFarm Happy Frog Potting Soil is the lighter companion — more perlite, slightly lower nutrient load, and ideal for transplant stages or beds where you want to manage fertility independently. Both are widely used in both home garden and production settings.
See our complete guide on how to amend soil for a deep dive on improving structure and fertility.


Step 6 – Decide What to Plant and When
Almost any vegetable, herb, or annual flower works in a raised bed. Some guidelines:
Cool-season crops (plant in early spring or fall): Lettuce, spinach, kale, broccoli, cauliflower, carrots, radishes, beets, onions. These tolerate light frost and often prefer soil temperatures of roughly 50–65°F.
Warm-season crops (plant after last frost, soil 60°F+): Tomatoes, peppers, cucumbers, squash, beans, basil. These need warmth to establish and will stall in cold soil even if air temps have warmed.
What you grow should match your family’s eating habits and your climate. For example, in hot-summer regions, lettuce bolts quickly, while peppers and okra thrive.
What NOT to plant in a raised bed: Large vining crops like giant pumpkins and some watermelons that need to ramble many feet are better off in-ground. Corn (wind-pollinated, needs block planting) is also better planted in larger ground blocks. Perennial shrubs and small fruit trees that need to spread roots beyond the bed boundaries are generally better planted in the ground, though shallow-rooted perennials like strawberries can perform well in dedicated raised beds.
Start conservative on plant count. Overplanting is the most common beginner mistake — read the spacing guidance on each seed packet or plant tag and stick to it for the first season. You’ll learn what density works in your specific bed and climate before maxing out.
Step 7 – Tend the Bed Through the Season
Raised beds need less maintenance than many in-ground gardens, but consistent habits matter:
Watering: Raised beds drain faster and dry out more quickly than in-ground soil. During hot weather, once-daily watering may be necessary — especially for shallow beds or beds with high organic matter ratios. Check soil moisture by pressing two fingers an inch into the surface; water when the top inch is dry. For more on watering technique, see how to properly water plants.
Setting up a drip irrigation system early is one of the best investments you can make in a raised bed garden. Consistent, low-volume watering at the root zone outperforms overhead hand-watering for both plant health and efficiency. The DIG ML50 Raised Bed Drip Kit is designed specifically for raised beds — each kit includes 1/4-inch dripline with emitters spaced every 9 inches and components to water up to about 150 square feet, which aligns well with typical raised bed planting densities. It installs without modifying your existing outdoor faucet beyond attaching the included backflow preventer, pressure regulator, and fittings.
Fertilizing: Most quality raised bed mixes provide enough fertility for roughly 4 to 8 weeks. After that, plants — especially heavy feeders like tomatoes, peppers, and brassicas — need ongoing nutrition. For an easy, clean solution, HGV Dry – Grow is a water-soluble three-part nutrient system compatible with all grow media, including soil beds. Mix into your watering can or irrigate through your drip system. It works at home-garden scale (5 lb bags) or production scale. See our guide on plant nutrients & pH for feeding fundamentals.
Weeding: Even with clean fill soil, weed seeds blow in from above. Mulch the surface with straw, wood chips, or shredded leaves to suppress germination between plants. Hand-weed what does emerge before roots establish — it’s much easier than digging out entrenched weeds later.
Soil refresh: At the end of each season, top-dress with 2 to 3 inches of compost and work it lightly into the top 4 to 6 inches. Raised bed soil compresses and depletes over time; annual compost additions are what keep the biology active and the structure open. See our guide on how to use worm castings for an effective organic amendment to add to your annual top-dress.
How Do You Fill a Raised Garden Bed Cheaply?
The biggest cost of a raised bed is usually the soil fill. Here are the strategies that work:
Buy in bulk, not bags. A cubic yard of triple-mix from a local landscape supplier costs far less per cubic foot than bagged mixes. If you’re filling multiple beds, this is the most straightforward cost savings.
Use the hugelkultur base layer. Fill the lower third of a deep bed with rotting logs, thick branches, wood chips, and rough organic debris. This mass decomposes slowly, releases nutrients over years, and dramatically reduces the volume of premium soil mix needed to fill the upper growing zone. You only need quality mix in the top 8–12 inches where roots establish most actively.
Make your own compost. A garden compost tea or compost pile converts kitchen scraps, yard clippings, and garden debris into free soil amendment. Even a simple three-bin compost setup can supply a significant portion of your annual top-dress needs.
Phased filling. Start with a shallower fill the first season. Soil settles 10–25% after watering in, so you’ll need to top up anyway. Budget for that top-up rather than overfilling at first.
Buy a Raised Garden Bed Kit: Top Options at Hydrobuilder
For growers who’d rather spend Saturday planting than building, pre-made raised bed kits eliminate the carpentry and can deliver better long-term durability than most DIY wood builds.
Vego Garden Modular Metal Raised Beds
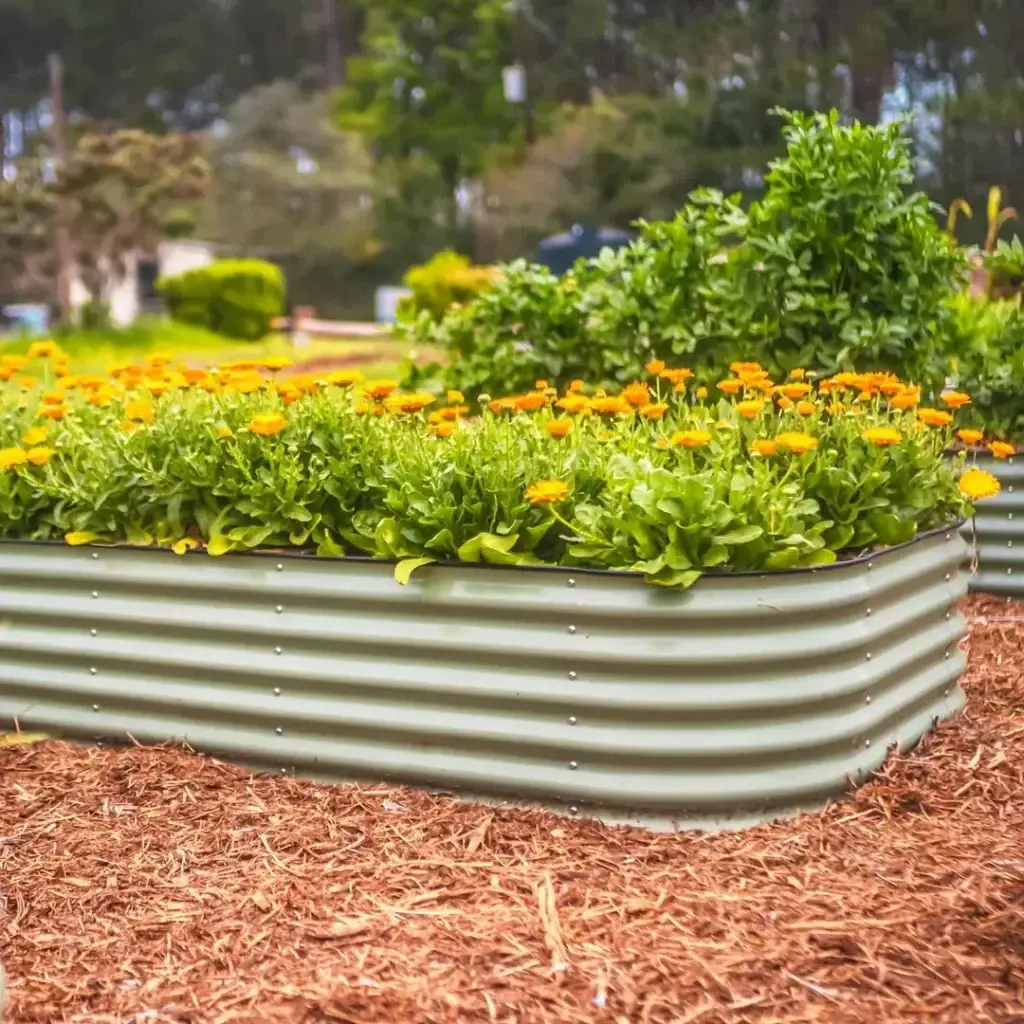
The Vego Garden 17-Inch Modular Metal Raised Garden Bed uses eco-friendly, Aluzinc-coated steel panels with a manufacturer-rated 20+ year life expectancy under typical garden conditions. The 9-in-1 modular system means panels can be reconfigured into different shapes and sizes as your space or garden plan changes. At 17 inches tall, the bed reaches a comfortable working height for most growers while providing adequate root depth for almost every vegetable crop when filled with an appropriate mix. The 11-inch round versions are available for smaller spaces or for filling out corners and side yards. The panel system requires no carpentry — you assemble the kit components and can typically unbox and install within a single day.
At a lower estimated per-year cost compared to many cedar builds that need replacing every 8 to 12 years, Vego Garden beds make a strong case for growers planning a multi-bed setup. Available in several finishes including Olive Green, Pearl White, and Modern Gray.
GeoPot GeoPlanter Fabric Raised Bed
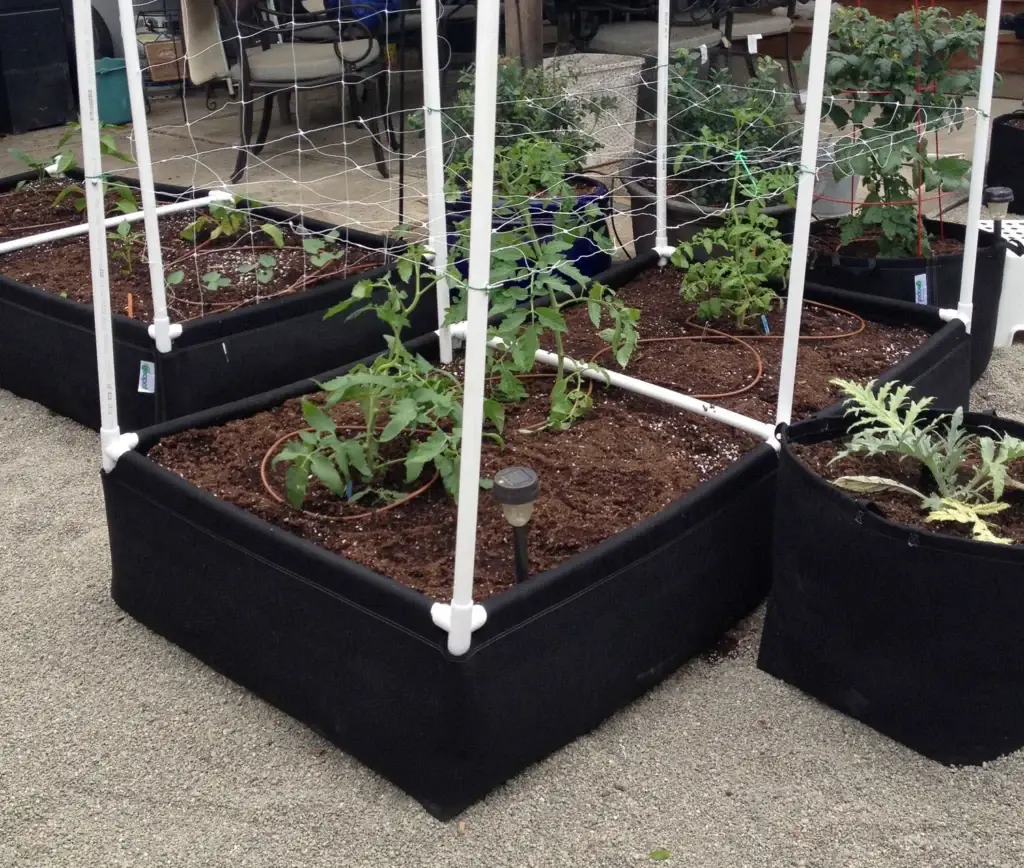
The GeoPot GeoPlanter Fabric Raised Bed takes a different approach: breathable geotextile fabric instead of rigid panels. The fabric air-prunes roots when they reach the container wall, encouraging them to branch out with denser, more fibrous feeder roots rather than girdling or circling. This same air-pruning principle used in fabric pots for indoor growing can translate to raised bed performance — often supporting better root architecture, more efficient water and nutrient uptake, and increased yield potential compared to a solid-walled container of the same volume when irrigation and fertility are well managed.
The GeoPlanter is an especially good option for growers who want the root-zone benefits of a raised bed without committing to a permanent installation. It’s foldable, lightweight, and can be relocated between seasons.
Pest and Disease Management in Raised Beds
Raised beds don’t eliminate pest pressure, but they can reduce it and make intervention easier. The defined perimeter, cleaner soil, and better visibility all work in your favor.
The key advantage is early detection. Because you’re working in and around the bed regularly, you’ll often catch aphid colonies, leaf damage, and fungal spotting much earlier than you would in sprawling in-ground rows. For specific pest control strategies, see our guides on integrated pest management and how to protect your outdoor grow.
For organic-compatible pest treatment in raised food gardens, BioSafe AzaGuard is a highly versatile option — it uses a botanical active ingredient (azadirachtin) derived from neem and is labeled for many insect pests on a wide range of crops. Always consult and follow the product label for allowed crops, application rates, and any pre-harvest intervals to ensure compliance and food safety.


Why Shop at Hydrobuilder for Raised Bed Supplies?
Hydrobuilder carries the full raised bed ecosystem — from the beds themselves (Vego Garden, GeoPot) to the soil mixes, nutrient programs, and irrigation equipment that make them productive. You’re not buying a garden bed and then hunting three other retailers for the fill, the fertilizer, and the drip system separately.
Our commercial accounts team can quote bulk soil orders, irrigation systems for multi-bed setups, and nutrient programs sized for market garden scale.
Contact us or visit our commercial accounts page for support beyond the retail level.
FAQ: Raised Garden Beds
Q: How deep should a raised garden bed be?
A: Twelve to 18 inches handles most vegetable crops. For deep-rooted crops like carrots, parsnips, or sweet potatoes, go 18 to 24 inches. Shallow-rooted greens and herbs (lettuce, spinach, basil) can produce well in 6 to 8 inches, though more depth almost always benefits the plant. If your native soil is compacted or poor, add about 6 inches to whatever minimum the crop requires — you want roots to have room to grow before they hit resistance.
Q: What is the best soil mix for a raised garden bed?
A: A blend of 50–60% topsoil and 40–50% compost or aged organic matter works well for most crops. Avoid using pure potting mix (too light, dries out fast) or pure native soil (too dense, compacts and restricts drainage). Pre-amended bag mixes like FoxFarm Ocean Forest simplify the process — they’re calibrated for good drainage and early nutrition without requiring additional amendments at planting time for most vegetables.
Q: What can you grow in a raised garden bed?
A: Almost anything — tomatoes, peppers, cucumbers, beans, lettuce, kale, carrots, beets, onions, herbs, and most annual flowers all perform well. Exceptions include giant vining crops (large pumpkins, some watermelons) that spread many feet beyond the bed, corn which needs block planting for reliable pollination, and perennial trees or shrubs that require roots extending well beyond the bed perimeter. Strawberries, asparagus, and perennial herbs work well in dedicated raised beds where their long-term occupancy is planned.
Q: Do raised garden beds need a bottom liner?
A: Most beds perform best open to the ground — earthworms access the bed, deep roots can penetrate below the frame, and drainage operates freely. If burrowing pests like gophers or voles are a problem, install hardware cloth (1/4-inch or finer) at the base before adding soil. Avoid solid plastic liners — they trap water and restrict root depth.
Q: How often should you water a raised garden bed?
A: Raised beds dry out faster than in-ground gardens because drainage is better and soil volume is limited. During hot weather (above about 85°F), daily watering is often necessary — especially for beds under 12 inches deep. In mild weather, every 2 to 3 days may be sufficient. Check by pressing two fingers into the soil; water when the top inch is dry. Drip irrigation on a timer is the most reliable approach for consistent soil moisture without over- or under-watering.
Q: When should you plant a raised garden bed?
A: Cool-season crops (lettuce, spinach, kale, broccoli, carrots) can go in as early as 4 to 6 weeks before your local last frost date — raised beds warm faster than many in-ground soils, often giving you a 1 to 2 week head start on planting season. Warm-season crops (tomatoes, peppers, cucumbers, beans) should wait until after last frost and when soil temperature has reached at least about 60°F. Know your USDA hardiness zone and last frost date before finalizing your planting calendar.
Q: How do you fill a raised garden bed cheaply?
A: Buy topsoil in bulk by the yard rather than by the bag when you’re filling multiple beds. Use the hugelkultur method to fill the lower third of deep beds with rotting wood and rough organic matter, reducing the volume of premium fill soil needed. Home compost can cover a significant portion of annual top-dress needs for free. Phased filling — starting shallower and topping up after soil settles — also spreads the cost across seasons.
Q: Can you use fabric raised beds instead of rigid frames?
A: Yes. Fabric raised beds like the GeoPot GeoPlanter use breathable geotextile that air-prunes roots at the container wall, creating denser, more fibrous root systems than many rigid containers allow. The tradeoff is that fabric beds dry out faster than metal or wood frames and may need more frequent irrigation. The advantage is portability, lightweight installation, and better root architecture — particularly valuable for crops where root quality directly affects yield when water and nutrients are managed consistently.
Q: How do you keep soil healthy in a raised bed long-term?
A: Top-dress with 2 to 3 inches of compost every season and work it lightly into the top 4 to 6 inches. Rotate crop families within the bed annually to help prevent disease buildup. Add a water-soluble nutrient program once the initial soil fertility depletes (typically 4 to 8 weeks after planting). Mulching the surface between plants suppresses weeds, retains moisture, and adds slow-release organic matter as it breaks down.