

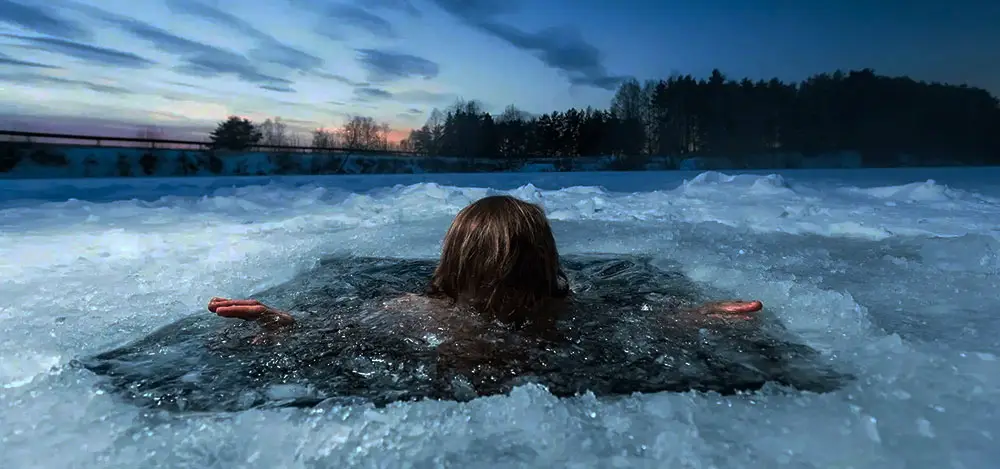
A DIY cold plunge setup lets you build a functional cold water immersion system at a fraction of the cost of a pre-built luxury tub. You’ll need a vessel to hold the water, plus a way to chill, circulate, and sanitize it. The fastest path is an all-in-one chiller that handles cooling, circulation, filtration, and sanitation in a single unit. The more traditional path pairs a standalone chiller with a separate pump and filter.
This guide covers both approaches, how to size your chiller, how target temperature works, and the safety rules to follow either way.
Whether you’re a weekend athlete or just curious about cold therapy, building your own system is more approachable than it looks — and one product now makes it dramatically simpler.
A quick note on the vessel: Hydrobuilder doesn’t carry cold plunge tanks or tubs — you’ll need to source your vessel separately (a 100+ gallon stock tank, insulated tub, or similar container works well). What we carry is everything that turns that container into a working cold plunge: the chiller, filtration, and circulation gear below.
What Is Cold Water Immersion Therapy?
Cold water immersion means submerging your body in water cooled to roughly 39–59°F (4–15°C) for one to five minutes. The cold triggers vasoconstriction (blood vessel narrowing) as your body works to conserve core temperature. When you exit, vessels dilate and blood rushes back to the extremities.
Regularly practiced cold therapy has been associated with reduced post-exercise muscle soreness, improved circulation, lower perceived stress, elevated mood via endorphin release, and better sleep onset. These responses are well documented in athletic recovery research, though individual results vary based on frequency, duration, and water temperature.
Cold Plunge Benefits: What the Research Says
Reduced Inflammation and Muscle Recovery
Cold water immersion can reduce delayed-onset muscle soreness (DOMS) when used within 30–60 minutes of intense training. The mechanism is vasoconstriction limiting inflammatory fluid buildup in stressed muscle tissue. This makes cold plunging a popular recovery tool for endurance athletes and anyone lifting heavy regularly.
Improved Circulation
The vascular cycle of constriction (in the cold) followed by dilation (on exit) acts as a pump for peripheral circulation. Over time, regular cold exposure may improve baseline cardiovascular tone and circulation efficiency.
Mood and Mental Resilience
Cold water immersion activates the sympathetic nervous system and triggers the release of norepinephrine and endorphins. Many practitioners report sharper mental clarity, lower baseline stress, and a greater sense of control over discomfort over time.
Immune Function
Some research links regular cold exposure to increased white blood cell activity, though the evidence base here is less robust than for recovery and circulation. It’s a secondary benefit, not a primary driver for most users.
Building Your Cold Plunge: All-in-One vs. Modular
There are two ways to build a DIY cold plunge. Which one is right for you depends on budget, how much plumbing you want to deal with, and whether you want built-in water sanitation from day one.
Option 1: All-in-One Chiller (Recommended for Most Builds)
The Active Aqua Outdoor Water Chiller, 1/3 HP was purpose-built for cold plunge and ice bath use, not adapted from a hydroponic reservoir chiller. It combines four systems in one outdoor-rated housing:
- Chilling — cools water down to 39°F (3°C) using a high-efficiency compressor and coil-based heat exchanger
- Circulation — an integrated 800 GPH pump, so there’s no separate pump to plumb in
- Filtration — a built-in 20-micron filter catches sediment and debris
- Sanitation — a built-in ozone generation system keeps water clean between sessions without added chemicals
It runs on a standard 120V GFCI-protected outlet, comes with 1/2″, 3/4″, and 1″ fittings to match most tub connections, and sits on locking caster wheels for easy repositioning. It’s rated for outdoor installation with a rainproof design, though it should be drained and disconnected in freezing weather.
This is the simplest way to build a cold plunge: connect two hoses between the unit and your tub, and the chilling, circulation, filtration, and sanitation are already handled. It’s the right choice if you want a plug-and-play setup without sourcing and plumbing separate components.
Option 2: Modular Build (Budget-Conscious or Custom Setups)
If you’d rather assemble your own system piece by piece — often a lower up-front cost, and more flexible if you already own some components — you’ll need a standalone chiller, a separate circulation pump, and your own filtration/sanitation plan. The Active Aqua DIY Cold Plunge Starter Kit (available in 1/10, 1/4, 1/2, and 1 HP) pairs a chiller with a matched pump in one package, though it does not include built-in filtration or ozone — you’d add that separately. The Active Aqua chiller line is saltwater, chlorine, and bromine safe.
Chiller sizing for modular builds: 1/4 HP suits an insulated vessel in a moderate climate. 1/2 HP is the workhorse choice for an uninsulated stock tank or a warmer climate. 1 HP+ makes sense for large tanks, hot climates, or fast chill-down times.


Setting Up Your Cold Plunge
With the all-in-one Active Aqua Outdoor Water Chiller:
- Position the unit outdoors or in a well-ventilated area near your tub, on a stable, level surface.
- Connect the inlet and outlet hoses between the unit and your tub using the included 1/2″, 3/4″, or 1″ fittings.
- Plug into a GFCI-protected 120V outlet.
- Fill your tub roughly halfway first to test water displacement, then top up.
- Power on the unit and set your target temperature on the digital controller. Initial chill time varies with starting water temperature and ambient conditions — refer to the manufacturer’s performance chart for expected chill-down times at your setup.
- Once the water reaches temperature, begin plunging.
With a modular chiller + pump setup:
- Choose and position your vessel — a 100+ gallon stock tank or insulated tub, placed in its permanent location.
- Drill and install bulkhead fittings at the tub inlet and outlet, sealing before filling.
- Position the chiller in a ventilated area. Run hose from the tub outlet to the chiller inlet, then chiller outlet back to the tub, following the chiller’s directional flow arrows.
- If adding filtration, install it inline between the pump outlet and chiller inlet.
- Fill the tub halfway, test, then top off.
- Power on and allow 4–8 hours for initial chill-down, depending on chiller HP, tub insulation, and ambient temperature.
Either way, target 50–59°F (10–15°C) for most cold therapy protocols, working down toward 39–45°F as your tolerance builds, if desired.
Water Temperature: What to Target
The effective range for cold water immersion therapy is generally 39–59°F (4–15°C). Most research on recovery and mood benefits uses protocols in the 50–59°F range. The Active Aqua Outdoor Water Chiller’s ability to hold water at 39°F opens up more advanced cold therapy protocols once you’ve built tolerance — but start warmer.
Start at 55–59°F for your first few sessions. Drop temperature incrementally as you build cold adaptation. A chiller with a digital thermostat, like the Active Aqua Outdoor unit, makes this easy — set your target and the system maintains it automatically.
Do not target temperatures below 39°F for regular immersion, and be cautious even approaching that range without meaningful prior cold tolerance.
Water Maintenance and Filtration
Clean water matters for a frequently used cold plunge. Cold temperatures slow bacterial growth compared to a hot tub, but they don’t stop it.
If you’re using the all-in-one Active Aqua chiller: the built-in 20-micron filter and ozone generator handle ongoing sanitation automatically. You’ll still want to rinse off before plunging to reduce the organic load entering the system, and periodically check the unit’s filter per the manufacturer’s instructions.
If you’re running a modular build without integrated filtration: a point-of-use sediment/carbon filter on your fill line reduces chlorine and particulates before they enter your system. The AXEON FSD-110 Single Stage Cartridge Filter System is a straightforward inline option for treating fill water — AXEON’s filtration line is trusted across commercial water treatment applications, and a single-stage housing is right-sized for cold plunge fill duty without the cost of a full RO system.
Filling water: Tap water is safe for most cold plunge applications. If your municipal water is heavily chlorinated, running it through a sediment/carbon filter at fill time reduces chemical load. Full RO filtration isn’t necessary unless your tap water has specific quality concerns. For more on water filtration systems generally, see our guide to RO systems for growing plants.
Cold Plunge Safety
Cold water immersion is low-risk for healthy adults when practiced sensibly. Follow these guidelines:
Start gradually. Begin with 1–2 minutes at 55–59°F. Do not push to extreme durations or temperatures in your first session. Cold adaptation improves meaningfully over 2–3 weeks of regular practice.
Don’t plunge alone the first several times. Cold shock can cause sudden involuntary gasping and, in rare cases, dizziness or brief disorientation. Having someone nearby is a reasonable precaution for beginners.
Exit immediately if you feel dizzy, nauseous, or experience extreme uncontrolled shivering. Mild shivering is normal. Violent, uncontrolled shivering signals your body is struggling to thermoregulate — get out.
Consult your physician before starting cold therapy if you have: cardiovascular disease, arrhythmia, Raynaud’s disease, uncontrolled hypertension, or any condition affecting peripheral circulation or cold sensitivity.
Electrical safety: All chillers and pumps must be plugged into GFCI-protected outlets. The Active Aqua Outdoor Water Chiller ships with a GFCI-protected cord — do not bypass it. Water and electricity require proper grounding at every connection.
Keep the area around the tub non-slip. Cold-numbed extremities reduce coordination on exit. Anti-slip mats inside and outside the tub are not optional.
Why Buy Your Cold Plunge Components at Hydrobuilder?
Hydrobuilder carries the water chiller, filtration, and circulation equipment that make a DIY cold plunge work — including the Active Aqua Outdoor Water Chiller built specifically for this application, and AXEON water treatment products trusted across commercial water systems. Our team is available at 888-815-9763 or via the contact page to help you pick the right chiller for your setup and climate.
- 100% Secure Shopping
- Purpose-Built Cold Plunge Equipment
- Knowledgeable Support Team
Cold Plunge: FAQs
What's the easiest way to build a DIY cold plunge?
An all-in-one unit like the Active Aqua Outdoor Water Chiller is the simplest path — it combines chilling, circulation, filtration, and ozone sanitation in one outdoor-rated housing. Connect it to your tub with two hoses and you skip the separate pump and filter plumbing a modular build requires.
What size water chiller do I need for a cold plunge?
For an all-in-one unit, the Active Aqua Outdoor Water Chiller’s 1/3 HP is sized specifically for typical cold plunge tub volumes and cools to 39°F. For a modular build, 1/4 HP suits an insulated vessel in a moderate climate, while 1/2 HP is the standard choice for an uninsulated stock tank or a warmer climate. Going too small means the chiller runs constantly without reaching target temperature on warm days.
What temperature should a cold plunge be?
Most cold therapy protocols target 50–59°F (10–15°C) for regular use. This range reliably triggers vasoconstriction and the recovery response without excessive cold shock risk. Beginners should start at 55–59°F and work lower as tolerance builds. More advanced protocols may go as low as 39°F, which the Active Aqua Outdoor chiller supports, but that’s not a starting point.
How long should you stay in a cold plunge?
Start with 1–2 minutes and work up gradually as your body adapts. Most experienced practitioners land on 3–5 minutes as a sustainable daily protocol. Consistency matters more than pushing for extreme duration early on.
Do I need a separate filter if I use an all-in-one chiller?
No. The Active Aqua Outdoor Water Chiller includes a built-in 20-micron filter and ozone generator, so no separate filtration system is needed. A standalone filter like the AXEON FSD-110 is only necessary for modular builds using a standalone chiller without integrated filtration.
What is ozone generation used for in a cold plunge?
Ozone continuously oxidizes bacteria, algae, and other contaminants in the water, which is why it’s the preferred sanitation method for cold plunges — no added chemicals, minimal maintenance. The Active Aqua Outdoor Water Chiller includes this built in; modular builds need it added separately.
How much does a DIY cold plunge cost to build?
The Active Aqua Outdoor Water Chiller is priced in the four-figure range and covers chilling, circulation, filtration, and sanitation in one unit — you’d add only a vessel and hose; check Hydrobuilder.com for current pricing, since equipment pricing can change. A modular build using a standalone chiller kit can start lower up front but typically requires separate filtration and more plumbing work to reach the same functionality.
Does Hydrobuilder sell cold plunge tubs or tanks?
No — Hydrobuilder carries the chiller, filtration, and circulation equipment for a DIY cold plunge, but not the tank or tub itself. Most builders use a 100+ gallon stock tank or insulated tub sourced separately.